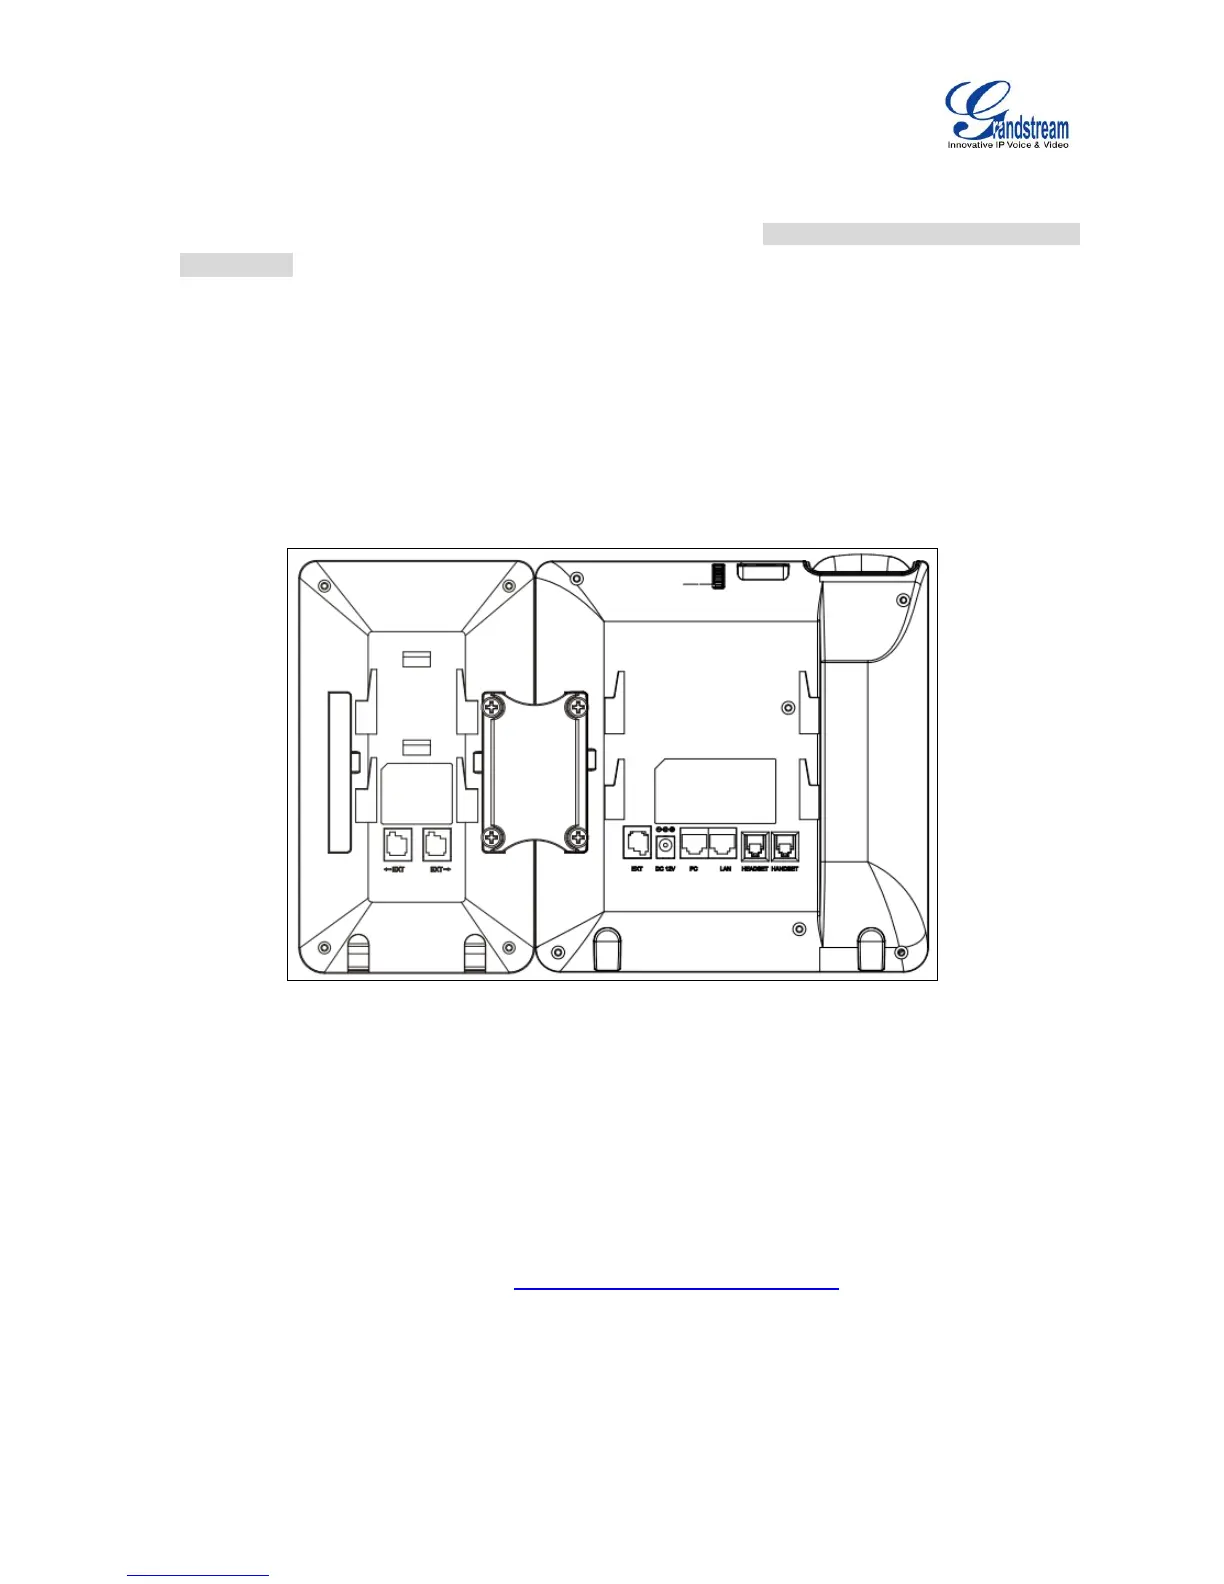
1. On the back of the GXV3240 and the GXP2200EXT, there are slots for connector plate. Attach the
connector plate between the slots for GXV3240 and the GXP2200EXT;
2. Apply the screws provided and securely tighten them in (See Figure 3: GXV3240 Back View with
GXP2200EXT);
3. Connect the GXP2200EXT to the GXV3240 via the EXT port using the RJ11-RJ11 cable provided
with the GXP2200EXT;
4. Install the phone stand on the GXV3240 and the GXP2200EXT;
5. Power up the GXV3240. The GXP2200EXT will show the booting up screen with version information
and connecting status;
6. After successfully booting up, the GXP2200EXT will stay in idle. Press and hold the LEFT button for
about 3 seconds to check the version information and status.
Figure 3: GXV3240 Back View with GXP2200EXT
The GXP2200EXT can be configured via the web GUI of the GXV3240 connected. After successfully
configured, press LEFT or RIGHT button on the GXP2200EXT and users could browse all the MPK's
status in different pages.
For more information on installing, connecting and configuring the GXP2200EXT with GXV3240, please
refer to the GXP2200EXT user manual in http://www.grandstream.com/support.

 Loading...