Page 124
Replacing a UV Lamp
UVTOCMaintenance.fm
Section 7
6. Install the new lamp using this procedure in reverse order. Make sure the
PFA tubing from the reactor passes through the GLS fitting so that the
reactor effluent does not contact the fitting.
7. Close the enclosure door and resupply power. Do not supply power to
the UV lamp while the enclosure door is open.
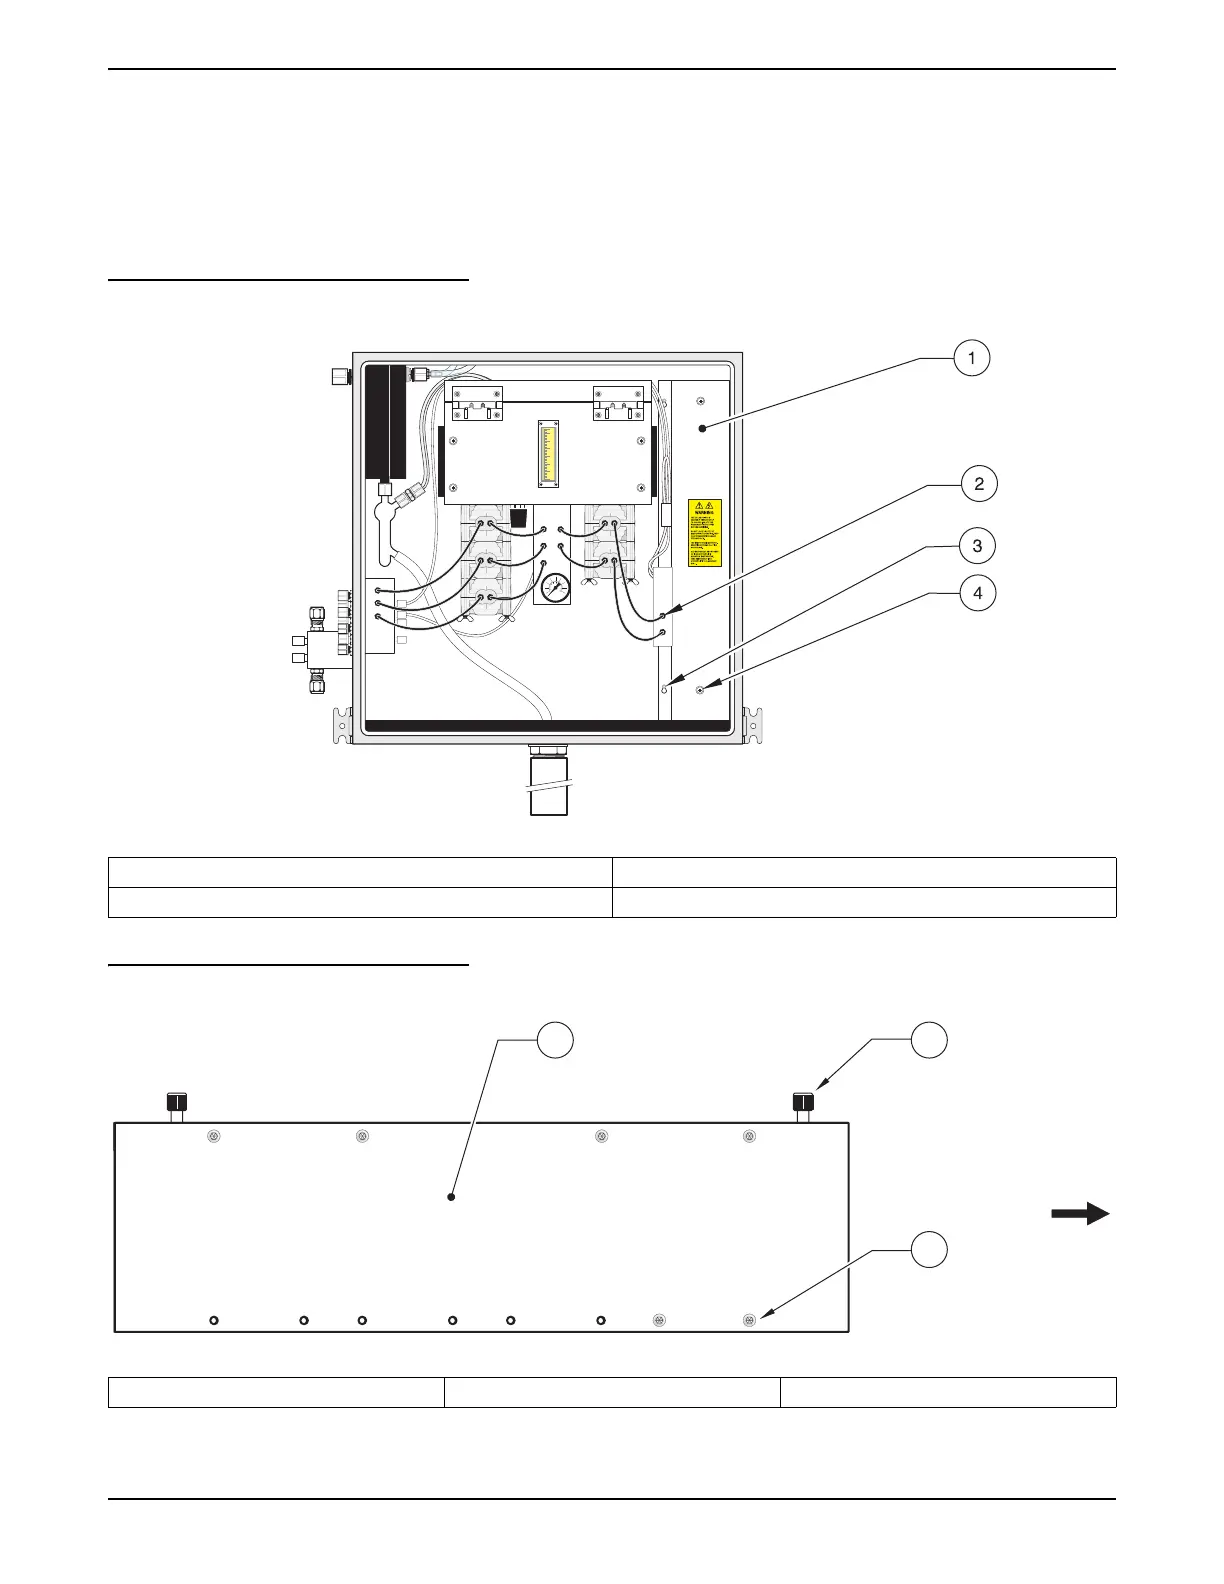
Figure 48 UV Lamp Position in the Analyzer
Figure 49 UV Lamp Assembly Access Cover
1. UV Lamp Assembly 3. Loosen socket head cap screws. (2x)
2. Disconnect tubing from manifold. 4. Release captive screws. (2x)
1. UV Access Cover 2. Captive screws (2) 3. M4 x ¼ screws1
1
The number of screws varies with the number of lamps in the assembly.
12
3
UP