Page 112
Periodic Maintenance
UVTOCMaintenance.fm
Section 7
7.3 Periodic Maintenance
The manufacturer is not responsible
for damage caused by the failure of
the user to follow the recommended
periodic maintenance.
Perform the following routine preventive maintenance on the recommended
schedule to ensure satisfactory long-term performance.
Important Note: The analyzer circuit board components are sensitive
to static electricity damage in a powered or unpowered state. Do not touch
circuit boards or their components without wearing a properly grounded
wrist strap. See Electrostatic Discharge (ESD) Considerations.
7.4 Shut Down
Important Note: The shutdown procedure must be strictly followed to avoid damage to
the analyzer on subsequent startup.
The analyzer should run continuously, if possible. Turning the lamps on and
off unnecessarily will shorten their life. If it is necessary to turn the lamps off,
observe the following cautions:
• Do not allow the UV lamps to remain lit without liquid flowing
through the reactor because plugging and/or damage to the reactor
may result.
• If measurement is not necessary or possible, substitute DI water for
sample in the analyzer.
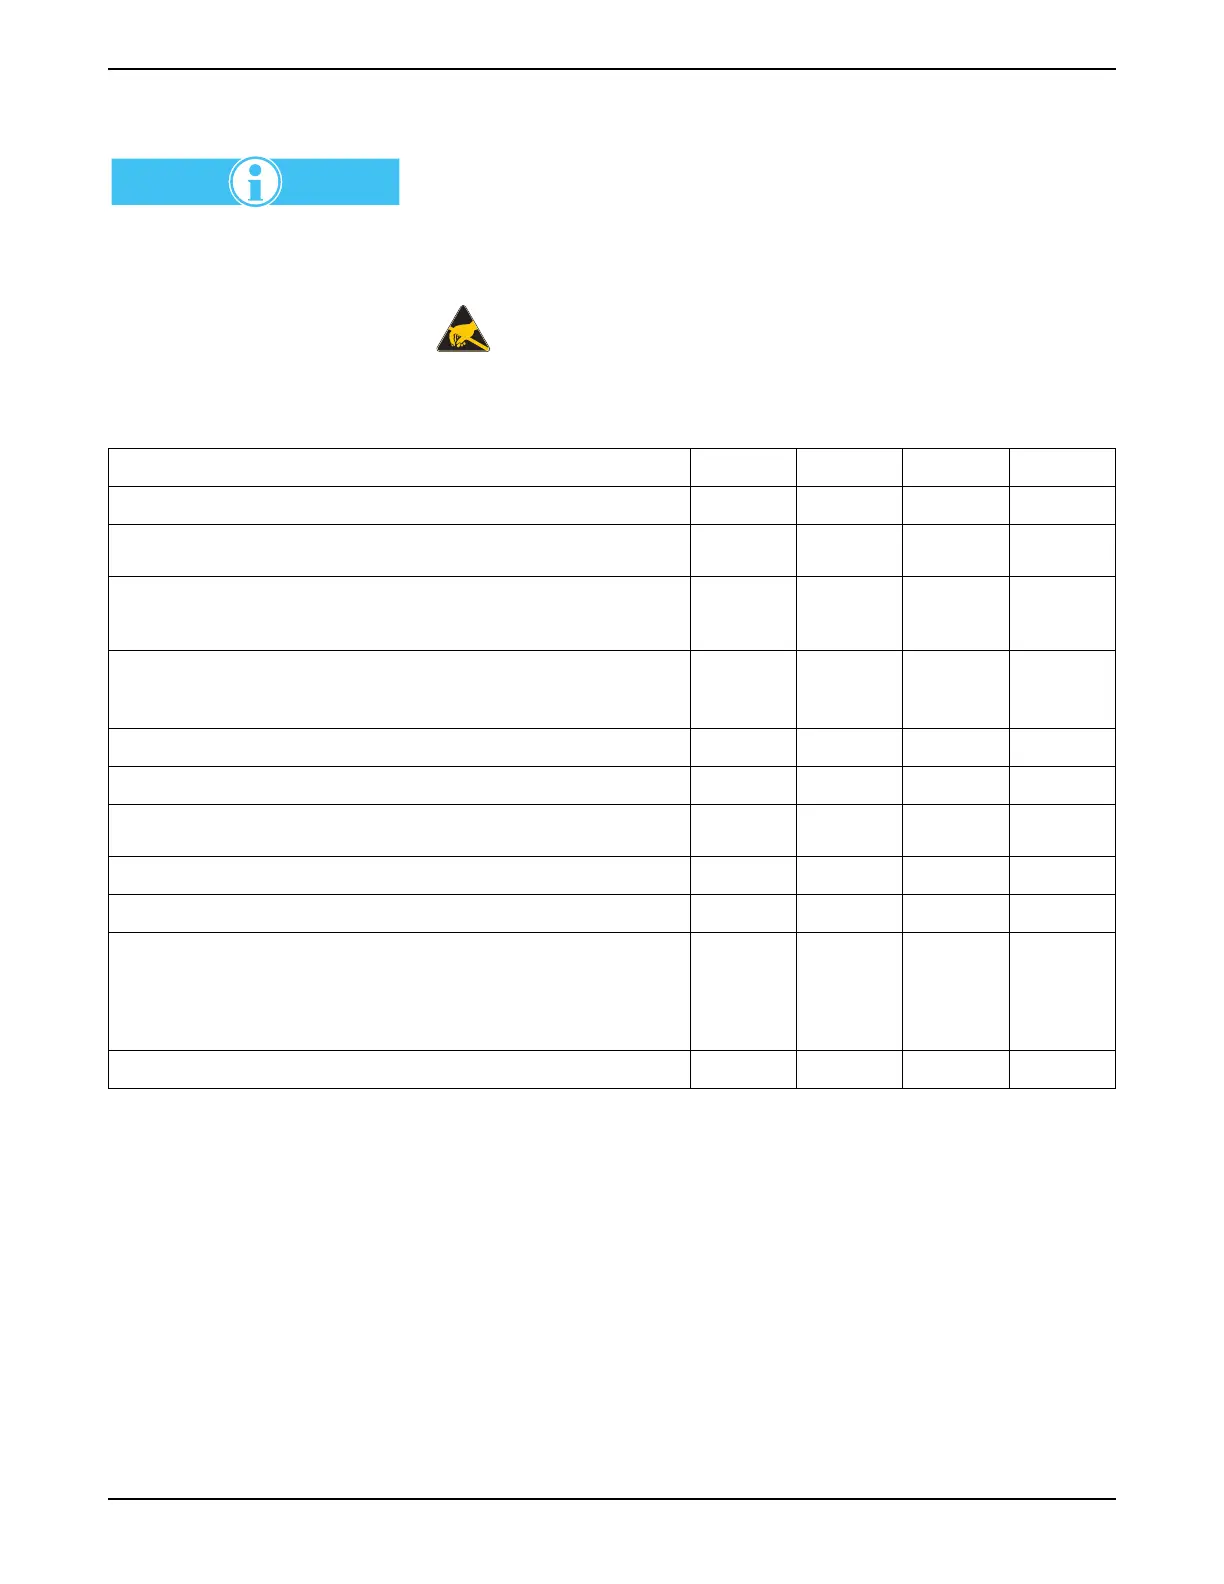
Table 14 Maintenance Tasks and Schedule
Maintenance Task Daily Monthly Quarterly Annually
Check for alarms. XXXX
Check for liquid leaks and other unusual conditions. Eliminate leaks
immediately to avoid analyzer damage.
XXXX
Check the flowmeter reading for the reactor carrier flow. It should be
stable and near the reading shown when the analyzer was
commissioned.
XXXX
Visually observe that the sparge gas bubbles are flowing correctly in
the GLS and sparger.
Note: The sparger on the TC version is bypassed with the conversion.
XXXX
Prepare reagents and refill containers. XXX
Recalibrate the analyzer, using fresh carbon standards. XXX
Check the pressure of the carrier gas feed to ensure that an adequate
supply is available.
XXX
If the analyzer is obviously dirty, perform a cleaning. XXX
Replace all peristaltic pump tubing. See Section 7.5. XX
Remove the UV lamps and remove the aluminum foil from the lamps to
perform lamp inspection. The lamp surface should be clear. If it is not,
run cleaning solution through the analyzer. Before returning to on-line
operation, wrap standard aluminum foil around each lamp to prevent
UV exposure.
X
Clean the IR sample cell and windows with a suitable solvent. X