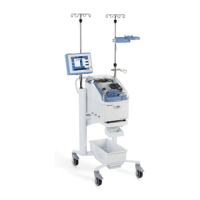
106 Calibration and Configuration
P/N: SM-ACP215-01-EN(AB) Haemonetics
®
ACP-215
®
Service Manual
Calibration Procedures
Note: After calibrating the device in the Calibration section of Utilities, replace
the memory protection and reboot the device before going into Diagnostics. If
this is not done, watchdog errors will occur when testing the pumps.
The components in the device generate enough heat that some circuits may
drift if the cooling system is not intact. For this reason, the rear panel should
always be propped into place whenever direct access through the rear opening
is not necessary. The cooling system is even more efficient when both panels
are in place, but it may be impractical to repeatedly remove and replace the
front panel. If a voltage measurement is needed, or if calibration of any of the
components is necessary, be sure the internal temperature has stabilized
before testing or adjusting.
Pneumatic
System
Pressure
Calibration
The pneumatic system pressure calibration can only be done on devices with
earlier serial numbers than 02K085. There is no pneumatic system pressure
calibration on newer devices.
Note: Power on the device in the Utilities mode of operation by pressing and
holding SHAKER while switching the power on. Hold SHAKER until the
UTILITIES menu appears on the display. On the UTILITIES menu, press
MODIFY PROGRAM until the arrow points to DIAGNOSTICS, then press
START.
5. Press MODIFY PROGRAM until the arrow point to VALVES.
6. Press START.
7. Disconnect the red pneumatic tubing of valve 1 and attach a pressure
meter (Bio-Tek Model DPM-11, or equivalent) to the tubing.
8. Adjust the meter to -13.5 to 75 psi scale (hPa and mmHg may be used
as well).
9. Press PUMP UP ARROW and adjust the pressure with the
potentiometer R23 (located on the top deck distribution boards) to 21 +/-
0.7 psi
(1450 +/-48 hPa or 1100 +/- 37 mmHg).
10.Press PUMP UP ARROW to release the pneumatic pressure.
11.Press PUMP UP ARROW to re-activate the pneumatic pressure.
12.Check to ensure that the value is within tolerance and readjust if
necessary.
13.Press PUMP UP ARROW to release the pneumatic pressure.
14.Remove the pressure meter and reconnect the red tubing.
15.Proceed to pinch valve occlusion test.
 Loading...