Calibration and Configuration 109
Haemonetics
®
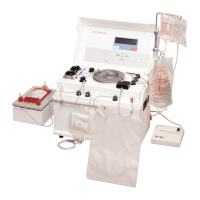
ACP-215
®
Service Manual P/N: SM-ACP215-01-EN(AB)
Centrifuge Calibration
1. Access the Utilities mode of operation by pressing and holding SHAKER
while switching the power on. Hold SHAKER until the UTLITIES menu
appears on the display.
2. Press MODIFY PROGRAM to move the arrow to CALIBRATION and
then press START.
3. The message REMOVE MEMORY PROTECTION OR STRIKE STOP
appears.
4. Switch the memory protect switch located toward the bottom of the CPU
board (the left-most card cage board, looking from the rear of the unit) to
the Protect Off mode (down). The calibration screen appears with two
choices: A/D and CENTRIFUGE.
5. Press MODIFY PROGRAM to move the arrow to CENTRIFUGE.
6. Press START.
7. The CENTRIFUGE CALIBRATION screen appears on the screen.
8. Place a blow molded bowl (half filled with water) into the centrifuge, close
the cover, and lock the centrifuge cover lock.
9. Adjust OUTVAL with the Yes/No keys until the actual speed reads
8000 +/-30RPM. Record the OUTVAL value.
10.If 8000 rpm can not be achieved using the Yes/No keys then with the
OUTVAL at 255 adjust the potentiometer R68 on the centrifuge drive
board to achieve an actual value of 8200 +/- 30 rpm. Then adjust the
OUTVAL down using the Yes/No keys to 8000 +/- 30 rpm.
Note: The centrifuge drive board is mounted on the power supply cage and is
accessed from the front of the device after removing the front cover.
11.Press SAVE PROGRAM, which stores the value and decrease the
centrifuge speed.
12.Increase (using the YES key) or decrease (using the NO key) the
OUTVAL until the actual speed reads 3000 +/- 30 RPM. Record the
OUTVAL value.
13.Press SAVE PROGRAM, which stores the value.
14.Press STOP.
15.Press MODIFY PROGRAM.
16.Press STOP.
17.The message REPLACE MEMORY PROTECTION appears.
18.Switch the memory protect switch on the CPU board to the Protect On
mode (up).