4 - Sprayer set-up
29
Mechanical equipment
Hitches
The hitch is equipped with a ring as standard, or with an optional articulated system with or without offset correction.
All hitches are fixed using six bolts secured by locknuts under the sprayer, close to the rear axle. Also, the hitch is supported
by two bolts secured by locknuts under the platform.
Ring hitches have an extension piece, secured with six bolts.
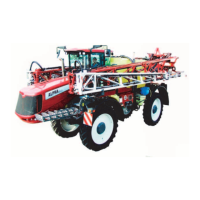
1. Ring hitch
2. Extension
3. Ring hitch fixing screw on the extension
4. Ring
For more information, refer to section Every 1,000 hours - Hitch
extension page 61
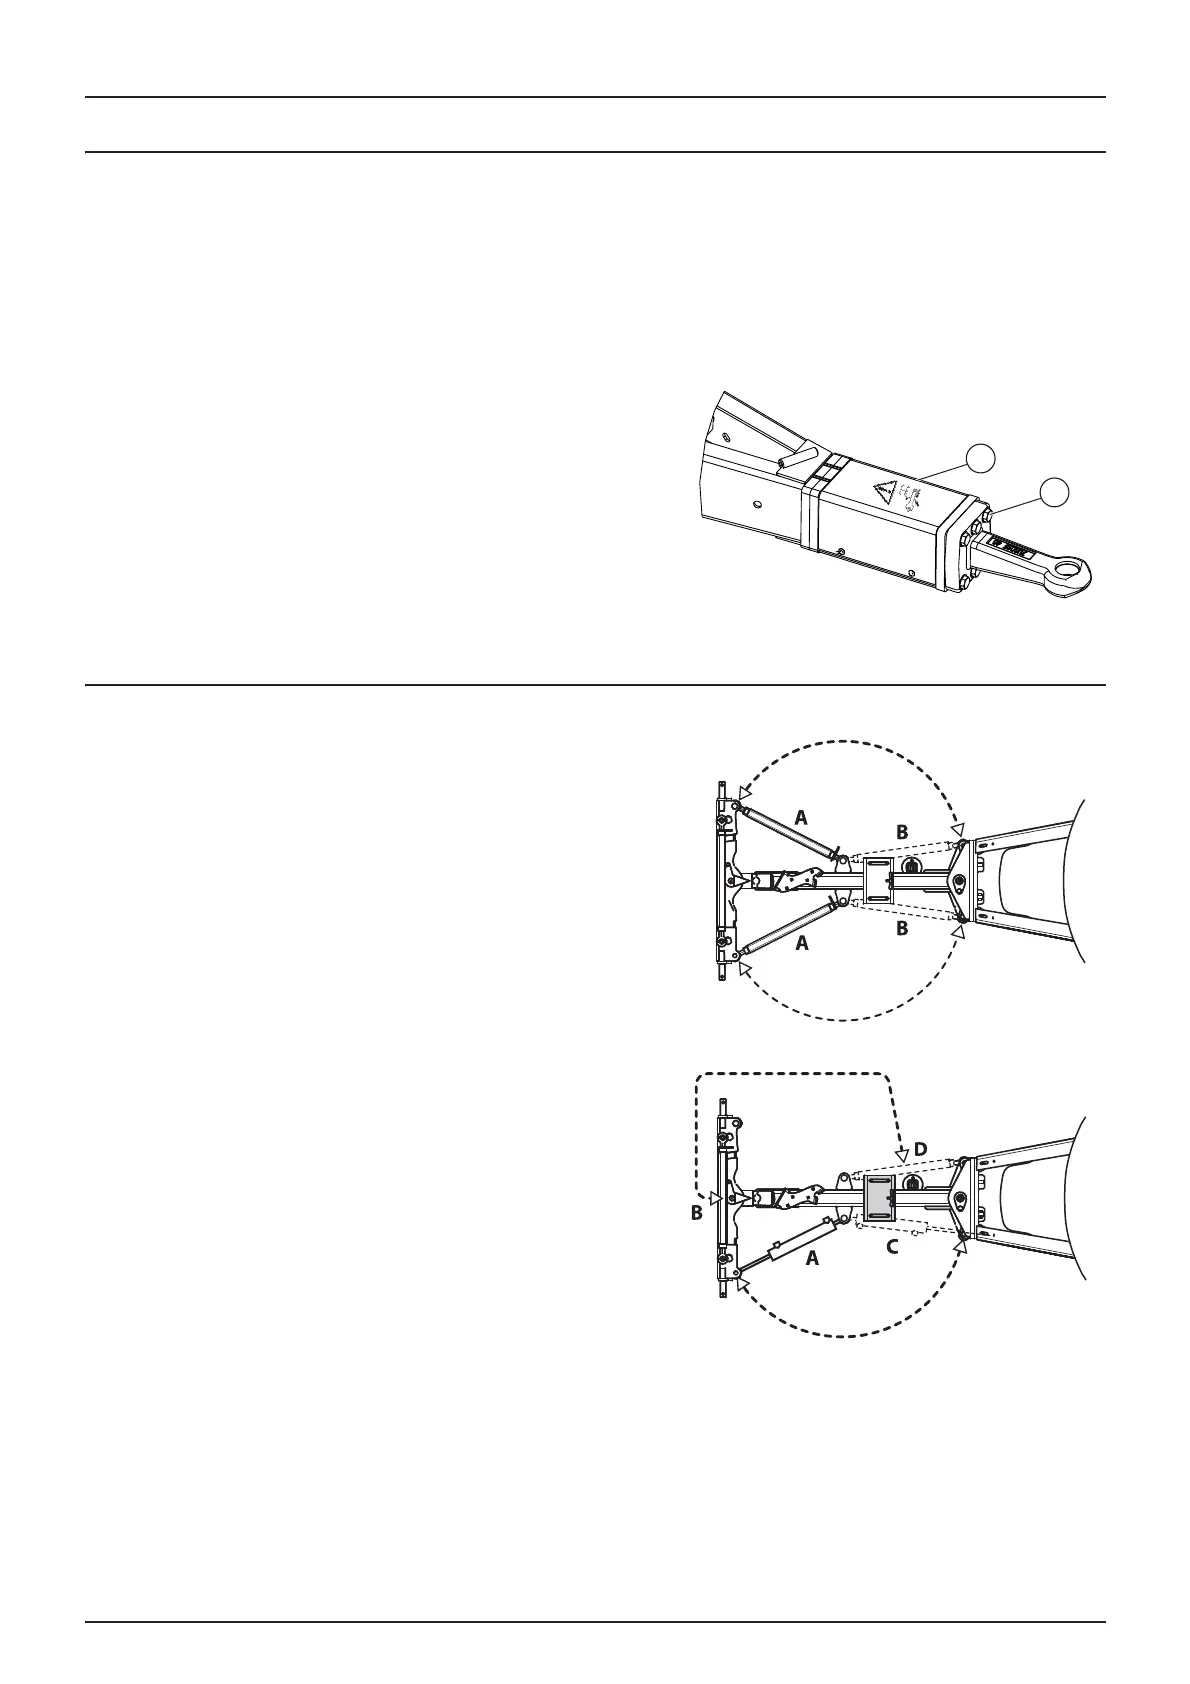
Articulated hitch with tilt correction (optional)
When the sprayer is hitched to the tractor, move the tie-rods from
position (B) to position (A).
Position of tie-rods:
A. Spraying.
B. Driving on the road.
€
DANGER! While driving on public roads, the tie rods must be in
position (B). If this is not the case, the sprayer could tip on bends
or when turning.
Where the articulated hitch is equipped with an offset corrector, remove
the tie rod from position (D) and store it in position (B). Pivot the cylinder
from position (C) to position (A).
Position of the tie-rod/cylinder:
A. Spraying with offset correction.
B. Tie-rod storage (not used during work).
C. Driving on the road.
D. Driving on the road.
€
DANGER! While driving on public roads, the cylinder and tie rods
must be in positions (C) and (D). If this is not the case, the sprayer could tip on bends or when turning.
±
WARNING! To prevent any damage to the drawbar or chassis, the cylinder should not be under pressure when driving
on the roads (C).
1
2
 Loading...