5 - Operation
42
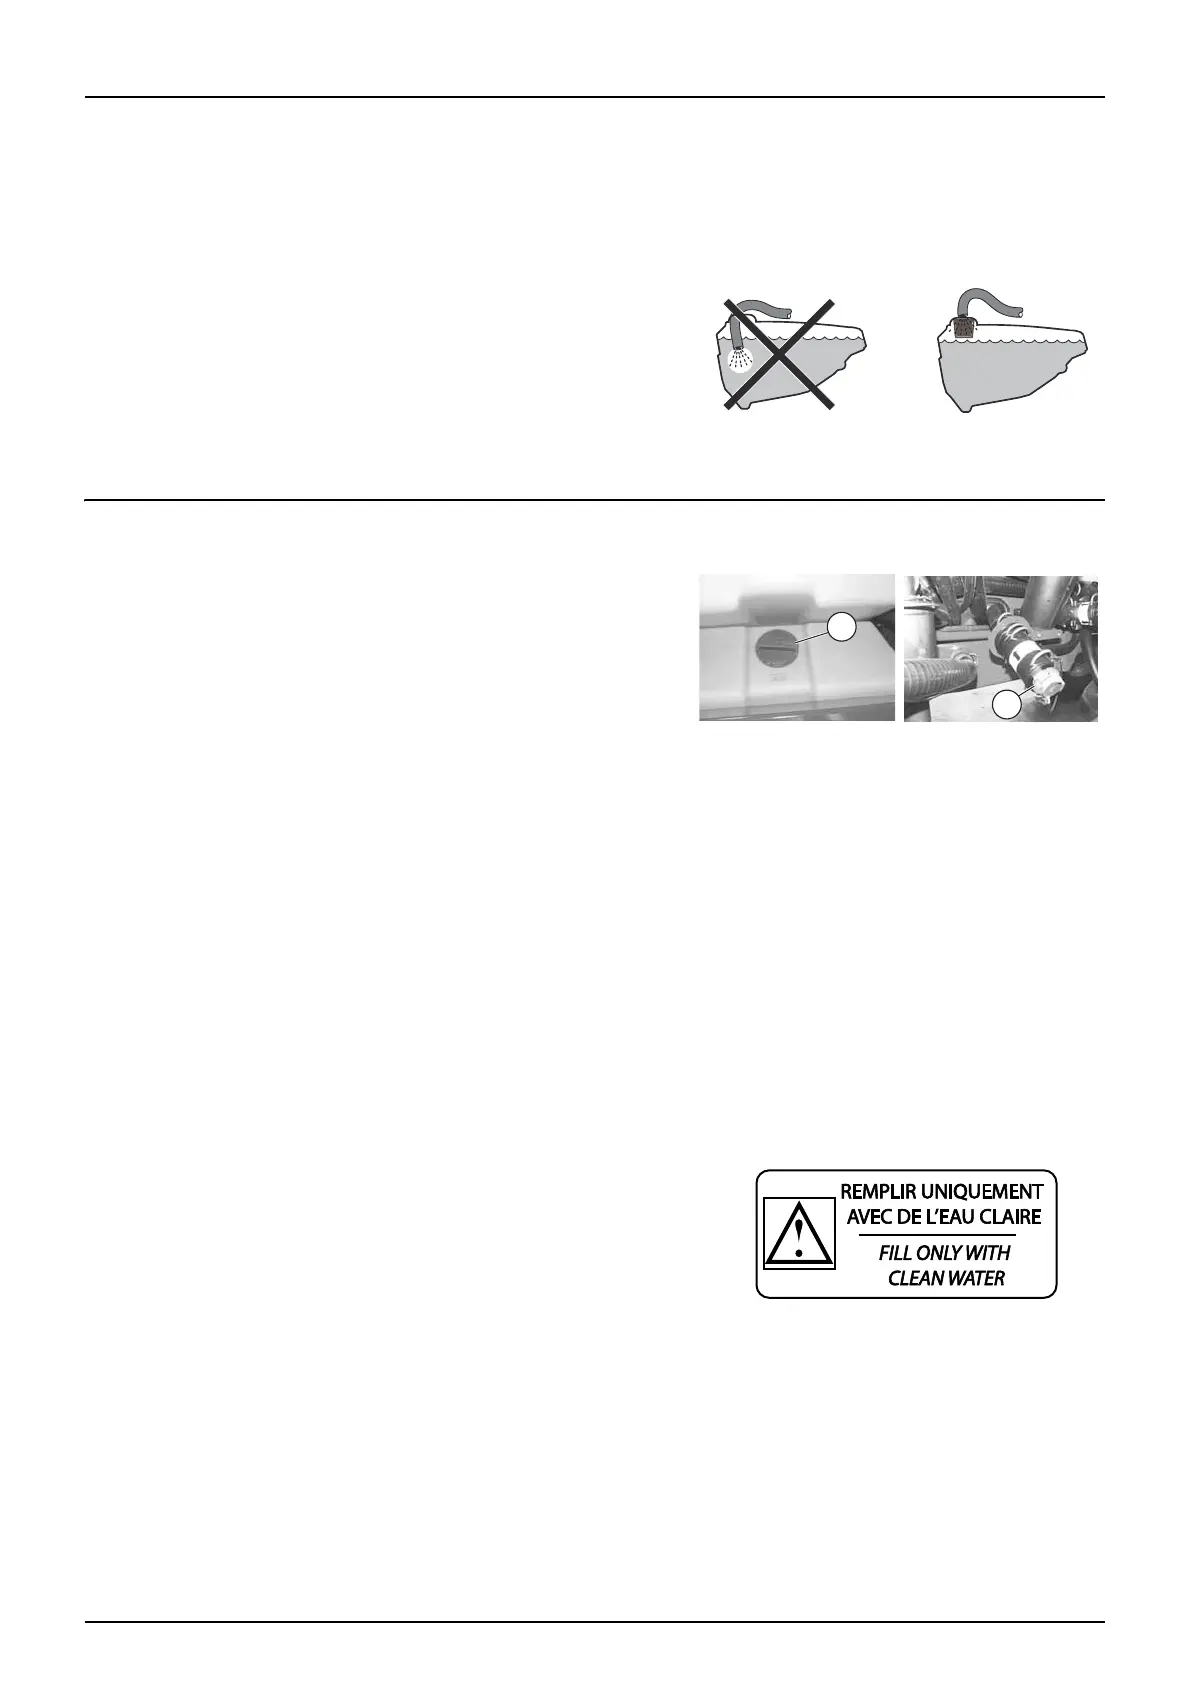
Filling via the opening in the tank
To put water into the tank, lift the lid on the top of it on the right hand side of the sprayer. The tank's lid is accessible from
the optional step. For treatment, it is recommended that you use the cleanest water possible. Leave the strainer in place to
prevent impurities being introduced into the tank. To speed up filling, you can fill by gravity.
±
WARNING! Do not put the filling pipe into the tank. Keep it
outside the tank, at its opening. If you put the pipe into the tank,
the mixture could be sucked back up in the event of a drop in
pressure, thus contaminating the pipes or the water source.
±
WARNING! For greater security, fit a control valve to the water
supply pipes. Always comply with current legislation.
±
WARNING! Fit a meter to the water supply to prevent any overflow. Always comply with current legislation.
Filling the rinsing tank
There are two ways to fill the rinsing tank:
Using the external filling connector
1. Remove the plug from the filling connector (2) and connect the
clean water supply pipe.
2. Open the clean water tap to fill the rinsing tank. Constantly
monitor the level to prevent any risk of overflow.
3. When filling is complete, close the clean water tap and remove the filling pipe. A non-return valve prevents water
leaking from the rinsing tank.
4. Replace the plug in the filling connector.
Via the tank lid
The tank lid (1) is located at the back of the sprayer. To fill:
1. Unscrew the rinsing tank lid.
2. Fill the tank. Monitor the tank level to avoid any risk of overflow.
3. When filling is complete, replace the lid.
Capacity: approximately 260 litres.
μ
IMPORTANT! Only fill the rinsing tank with clean water. To prevent the formation of algae, empty the rinsing tank if
you are not using the sprayer for any length of time.
 Loading...