4 - Sprayer set-up
30
Track width, axles and wheels
Modifying the track width
The sprayer's track width can be modified in stages.
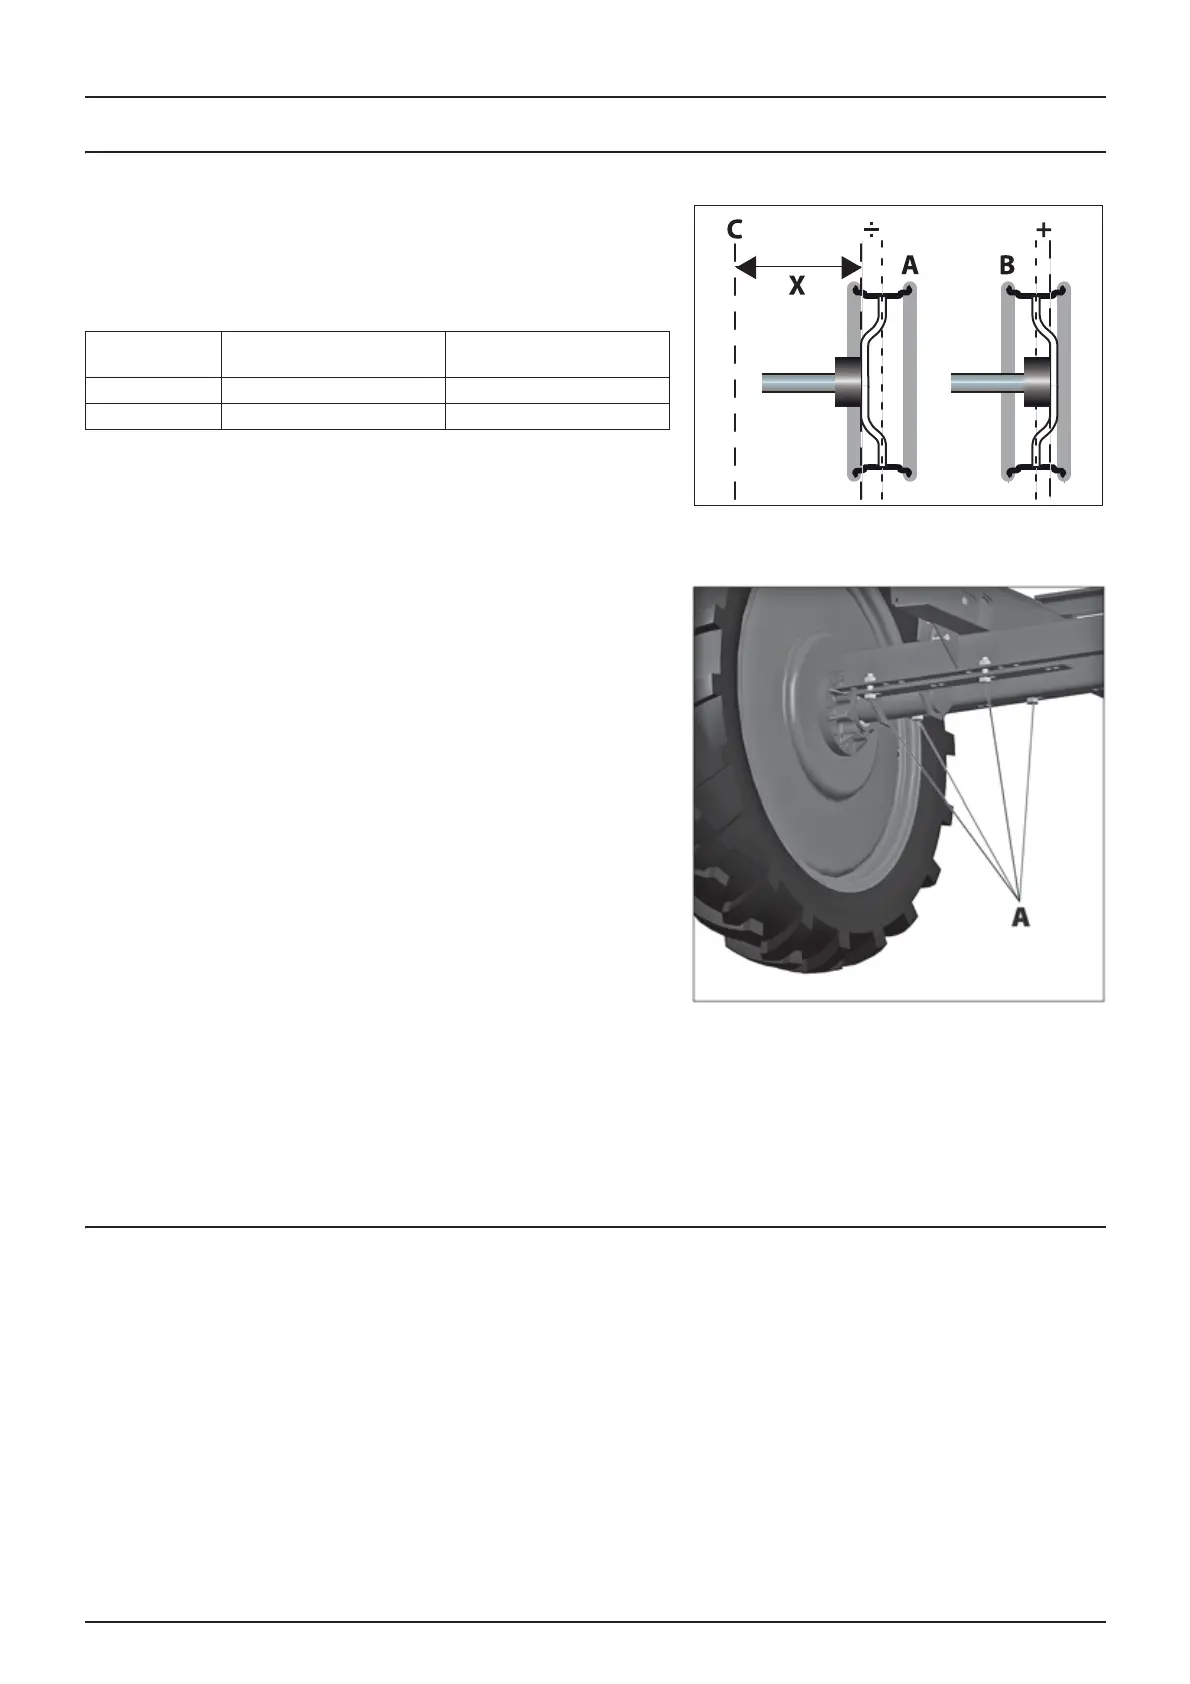
The tables show the track widths possible, twice the distance the axle (X)
can slide from the middle of the sprayer (C) and the position of the
wheel discs (A) and (B).
Modification procedure
1. Measure the track width (centre of the right tyre to the centre of
the left tyre). The increase or decrease in track width must be
divided between the two sides.
2. Hitch the sprayer to the tractor and engage the parking brake.
3. Place chocks in front of and behind the right hand wheel. Lift up
the left wheel and make the equipment secure.
4. Loosen the bolts (A) on the left stub-axle.
5. Loosen the setting screw on the hand brake control lever.
6. Slide the axle. If necessary, use tools to assist.
7. Tighten the bolts (A) to a torque of 250Nm.
8. Repeat the operation for the right hand wheel.
9. Check that the distance from the centre of the tyre to the centre of
the chassis is the same on both sides.
10. Tighten the bolts, including those on the wheels, to the indicated
torques after 8 hours of work.
IMPORTANT! The wider the track width, the more stable the sprayer. We recommend that you work with the widest
possible track width.
WARNING! Position the jack under the axle and lift the wheel, so that there is no weight on the flanges, before
tightening them to the specified torque.
Tyre inflation pressures
Check tyre pressures. Refer to section Tyre specifications page 78
±
An incorrectly inflated tyre could burst and will wear more quickly.
Wheel discs Offset Consequences for the track
width
ANegative Narrower
B Positive Wider
 Loading...