Make sure you have set access group and apply the access group to the access control device
successfully.
5) Click Save.
6) Oponal: Select the person/card group(s), and then click Delete to delete it(them).
7) Oponal: Select the person/card group(s), and then click Apply to re-apply access group that
failed to be applied previously to the access control device.
4. Select an access control point (door) of selected device on the
le panel.
5. Enter the maximum interval when entering password.
6. Add an
authencaon group for the selected access control point.
1) Click Add on the Authencaon Groups panel.
2) Select a congured template as the authencaon template from the drop-down list.
Note
For seng the template, refer to Congure Schedule and Template .
3) Select the authencaon type as Local Authencaon, Local Authencaon and Remotely
Open Door, or Local Authencaon and Super Password from the drop-down list.
Local
Authencaon
Authencaon by the access control device.
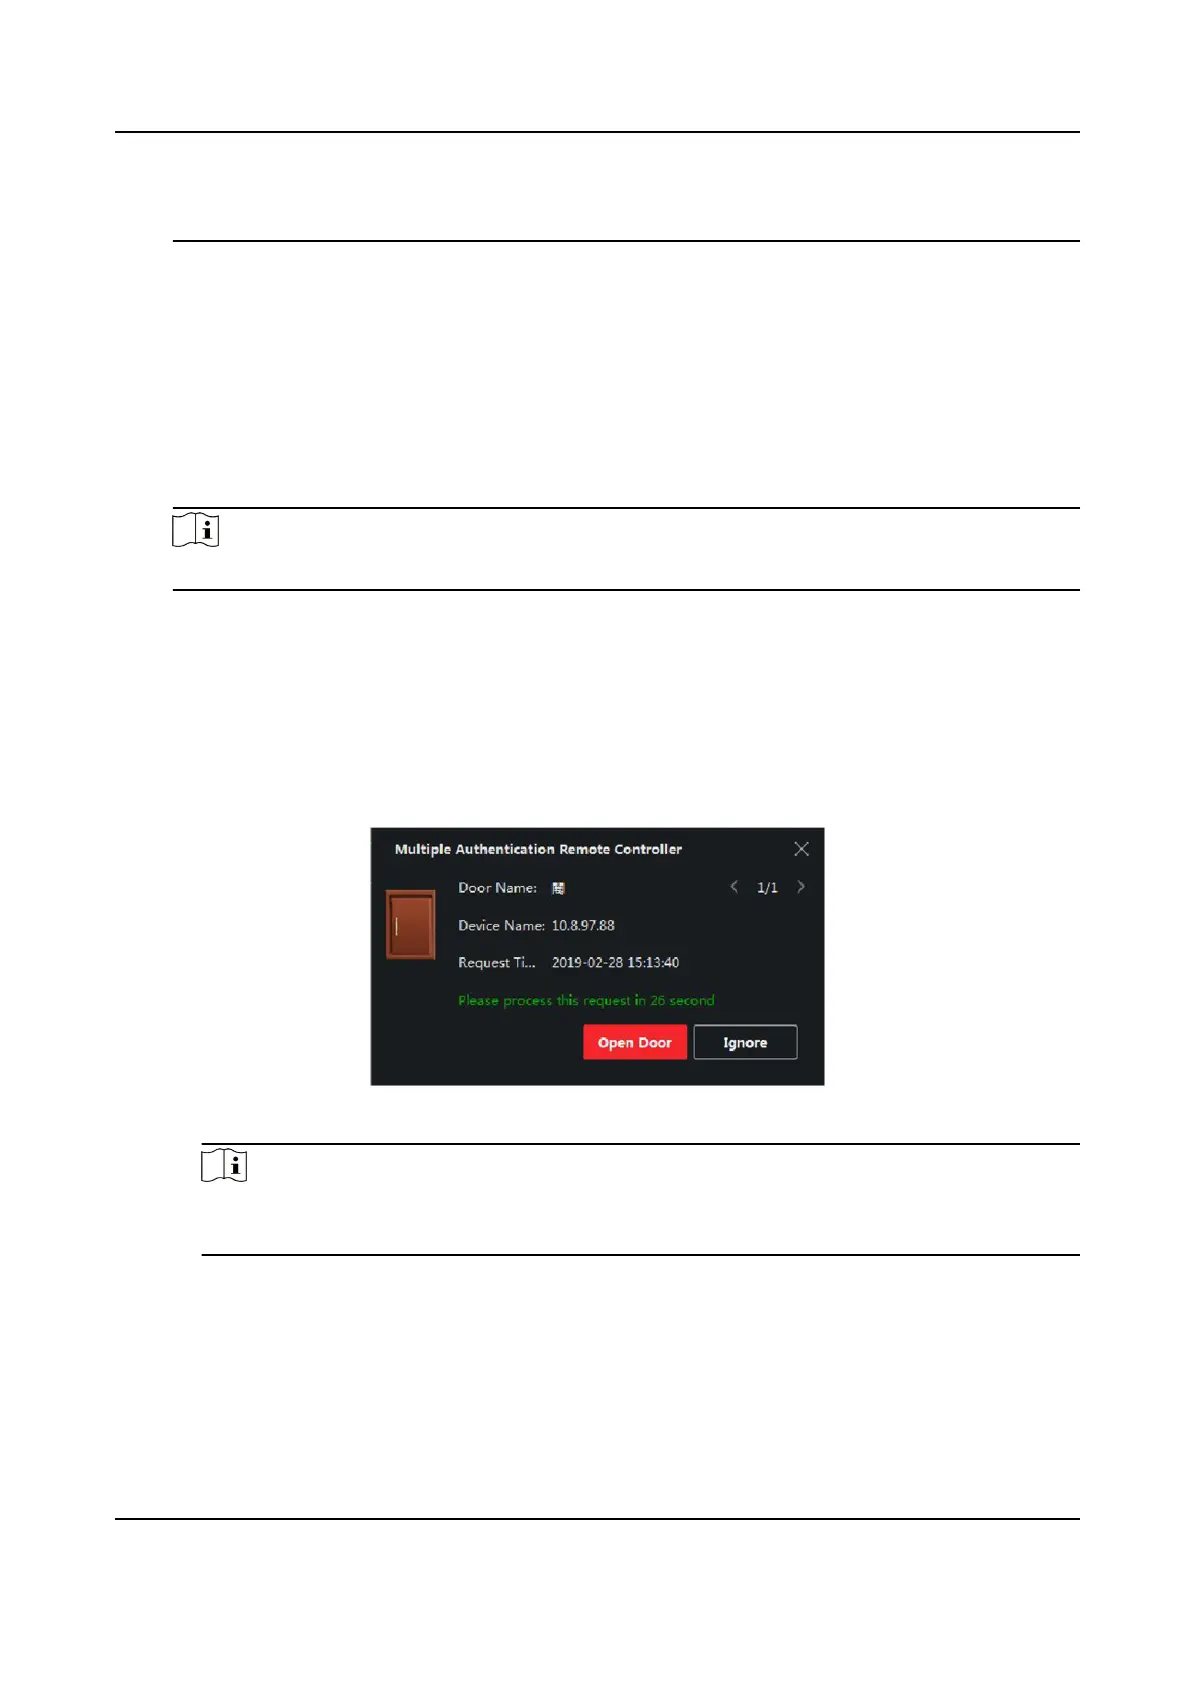
Local Authencaon and Remotely Open Door
Authencaon by the access control device and by the client. When the person swipes
the card on the device, a window will pop up. You can unlock the door via the client.
Figure 7-8 Remotely Open Door
Note
You can check Oine Authencaon to enable the super password authencaon when
the access control device is disconnected with the client.
Local Authencaon and Super Password
Authencaon by the access control device and by the super password.
4) Select the added person/card group in the le list below and it will be added to the Selected
list on the right as the
authencaon group.
Face Recognion Terminal User Manual
94
 Loading...