27
────────────────────────────────────────────────────
3.3 Setting the "SETTING" State
────────────────────────────────────────────────────
1
3
5
6
7
8
9
10
11
12
13
14
A
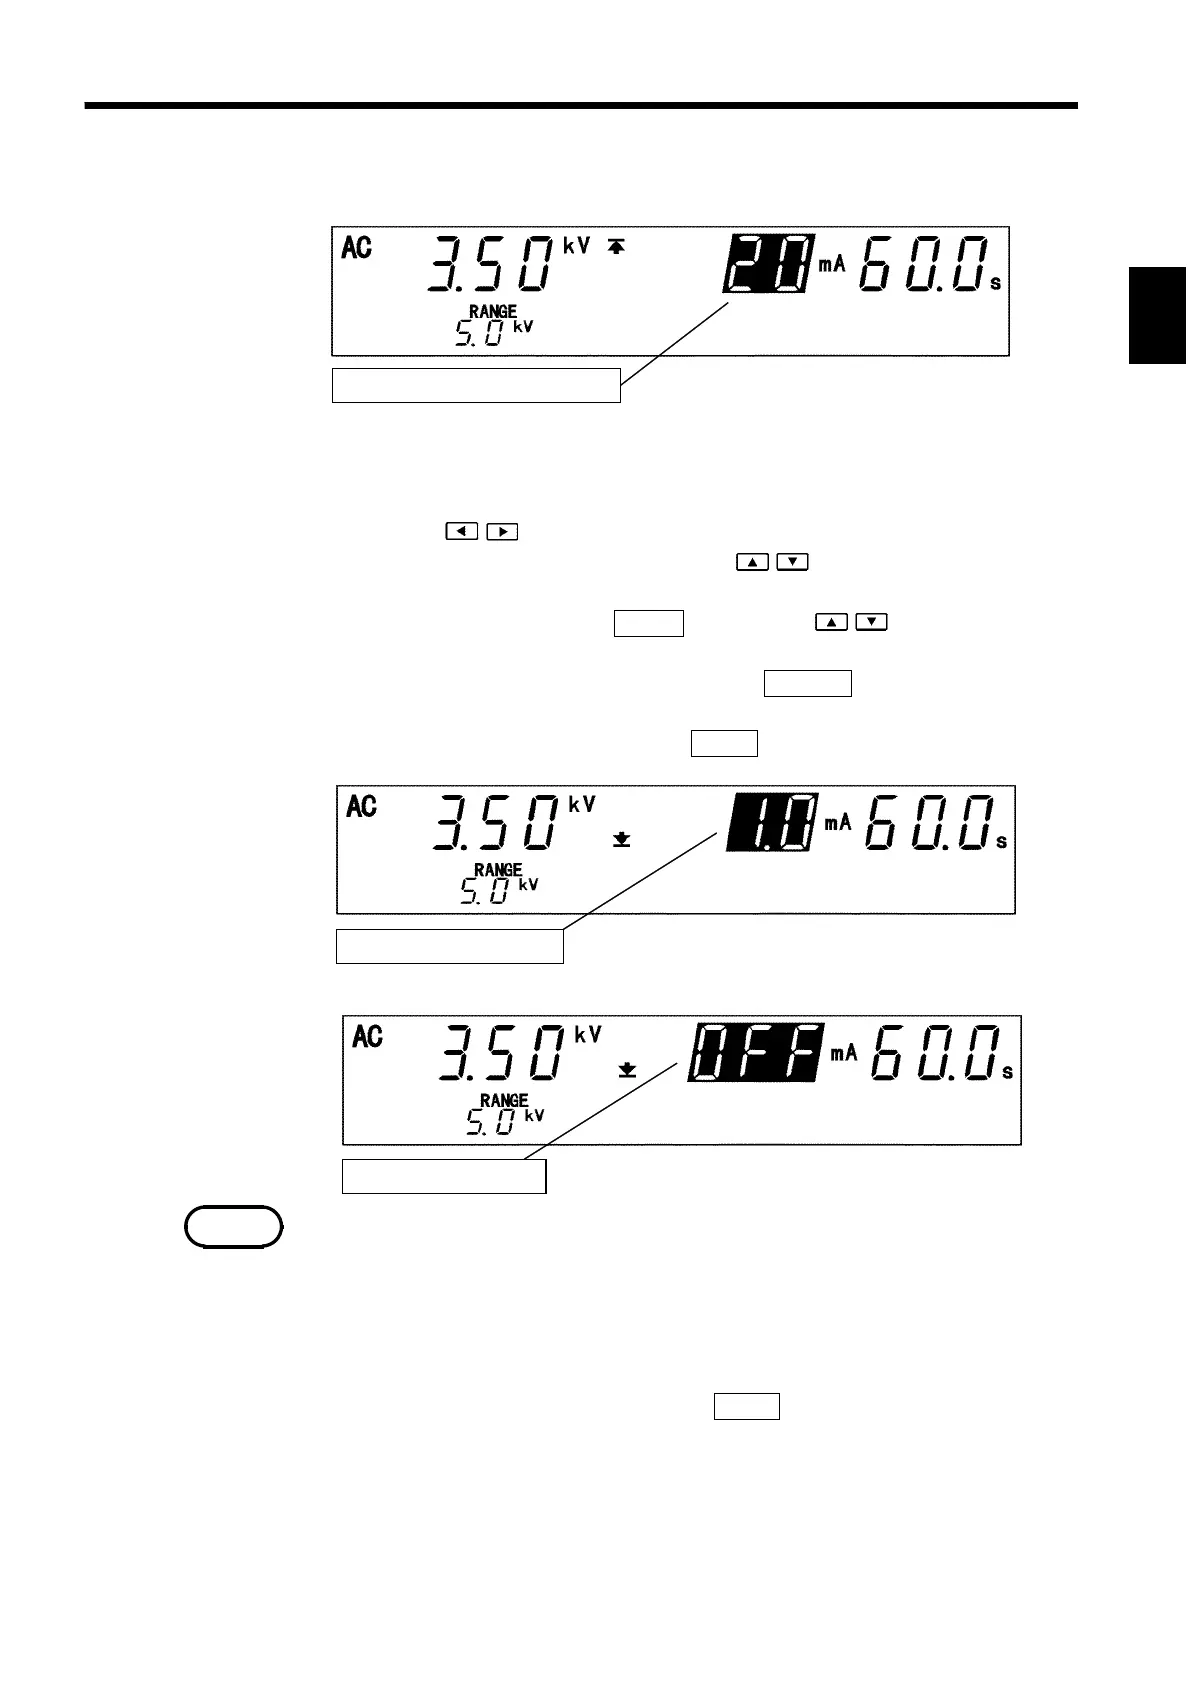
3.3.2 Setting the Upper (Lower) Level Value
Upper (Lower) level value: 20 mA
Lower level value: 1.0 mA
Lower level value: OFF
NOTE
(1) If the flashing cursor does not appear in the READY state, display the cursor at
the position where the Upper-Level Value (Lower-Level Value) is indicated by
pressing the
/ keys.
(2) Set the upper (lower) level value using the
/ keys.
The upper (lower)-level value will change by 0.1 mA (by 1 mA at 10 mA to 120
mA). While holding down the
SHIFT
key, press the / keys. The upper
(lower)-level value will change by 1.0 mA (by 10 mA at 10 mA to 120 mA).
If no lower level value is required, turn off the
ON/OFF
key. Upper level value
can not be turn off.
(3) When settings are complete, press the
STOP
key.
・
The setting resolution of the upper (lower)-level value is 0.1 mA at 0.1 mA to 9.9
mA, and 1 mA at 10 mA to 120 mA.
・
The current measurement resolution during a test depends on the set upper-level
value: 0.01 mA at 0.1 mA to 8.0 mA, 0.1 mA at 8.1 mA to 32 mA, and 1 mA at
33 mA to 120 mA.
・
If the set lower-level value is greater than the upper-level value, the unit will not
return to the READY state even when the
STOP
key is pressed. In such a case,
correct the upper- or lower-level value.
・
The electric current range will be decided by the upper-limit test value (2 mA-
range for "upper-limit test value
≦
2.0 mA", 8 mA-range for "2.0 mA
<
upper-
limit test value
≦
8.0 mA", 32 mA-range for "8.0mA
<
upper-limit test value
≦
32
mA", 120 mA-range for "32 mA
<
upper-limit test value")