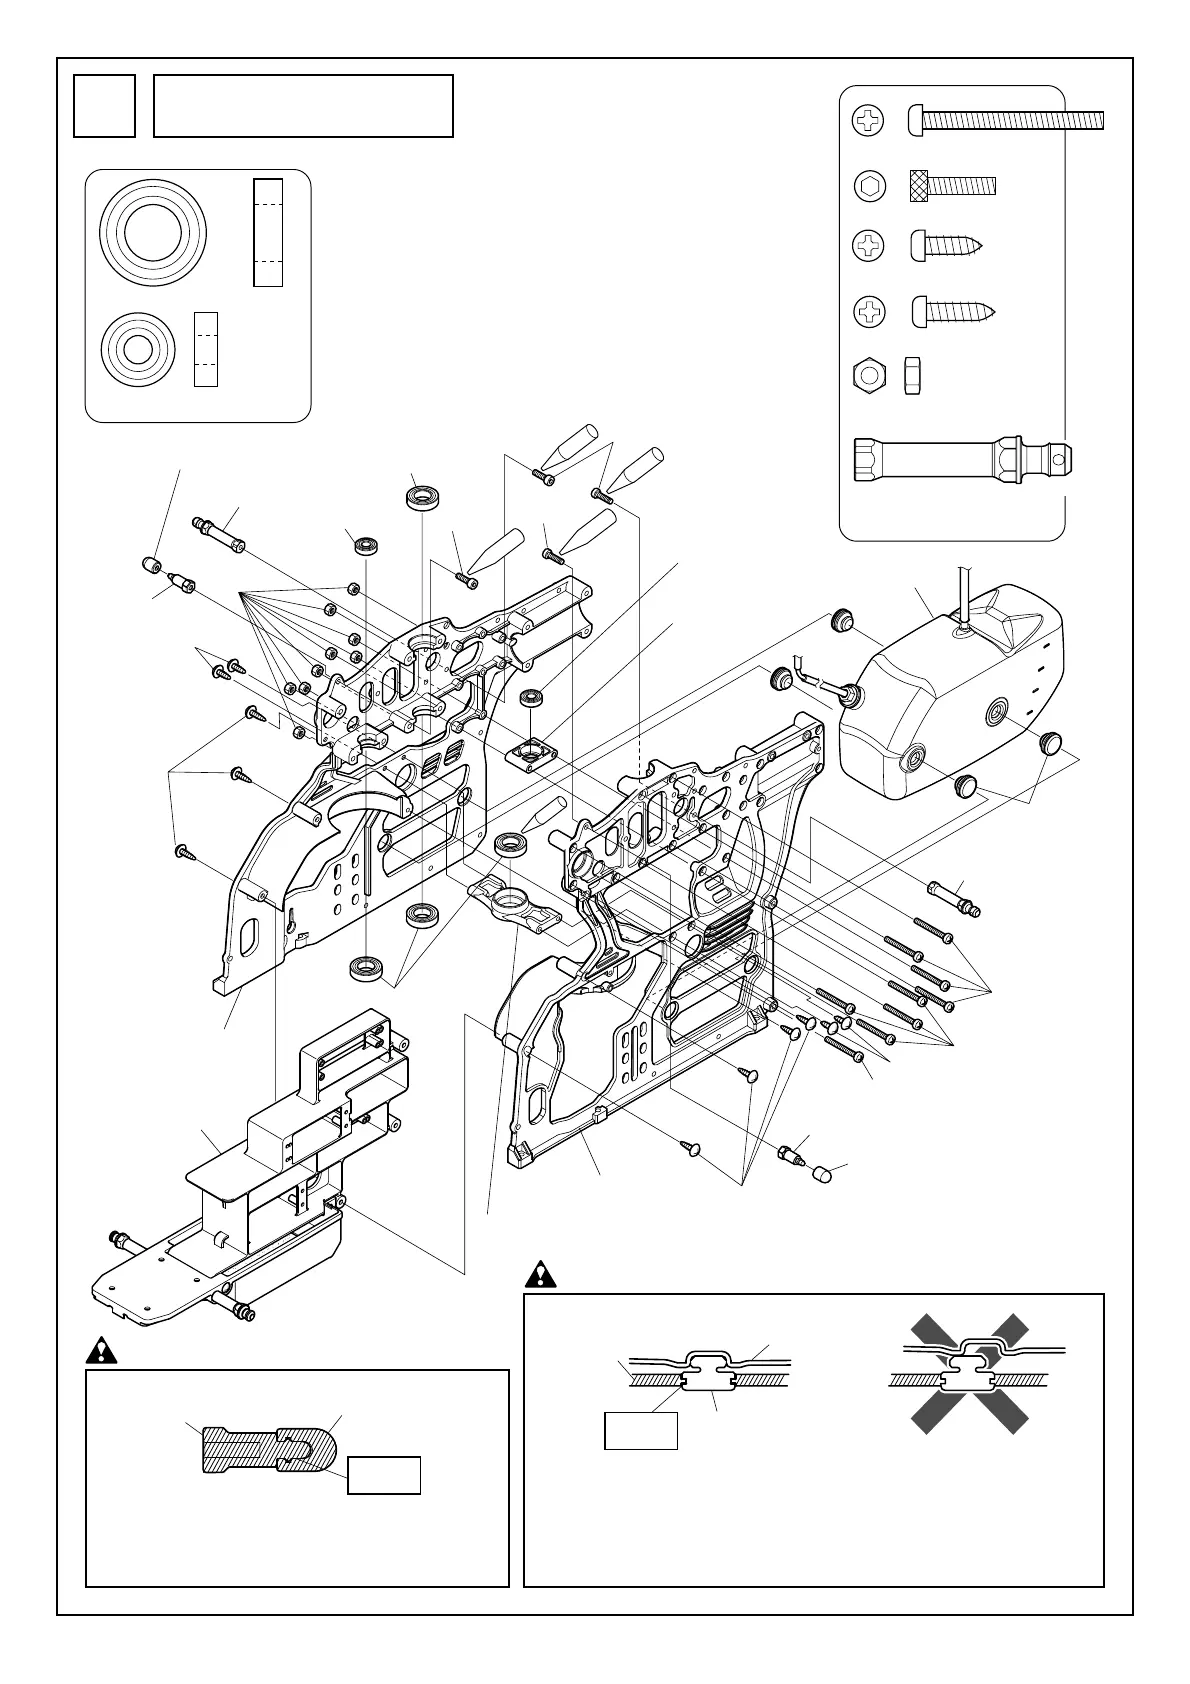
12
M3X12TS
M3X10TS
防振ゴム
Rubber isolators
M3X12TS
M3X10TS
M3 ナット
M3 nut
M3X32PH
M3X32PH
M3X32PH
Brg. ø10Xø19X5ZZ
Brg. ø5Xø13X4ZZ
メインフレーム (R)
Main frame (Right)
サーボマウントAssy
Servo mount assembly
メインフレーム (L)
Main frame (Left)
SF Brg.ホルダー ø13
SF bearing holder ø13
ø19 Brg.ホルダーW=60
ø19 bearing holder W=60
Brg. ø5Xø13X4ZZ
Brg. ø10Xø19X5ZZ
M3X12CS
M3X12CS
M3X12CS
ロック
ロック
Lock
ロック
Lock
ロック
Lock
Lock
キャビンサポートゴム
Cabin support rubber
キャビンサポート
Cabin support
ボディマウントL=30
Body mount L=30
ボディマウントL=30
Body mount L=30
燃料タンク
Fuel tank
キャビンサポートゴム
Cabin support rubber
キャビンサポート
Cabin support
ロック
Lock
M3X32PH............................. 9
M3X12CS ............................. 4
M3X10TS ............................. 4
M3X12TS ............................. 7
M3ナット ............................. 9
M3 nut
ボディマウントL=30 ......... 2
Body mount L=30
メインフレームの組立
Main frame assembly
4
注意 Caution
防振ゴムとフレームは凹凸部を合わせ、瞬間接着剤で接着してください。
燃料タンクの凹部を防振ゴムにはめ込んでください。
Connect the female part of the rubber isolator and the male part of the frame together
and seal with quick-dry adhesive.
Insert the female part of the fuel tank in the male part of the rubber isolator.
メインフレーム
Main frame
燃料タンク
Fuel tank
防振ゴム
Rubber isolator
接着
Adhesive
Brg.ø10Xø19X5ZZ............... 4
Brg.ø5Xø13X4ZZ................. 2
キャビンサポートゴムはキャビンサポートに瞬間接着剤で
接着してください。
Attach the cabin support rubber to the cabin support
using quick-drying adhesive.
キャビンサポート
Cabin support
Cabin support rubber
接着
Adhesive
注意 Caution