20
ラジアスブロック
Radius block
M2X8CS
M2 ナット
M2 nut
M2 ナット
M2 nut
ウォッシュアウト
Wash-out
スワッシュプレー
Swash plate
M3ナイロンナット
M3 nylon nut
M3X20CS
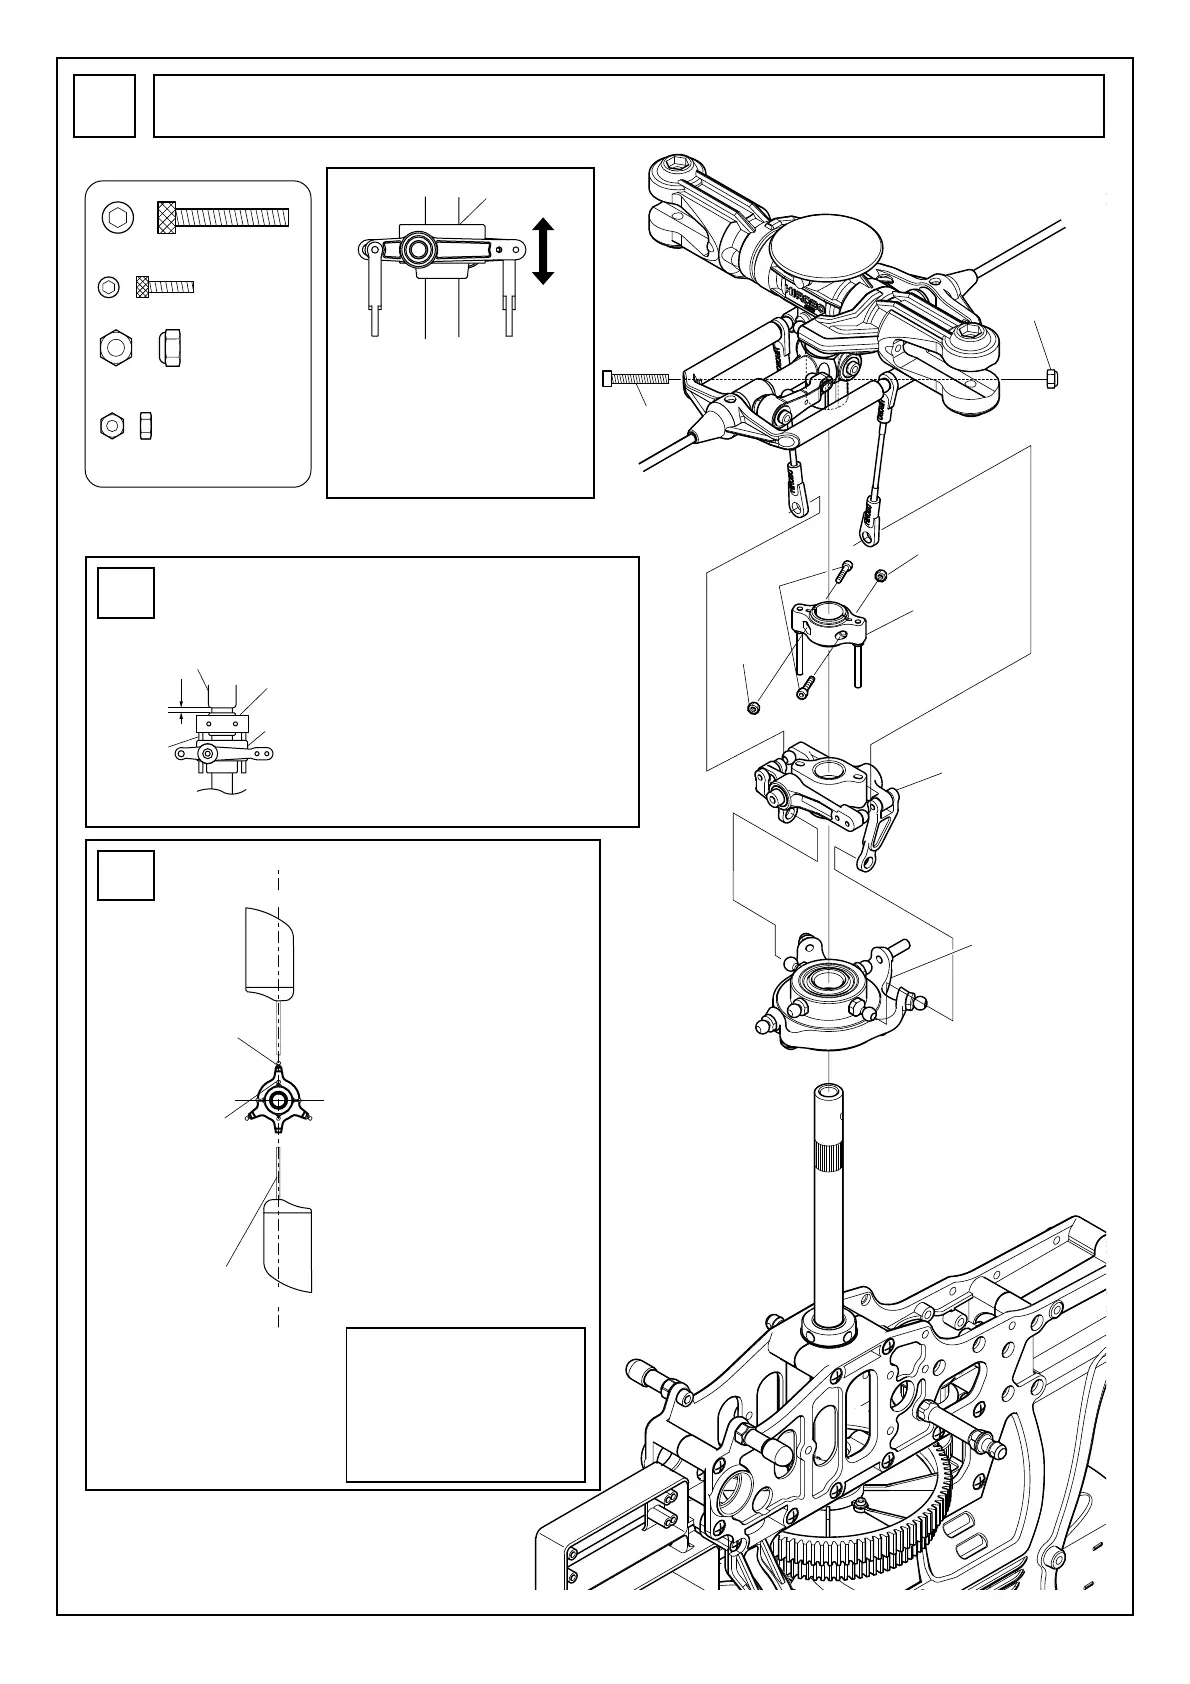
ローターヘッド部 / ウォッシュアウト部 / スワッシュプレート部の取付
Rotor head, wash-out, and swash plate installation
16
M3X20CS ............................. 1
M2X8CS ............................... 2
M3ナイロンナット ............. 1
M3 nylon nut
M2ナット ............................. 2
M2 nut
図-2
Fig. 2
AA':
機体の中心軸
Unit’s central shaft
BB':
スタビライザーバー
Stabilizer bar
図-1
Fig. 1
機体を真上からみて、スワッシュプ
レートのロアとアッパーのピボッ
トボルトが同一線上にあるとき、機
体の中心軸に対してスタビライ
ザーバーが平行になるよう、ラジア
スブロックを回転させM2X8CSと
M2ナットで固定してください。
(図-2)
なお、正確な位相調整は実際の飛行
により行います。
注)P24でラジアスアームステーを
取付後、行ってください。
Looking at the fuselage from above,
with the upper and lower pivot bolts
of the swash plate aligned with each
other, rotate the radius block so that
the stabilizer bar is parallel with the
fuselage's central axis and fasten using
the M2X8CS bolts and M2 nuts. (Fig.
2)
Precise phase adjustments depend on
the actual flight.
Note: Perform the phase adjustment
after the installation of the radius arm
stay (see p. 24).
ピッチハイの時
When in high pitch
Center hub
すきま3mm
gap 3mm
ラジアスブロッ
Radius block
ピン
Pin
スライドブロッ
Slide block
A
A'
B
B'
スワッシュプレート
アッパーの
ピボットボルト
Swash plate’s upper
pivot bolt
スワッシュプレート
ロアの
ピボットボルト
Swash plate’s lower
pivot bolt
スタビライザーバー
Stabilizer bar
AA'
//
BB'
スライドブロックの動きが堅い場
合は、メインマストに通して上下
に動かし慣らしてください。
Iftheslideblockdoesnotmove
smoothly,passitoverthemainmastand
moveitupanddownuntilitmoves
smoothly.
Oil
ラジアスブロックは、セン
ターハブから3mmすきまをあ
けて取付を行います。(図-1)
Install the radius block with a
3mm gap from the center hub.
(Fig. 1)