Manual Control Menu
Press the OK key.
Printing will be aborted.
Solution Press [OK] to abort.
OK
Cancel
=====Print Abort Confirmation=====
Manual Control Menu
Press the OK key.
The newly created print data will be printed.
Solution Press [OK] to print.
OK
Cancel
=====Print Confirmation=====
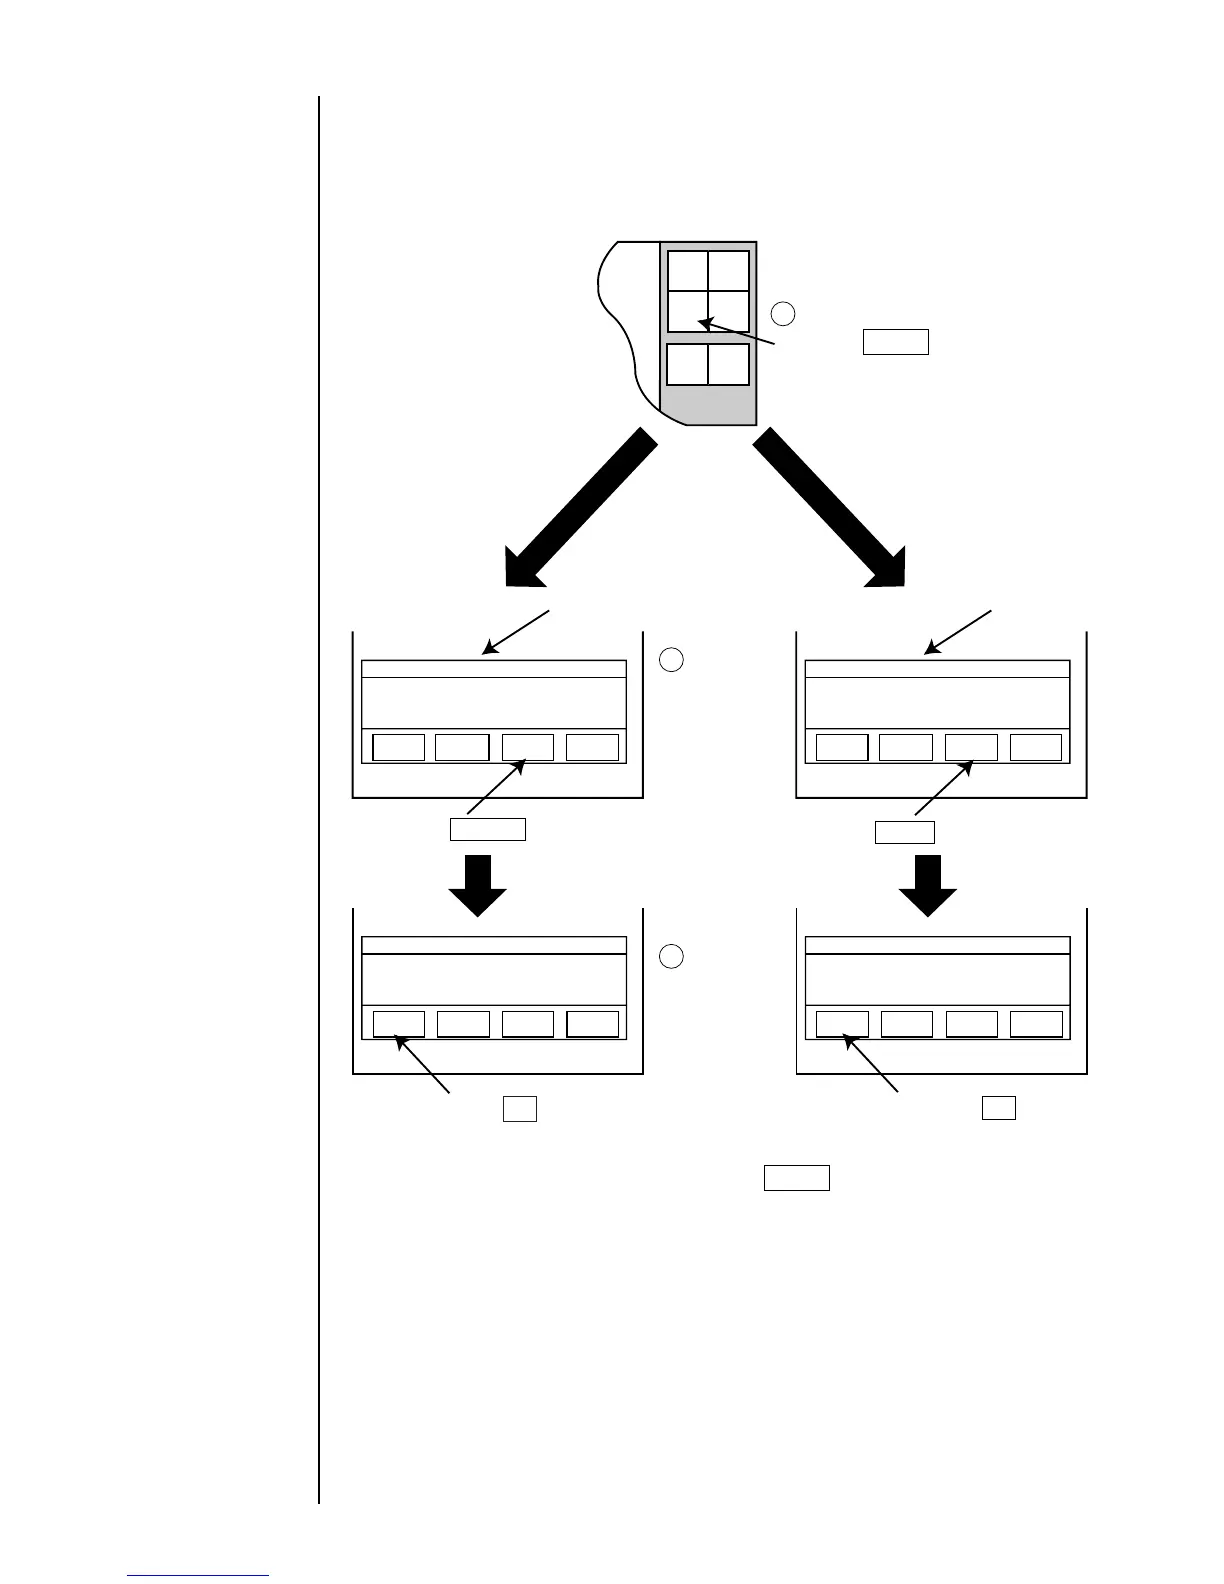
Press the Manual key.
Switching from "Ready"
state to "Standby" state
Switching from "Standby"
state to "Ready" state
The control
menu appears.
The confirmation
screen opens.
1
2
3
Start
up
Shut
down
Manual
Prev.
col.
Next
col.
=====Manual Control Menu=====
Eject ink: Ejects ink while applying no deflection voltage.
No-cleaning stop: Stops ink ejection without cleaning.
Standby : Switches between the ready - for - printing state
and standby state.
Eject ink
No-cleaning
stop
Standby Cancel
=====Manual Control Menu=====
Eject ink: Ejects ink while applying no deflection voltage.
No-cleaning stop: Stops ink ejection without cleaning.
Ready : Switches between the ready - for - printing state
and standby state.
Eject ink
No-cleaning
stop
Cancel
Press the Standby key.
Press the Ready key.
Comm
On/Off
Ready
¡
You can abort the operation by pressing the Cancel key from either the "Manual
Control Menu" screen or the confirmation screen.
(2) Switching between "Ready" state and "Standby" state
¡
When the conveyer interlock is put in operation by the Ready output signal, be
careful not to switch to "Standby" state since it will stop the conveyer.
Entering a deflection
voltage ON/OFF signal
executes the same
action.
(See Section 1.5.3-9,
Input for remote
control signals.)
See Section 1.5.3-1,
"Ready output signal".

 Loading...


