10-29
1
2
3
4
5
6
7
8
9
10
11
12
13
14
15
16
17
18
19
20
22) Apply engine oil to the crankshaft's primary drive gear
installation threads.
23) Install a new 22 mm flange nut and 22 mm washer on the
crankshaft.
24) Set the special tool on the alternator rotor side crankshaft
as shown, and hold the crankshaft.
TOOL:
Crankshaft holder 070PB-ZZ50100
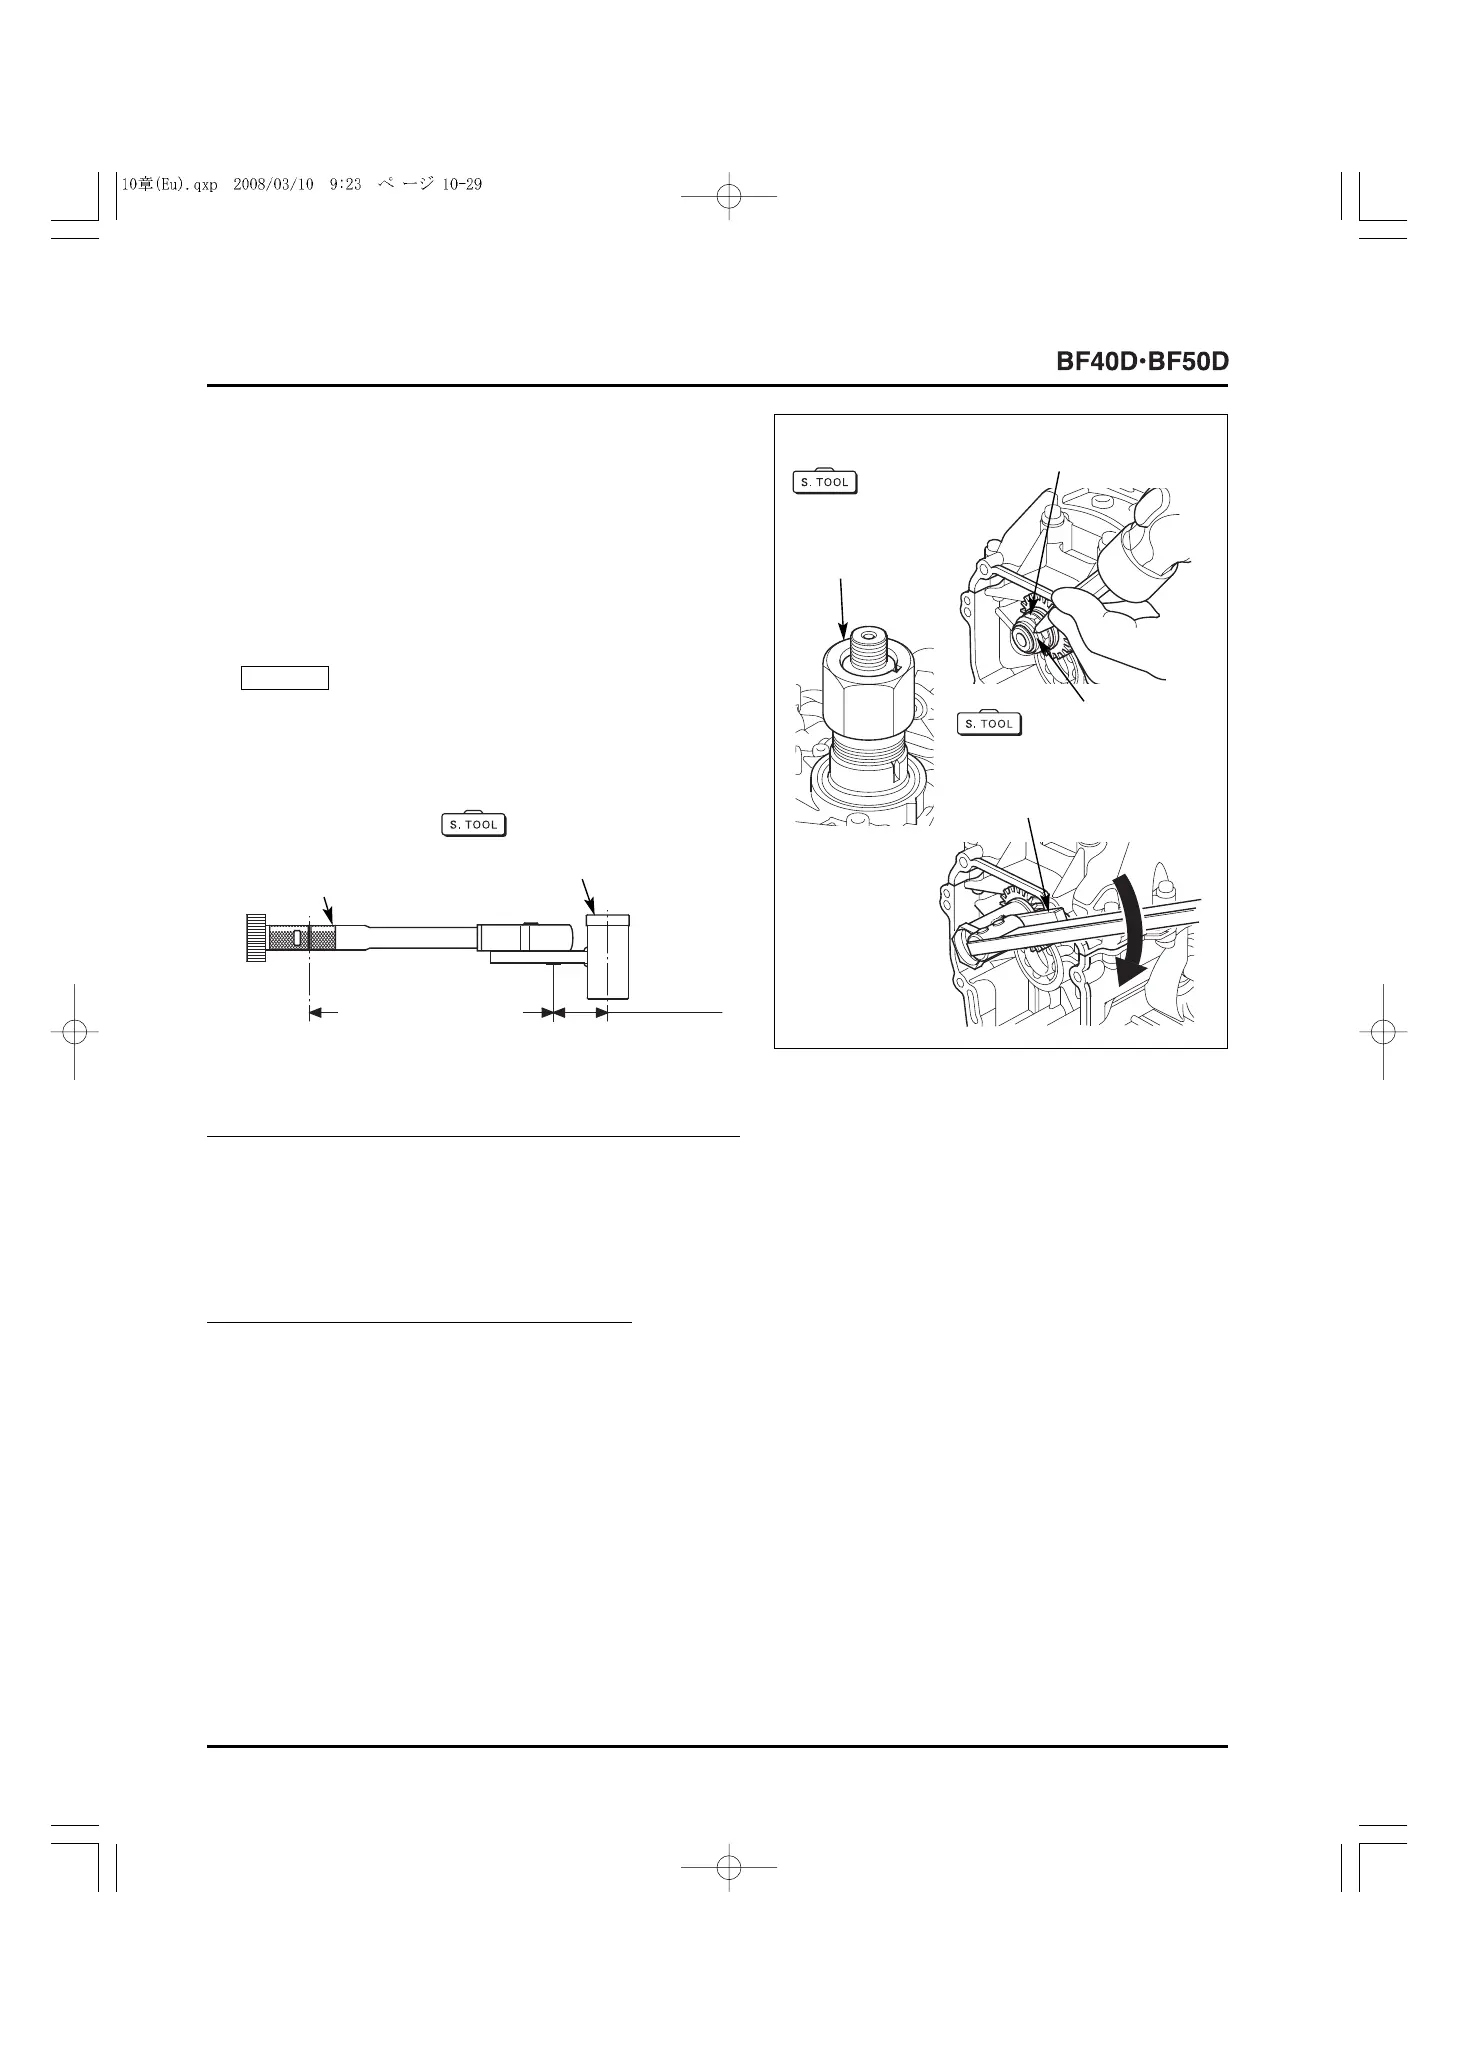
25) Tighten the 22 mm flange nut to the specified torque using
the special tool as shown.
To tighten the 22 mm flange nut, use the special tool and
read the torque as follows.
TOOL:
Lock nut wrench, 30 x 40 mm 07916-9690000
NOTICE
[4]
LOCK NUT WRENCH,
30 x 40 mm
07916-9690000
[3]
GROOVE
[2]
22 mm FLANGE NUT
[1]
CRANKSHAFT
HOLDER
070PB-ZZ50100
[6]
LOCK NUT WRENCH,
30 x 40 mm
• Formula:
[8] Torque wrench reading =
[9] [10]
Torque wrench effective length [m (ft)] x Specified torque [N
.
m (kgf
.
m, lbf
.
ft)]
[9] Torque wrench effective length [m (ft)] + 0.05 [m (0.164 ft)]
TORQUE: 92 N
.
m (9.4 kgf
.
m, 68 lbf
.
ft)
• Example:
Torque wrench reading in case of using a torque wrench
which effective length is 0.4 m (1.31 ft)
0.4 [m (1.31 ft)] x 92 [N
.
m (9.4 kgf
.
m, 68 lbf
.
ft)]
0.4 [m (1.31 ft)] + 0.05 [m (0.164 ft)]
= 82 [N
.
m (8.4 kgf
.
m, 60 lbf
.
ft)]
26) After tightening the 22 mm flange nut, stake it into the
groove in the crankshaft with a punch.
27) Clean the crankshaft/alternator rotor mating surfaces
thoroughly using a clean shop towel sprayed with
degreasing cleaning solvent. Wipe up oil from the mating
surface with the alternator rotor (P. 7-20).
28) Install the engine on the outboard motor (P. 6-9).
29) Install the following parts.
- Electric parts/main wire harness (Section 18)
- Oil filter cartridge (P. 3-5)
- Cylinder head assembly (P. 9-29)
- Air vent strainer/air vent tube (P. 5-115)
- Vapor separator (P. 5-110)
- Alternator/timing belt (P. 7-13)
- Engine cover (P. 4-2)
[0.05 m
(0.164 ft)]
[5]
TORQUE WRENCH
[7]
TORQUE WRENCH
EFFECTIVE LENGTH
[m (ft)]