7-22
1
2
3
4
5
6
7
8
9
10
11
12
13
14
15
16
17
18
19
20
3. PULSER ROTOR/PULSER COIL
a. REMOVAL
Remove the following parts.
- Engine cover (P. 4-2)
- Alternator cover (P. 7-2)
- Electric part cover (P. 18-19)
- Engine hanger, timing belt tensioner cap (P. 7-3)
1) Turn the alternator rotor counterclockwise to bring the
No.1 cylinder piston to the top dead center of its
compression stroke (P. 3-10).
Be sure to turn the alternator rotor in the direction shown
with the arrow. No not turn it in the opposite direction.
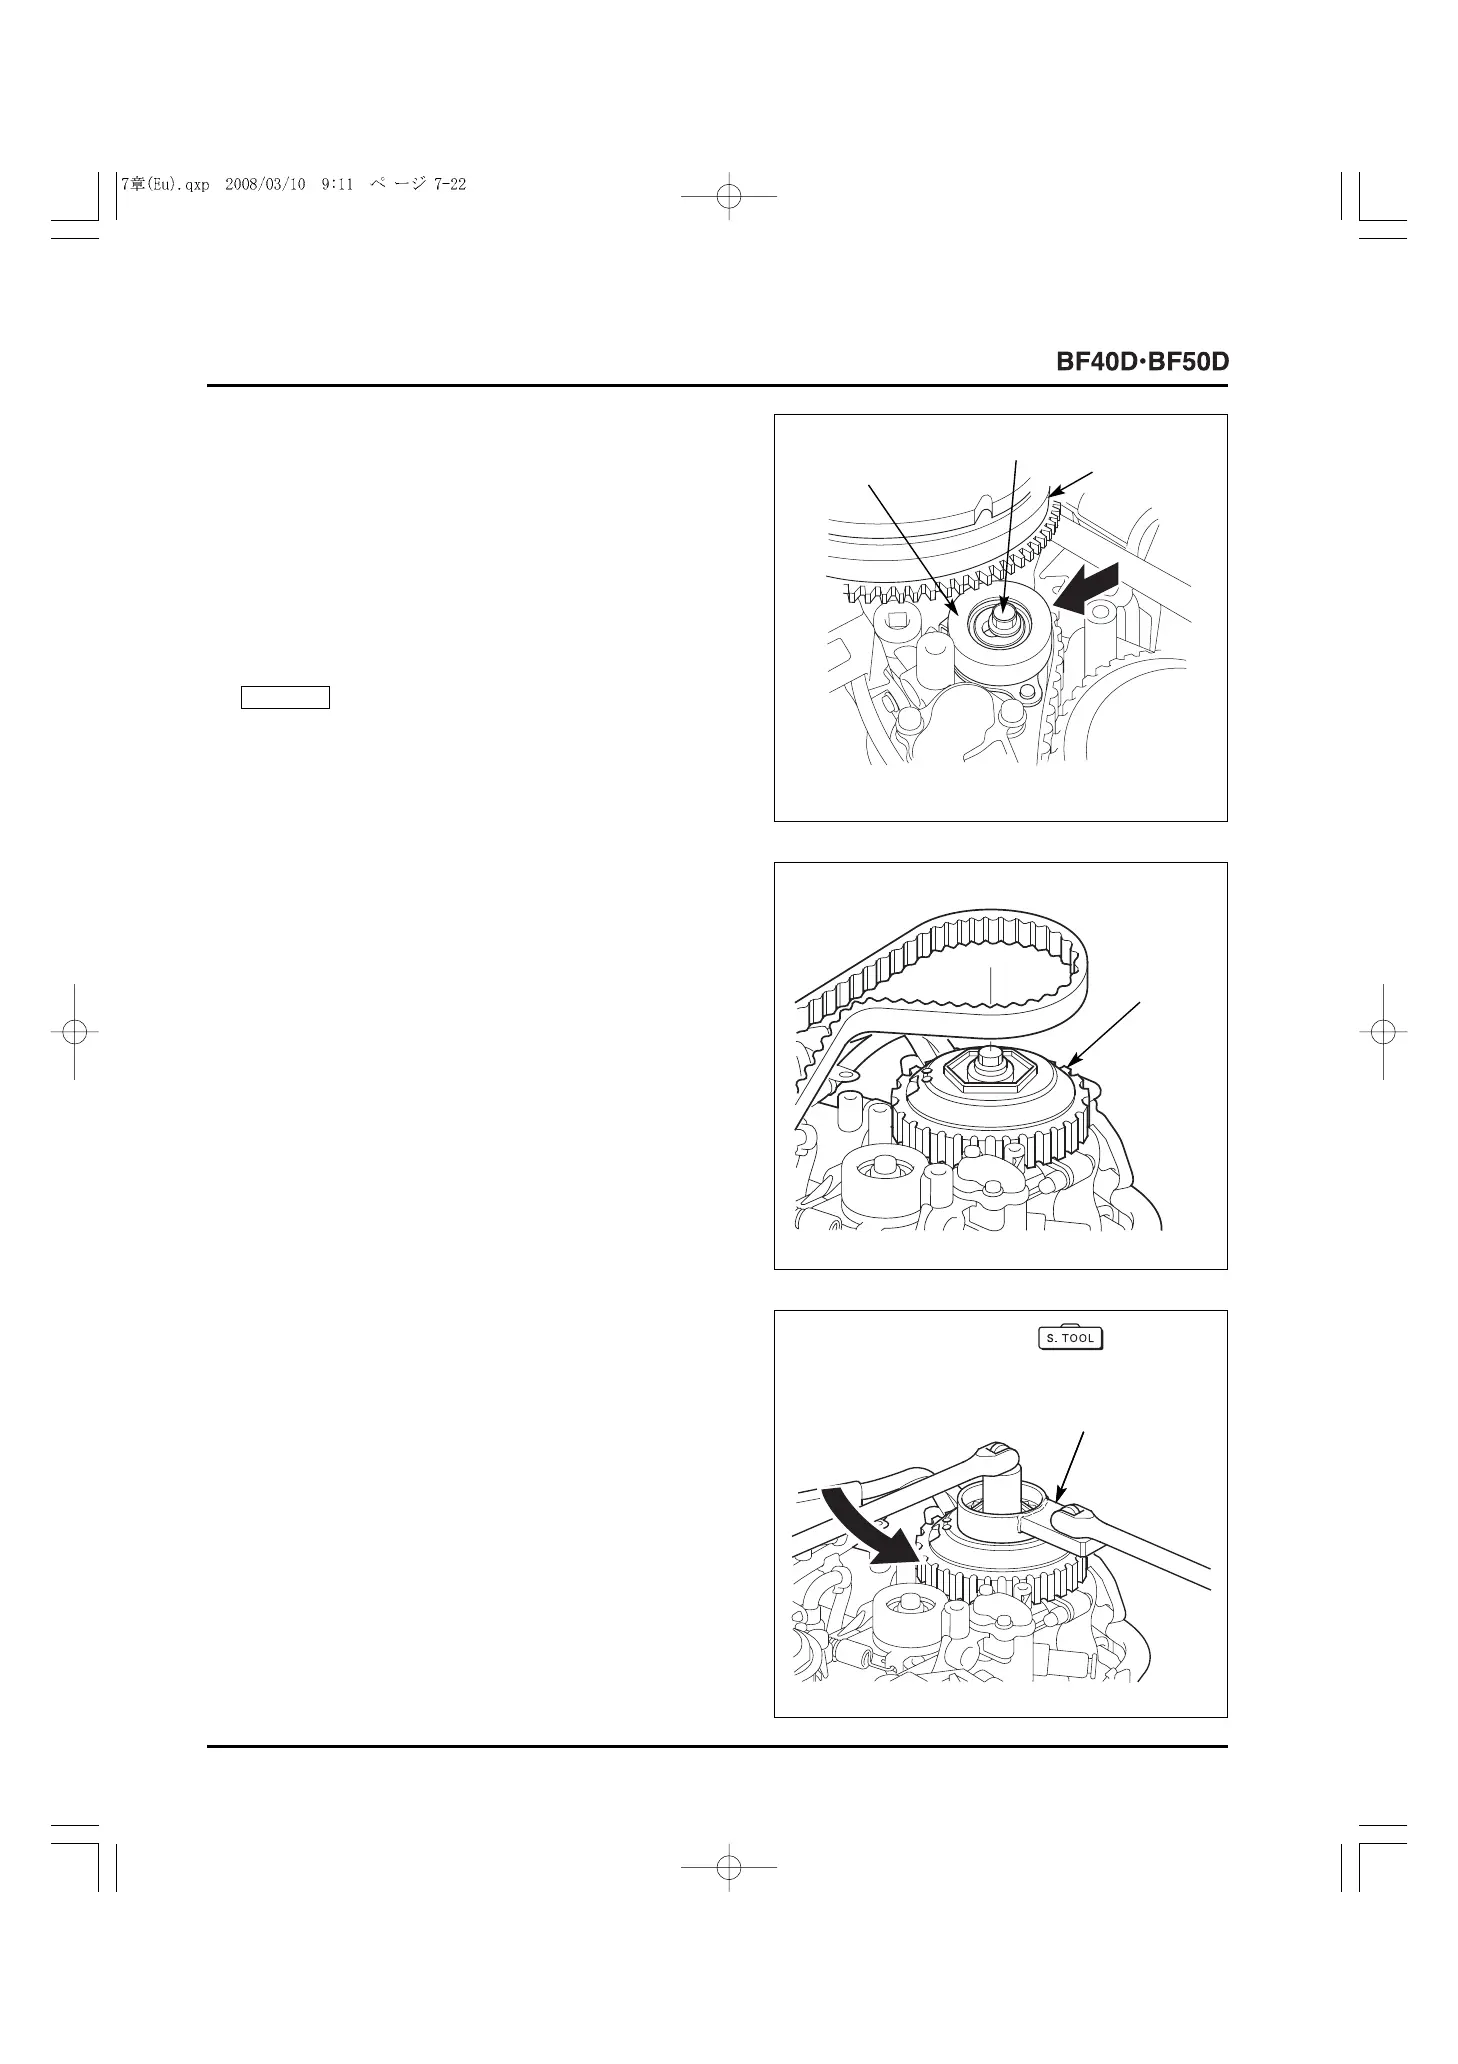
2) Loosen the 10 x 38 mm flange bolt that secures the timing
belt tensioner, then tighten the 10 x 38 mm flange bolt
while pushing the timing belt tensioner toward out.
NOTICE
4) Loosen the 10 x 32 mm flange bolt using the special tool as
shown.
TOOL:
56 mm lock nut wrench 07LPA-ZV30200
3) Remove the timing belt from the pulser rotor.
[2]
ALTERNATOR
ROTOR
[1]
TIMING BELT
TENSIONER
10 x 38
[1]
PULSER
ROTOR
[1]
56 mm LOCK NUT
WRENCH
07LPA-ZV30200