13-9
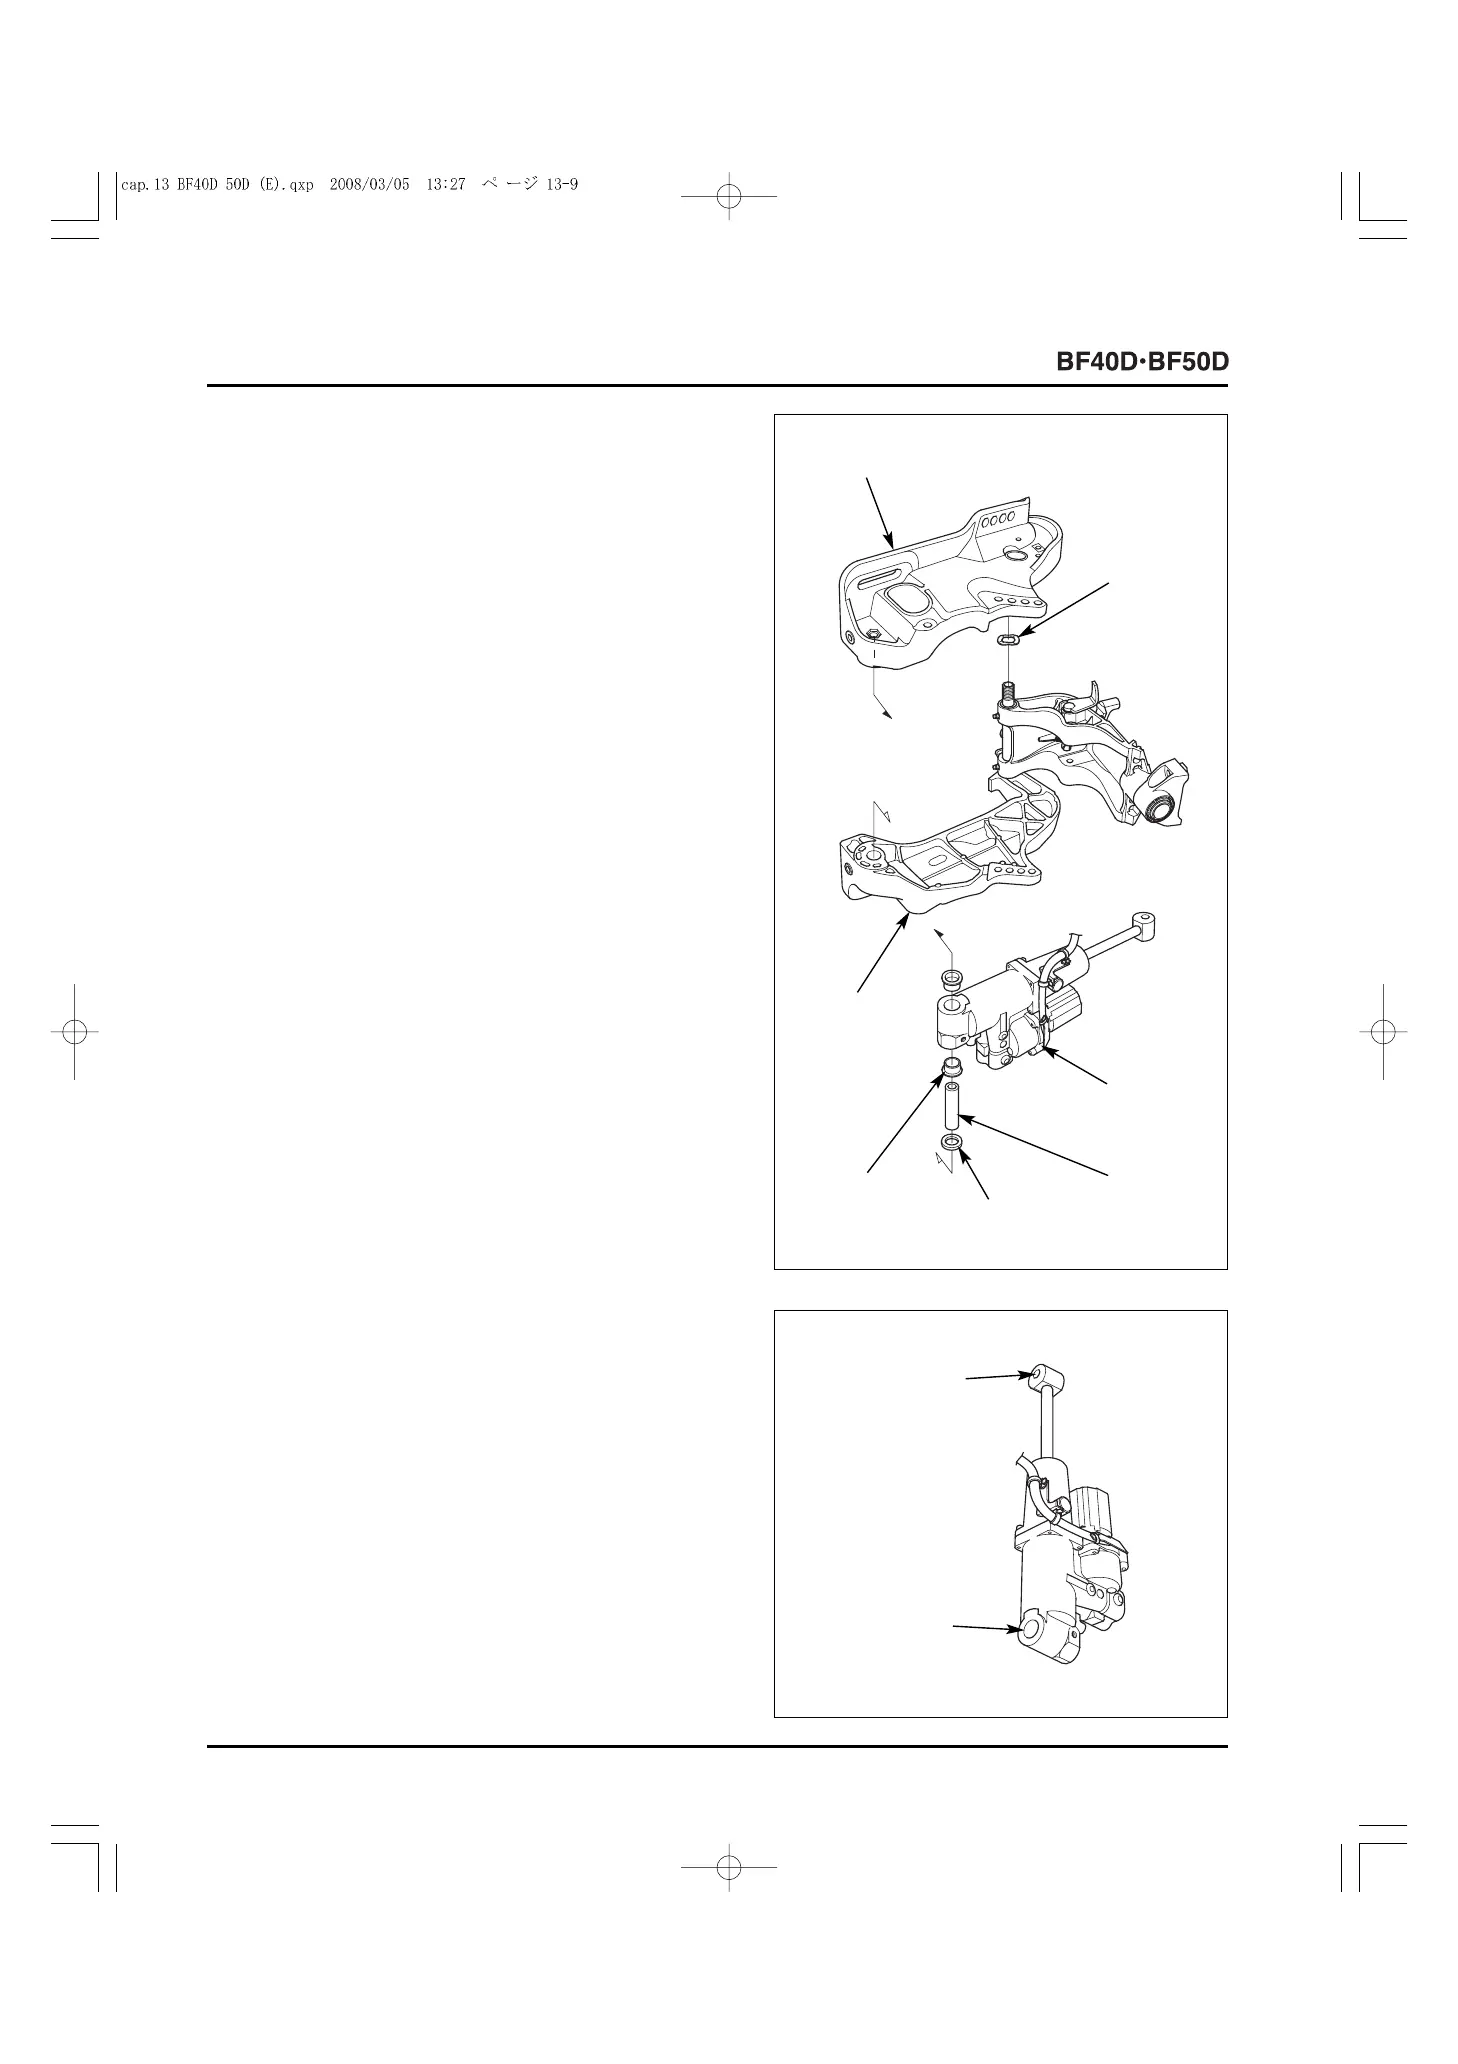
13) Remove the L. stern bracket, and remove the 22 mm wave
washer.
14) Remove the power trim/tilt assembly from the R. stern
bracket.
• Do not push in the piston rod after removing the power
trim/tilt assembly. If the piston rod has been pushed
down, set it in the fully extended position (P. 13-6).
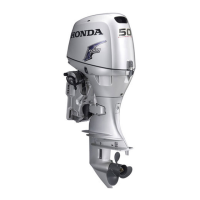
• After removing the power trim/tilt assembly, store it
holding it upright with the upper cylinder pin installation
part toward up. Never lay the power trim/tilt assembly on
its side or hold it upside down (with the lower cylinder
collar installation part toward up).
15) Remove the lower cylinder collar, 19.4 x 6 mm spacer and
the two lower cylinder bushings from the power trim/tilt
assembly.
Check the lower cylinder bushing for wear, damage or
deformation, and replace it with a new one if necessary.
[3]
POWER
TRIM/TILT
ASSEMBLY
[4]
LOWER
CYLINDER
COLLAR
[1]
L. STERN BRACKET
[6]
LOWER
CYLINDER
BUSHING (2)
[2]
LOWER CYLINDER
COLLAR
INSTALLATION
PART
[1]
UPPER CYLINDER
PIN INSTALLATION
PART
[5]
19.4 x 6 mm
SPACER
[2]
22 mm
WAVE
WASHER
[7]
R. STERN
BRACKET