14-5
1
2
3
4
5
6
7
8
9
10
11
12
13
14
15
16
17
18
19
20
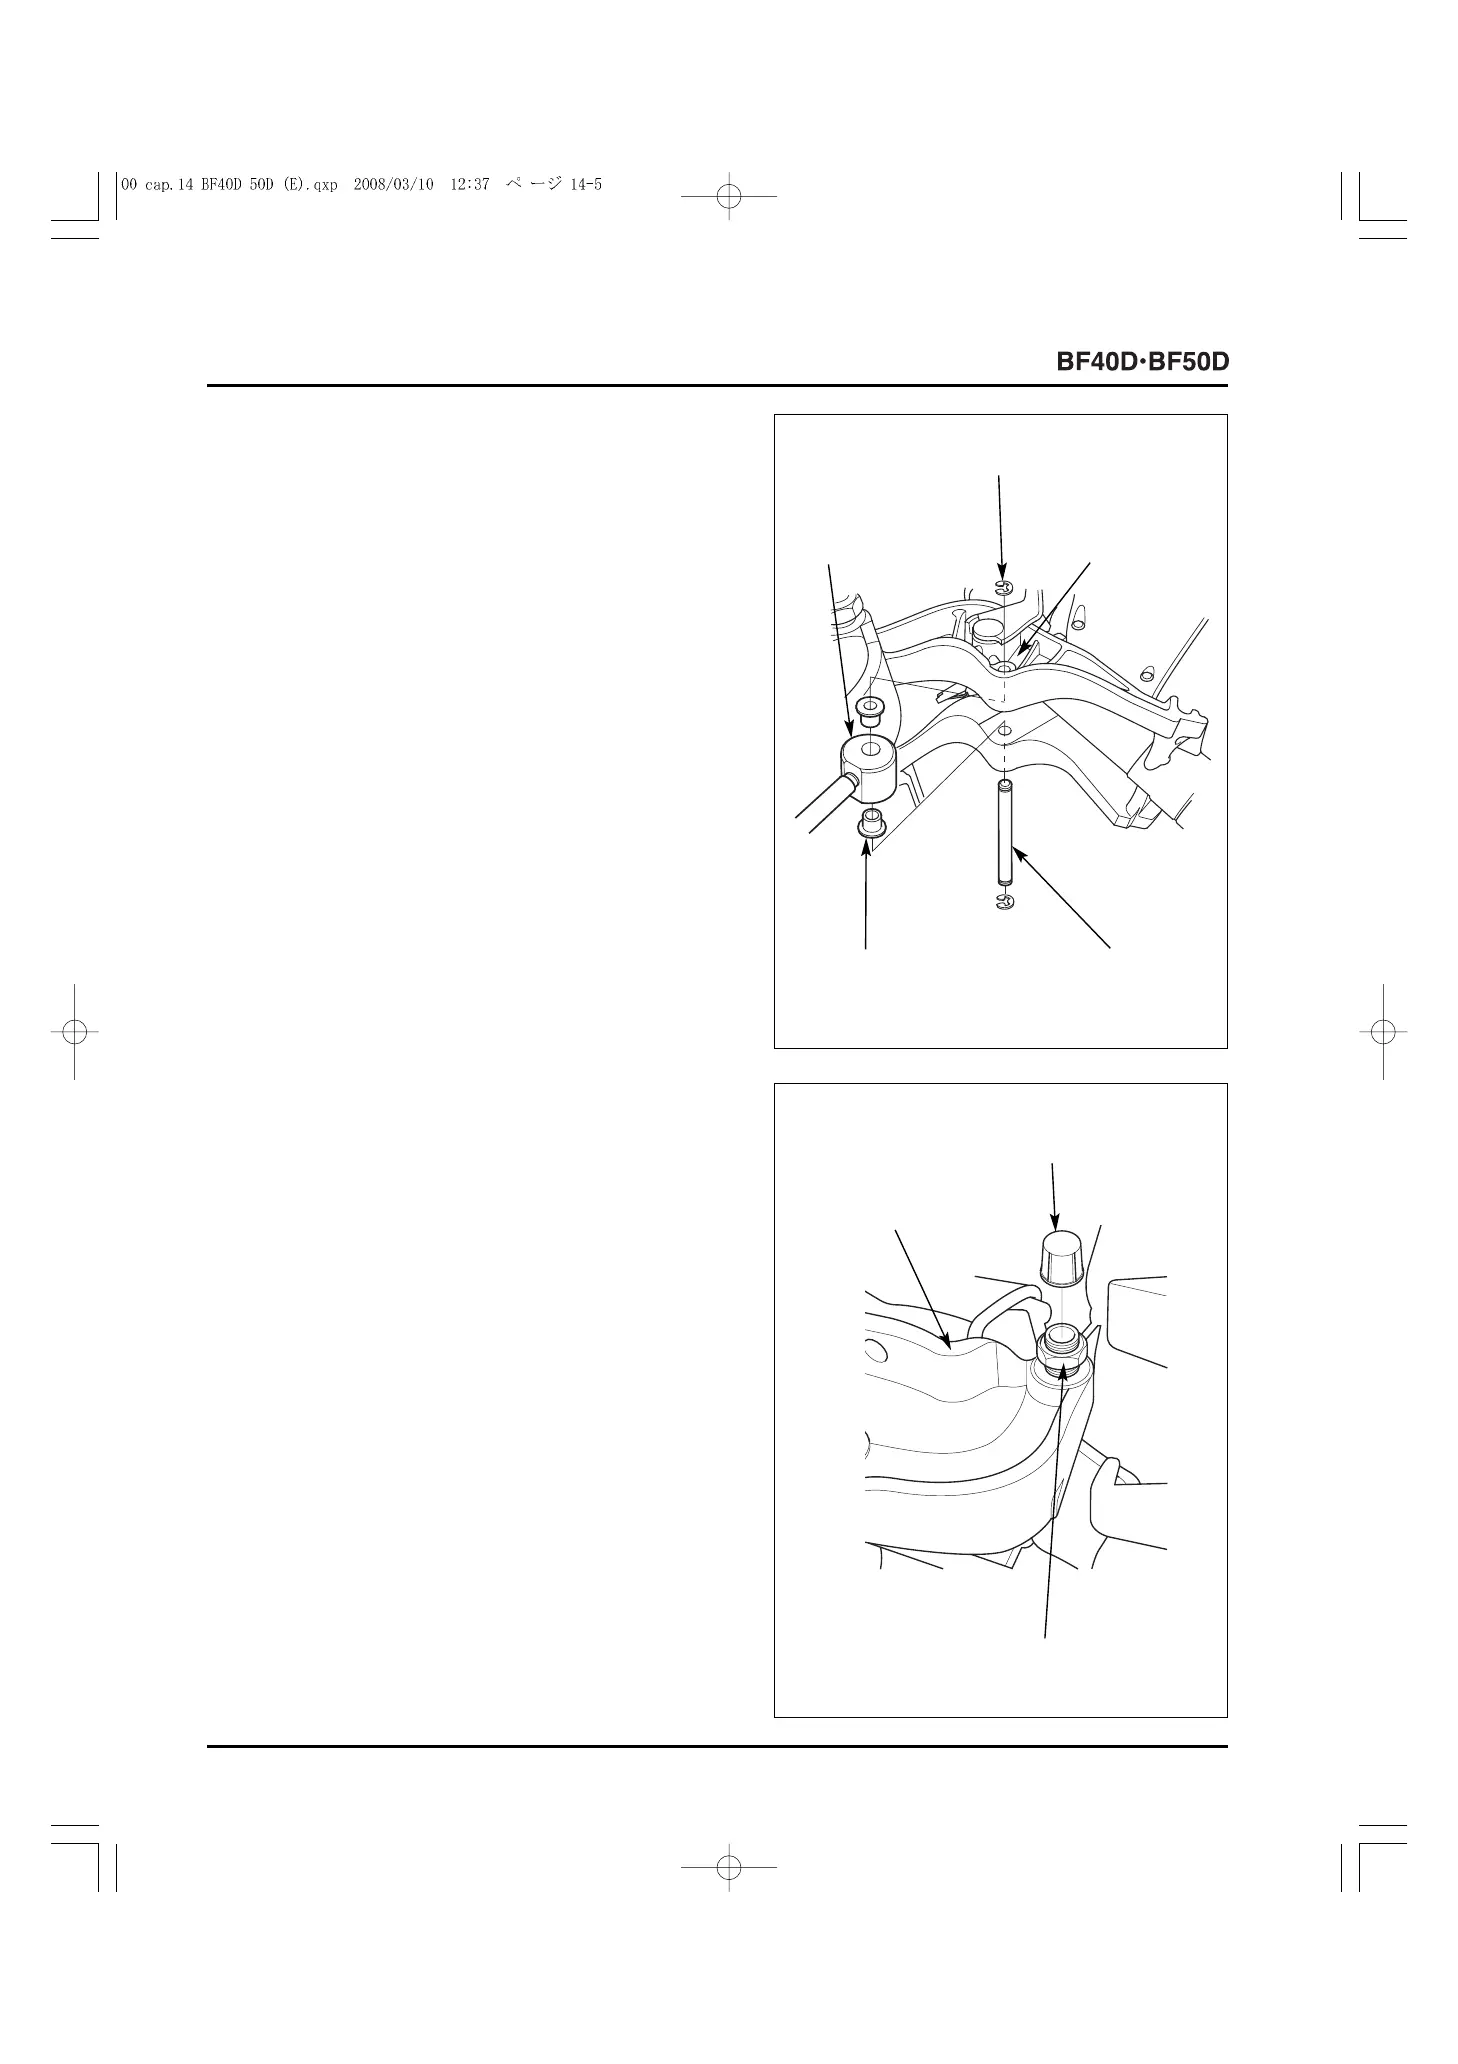
11) Remove the 10 mm E-rings from the upper cylinder pin,
and remove the upper cylinder pin.
Remove the upper joint metal of the power trim/tilt
assembly from the swivel case assembly.
Check the upper cylinder bushings of the power trim/tilt
assembly mounted on the upper joint metal for wear,
damage or deformation. Replace the upper cylinder
bushings with new ones if necessary.
If the upper cylinder bushings have been removed, replace
them with new ones on reassembly.
12) Remove the tilting bolt cap.
Holding the 7/8-14 UNF self-locking nut on the R. stern
bracket side, loosen the 7/8-14 UNF self-locking nut on the
L. stern bracket side.
• Loosen the 7/8-14 UNF self-locking nut with care not to
remove it from the tilting shaft.
[2] 10 mm E-RING (2)
[4]
UPPER CYLINDER
PIN
[5]
UPPER CYLINDER
BUSHING (2)
[1]
UPPER JOINT
METAL
[3]
SWIVEL CASE
ASSEMBLY
[3]
7/8-14 UNF SELF-
LOCKING NUT
[1]
L. STERN
BRACKET
[2]
TILTING BOLT CAP