14-60
1
2
3
4
5
6
7
8
9
10
11
12
13
14
15
16
17
18
19
20
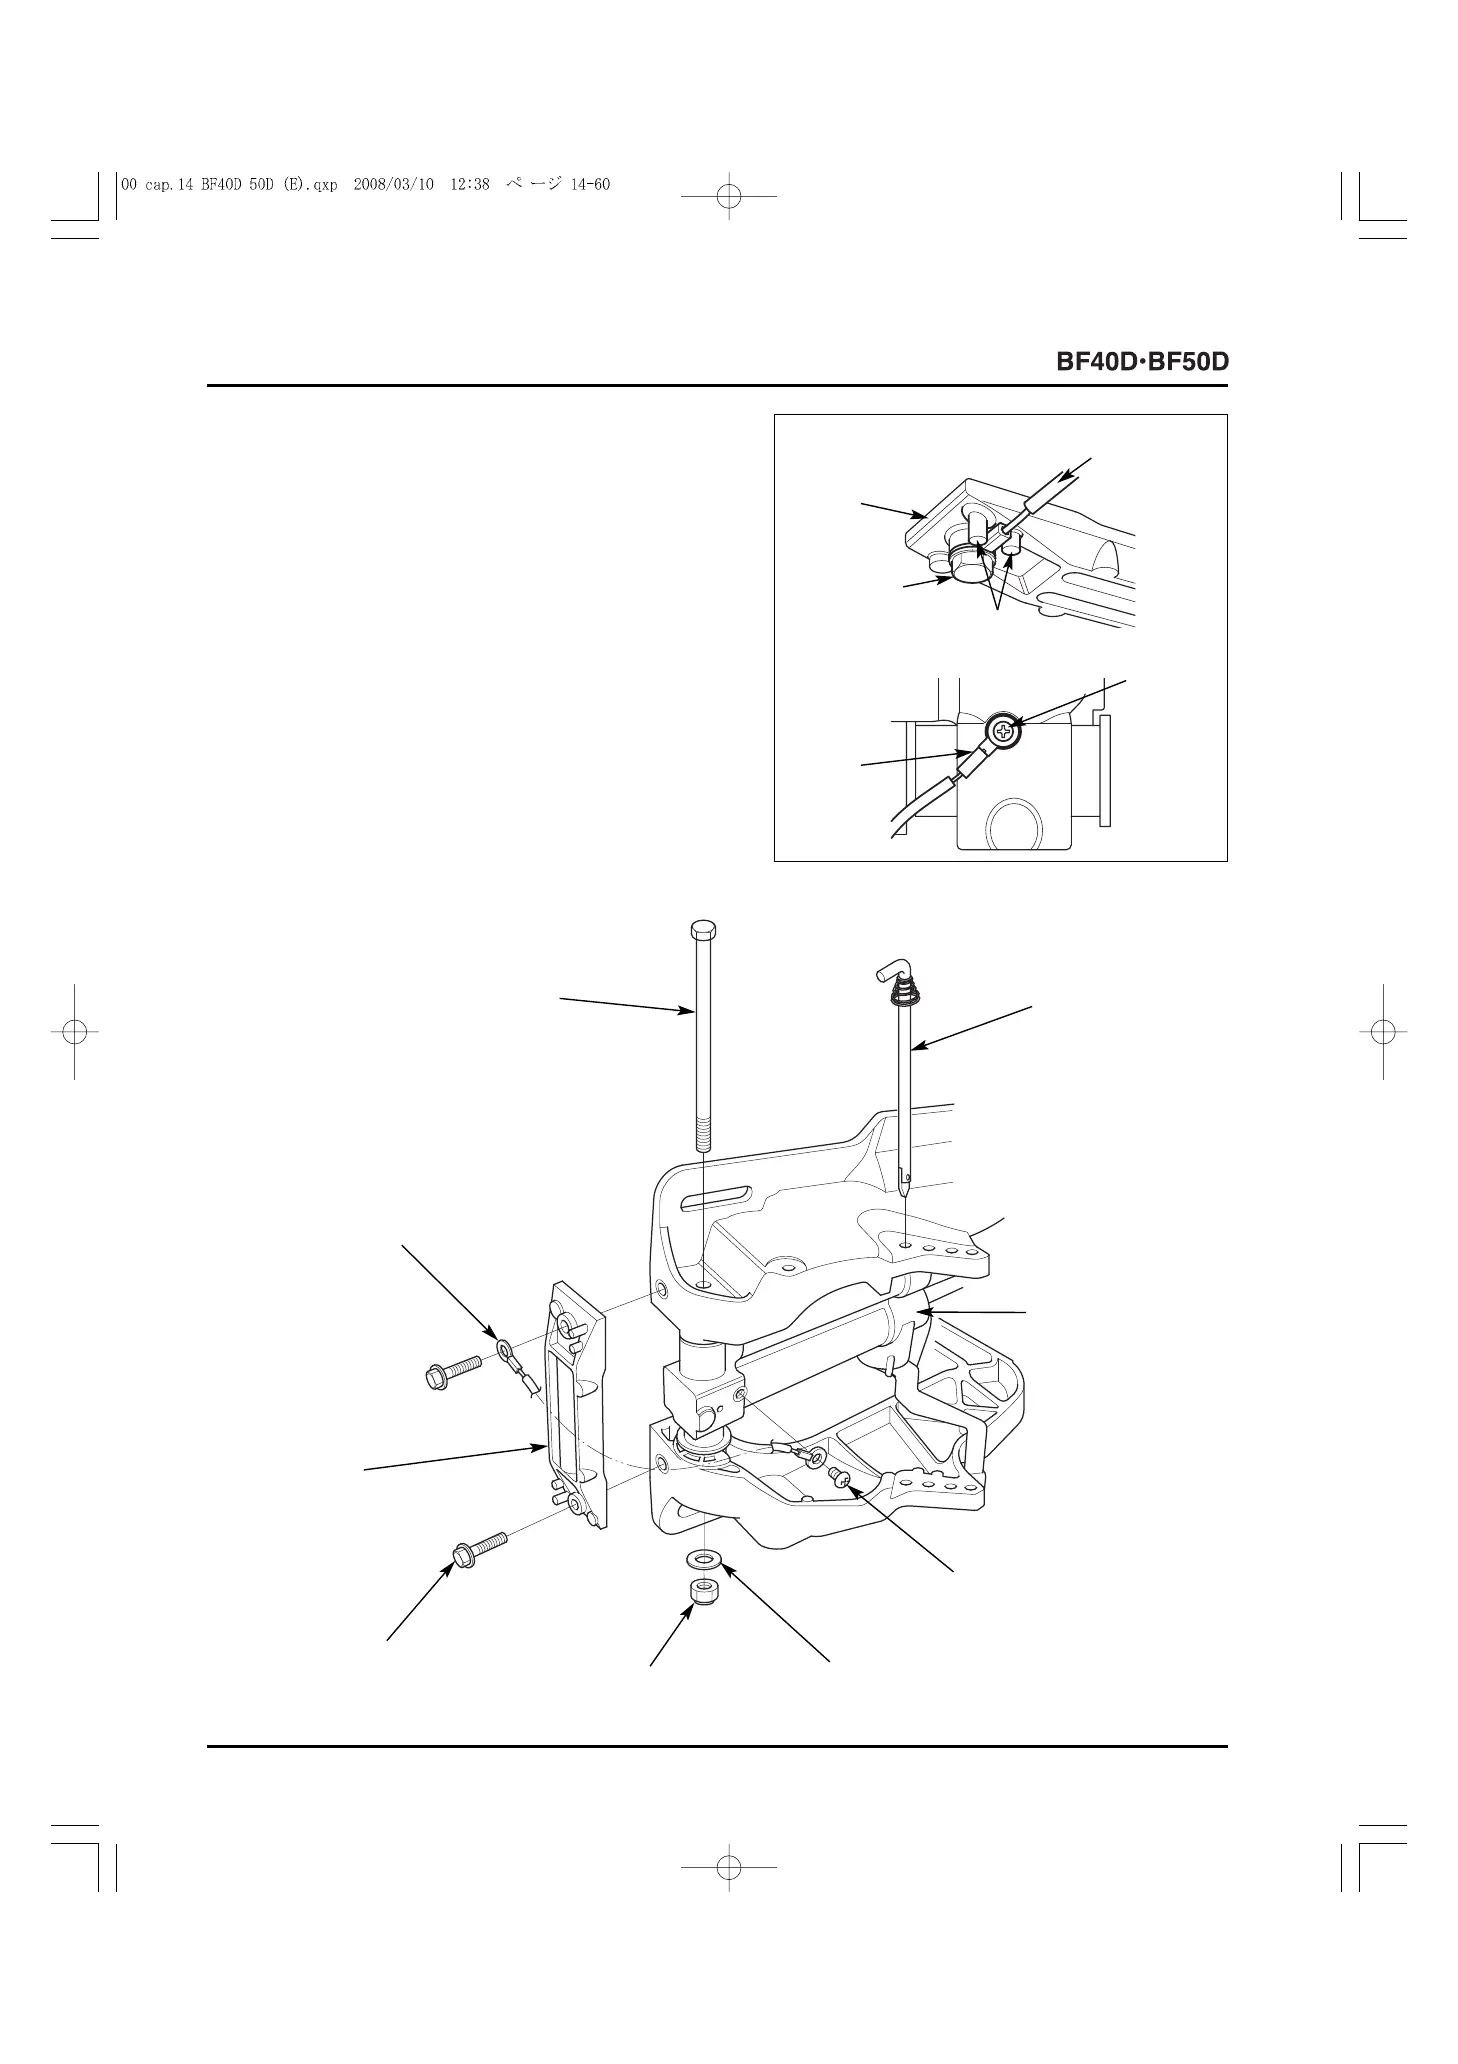
3) Install the adjusting rod.
4) Check the anode metal. Replace the anode metal with a
new one if it is corroded excessively.
5) Set the 116 mm lead wire between the projections on the
anode metal, and install the anode metal using the two
6 x 23 mm flange bolts.
Tighten the 6 x 8 mm screw securely so that the 116 mm
lead wire on the gas assisted damper assembly side is
installed at the angle shown.
6) Install the 10 x 158 mm hex bolt and the 10 mm washer,
and tighten the 10 mm self-locking nut to the specified
torque.
TORQUE: 35 N
.
m (3.6 kgf
.
m, 26 lbf
.
ft)
[4] PROJECTIONS
[6]
6 x 8 mm
SCREW
[6]
6 x 8 mm SCREW
[2]
ANODE
METAL
[2]
ANODE METAL
6 x 23
6 x 23 (2)
[3]
116 mm LEAD
WIRE
[3]
116 mm
LEAD
WIRE
[3]
116 mm LEAD WIRE
[5] <Gas assisted damper side>
[1] <Anode metal side>
[9]
GAS ASSISTED
DAMPER ASSEMBLY
[8]
ADJUSTING ROD
[7]
10 x 158 mm HEX
BOLT
[10]
10 mm WASHER
[11]
10 mm SELF-LOCKING
NUT