8-5
1
2
3
4
5
6
7
8
9
10
11
12
13
14
15
16
17
18
19
20
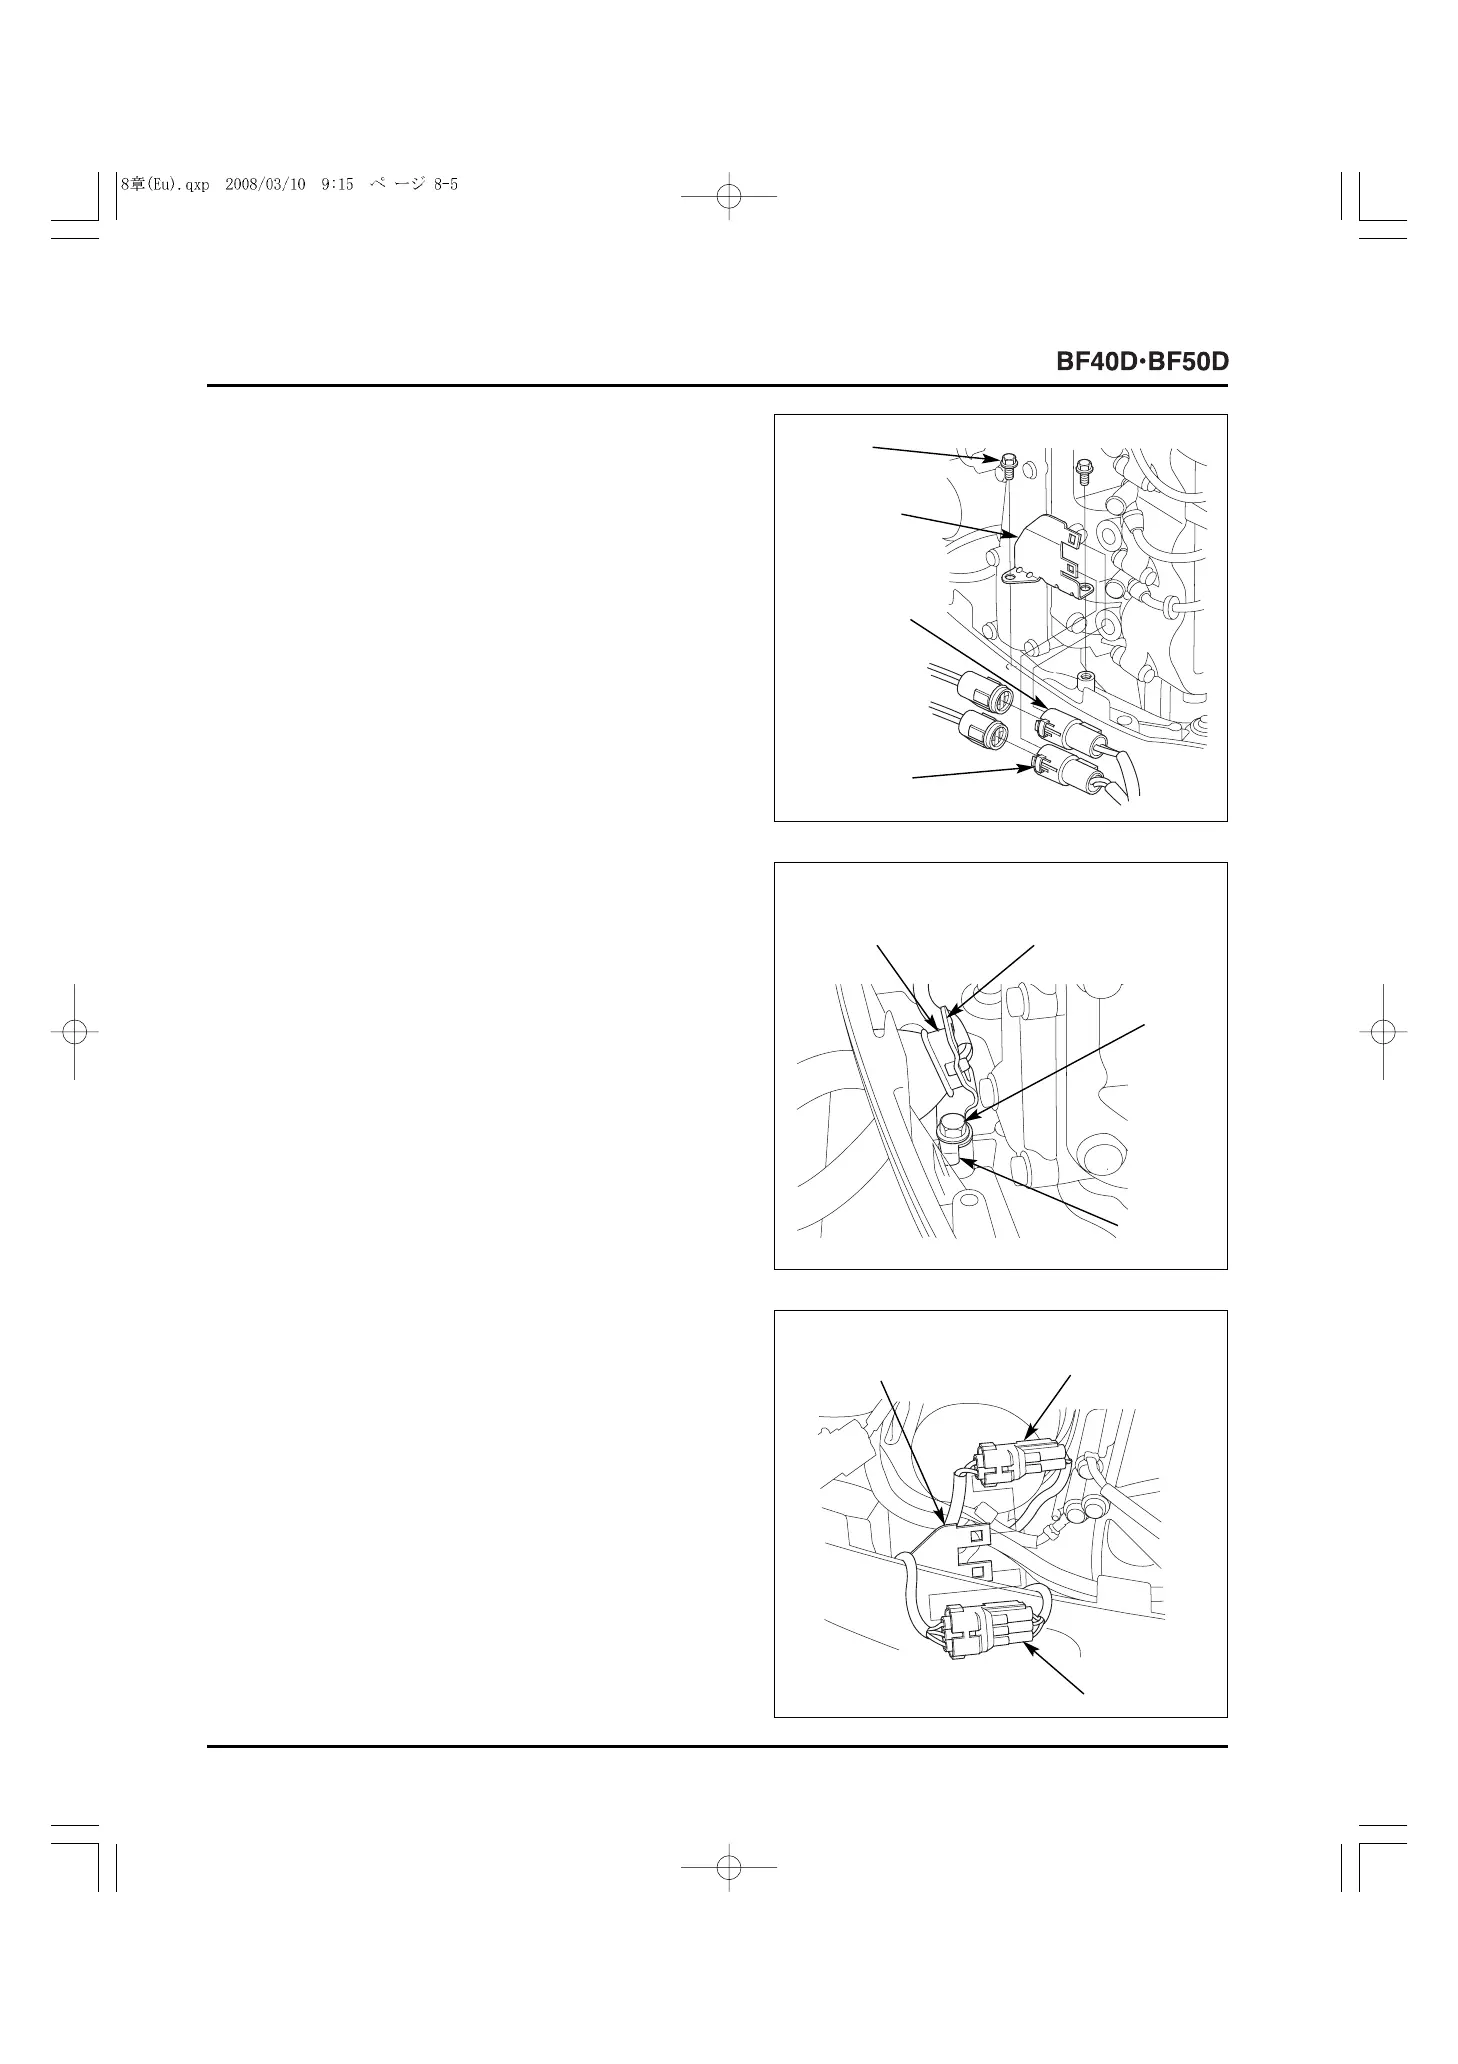
4) Install the connector bracket B and tighten the two 6 x 12
mm flange bolts securely.
5) Install the regulator/rectifier 2P connector and the
regulator/rectifier 3P connector on the connector bracket B.
Connect the regulator/rectifier 2P connector and the
regulator/rectifier 3P connector.
7) Install the power tilt switch 3P connector and the power tilt
relay 2P connector on the harness clip bracket A [Power
trim/tilt type only].
8) Install the following parts.
- Alternator cover (P. 7-2)
- Engine cover (P. 4-2)
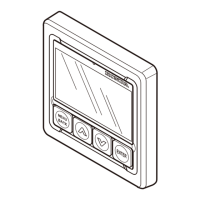
6) Install the power tilt switch and the power tilt switch stay as
a set. Tighten the 6 x 12 mm flange bolt while pushing the
projection on the power tilt switch stay against the engine
under case [Power trim/tilt type only].
[3]
CONTACT.
[2]
REGULATOR/
RECTIFIER 2P
CONNECTOR
[3]
REGULATOR/
RECTIFIER 3P
CONNECTOR
6 x 12 (2)
[1]
CONNECTOR
BRACKET B
[2]
POWER TILT
SWITCH STAY
[1]
POWER TILT SWITCH
6 x 12
[1]
HARNESS CLIP
BRACKET A
[2]
POWER TILT
RELAY 2P
CONNECTOR
[3]
POWER TILT
SWITCH 3P
CONNECTOR