43-TV-25-30 Iss.6 GLO Aug 07 UK 79
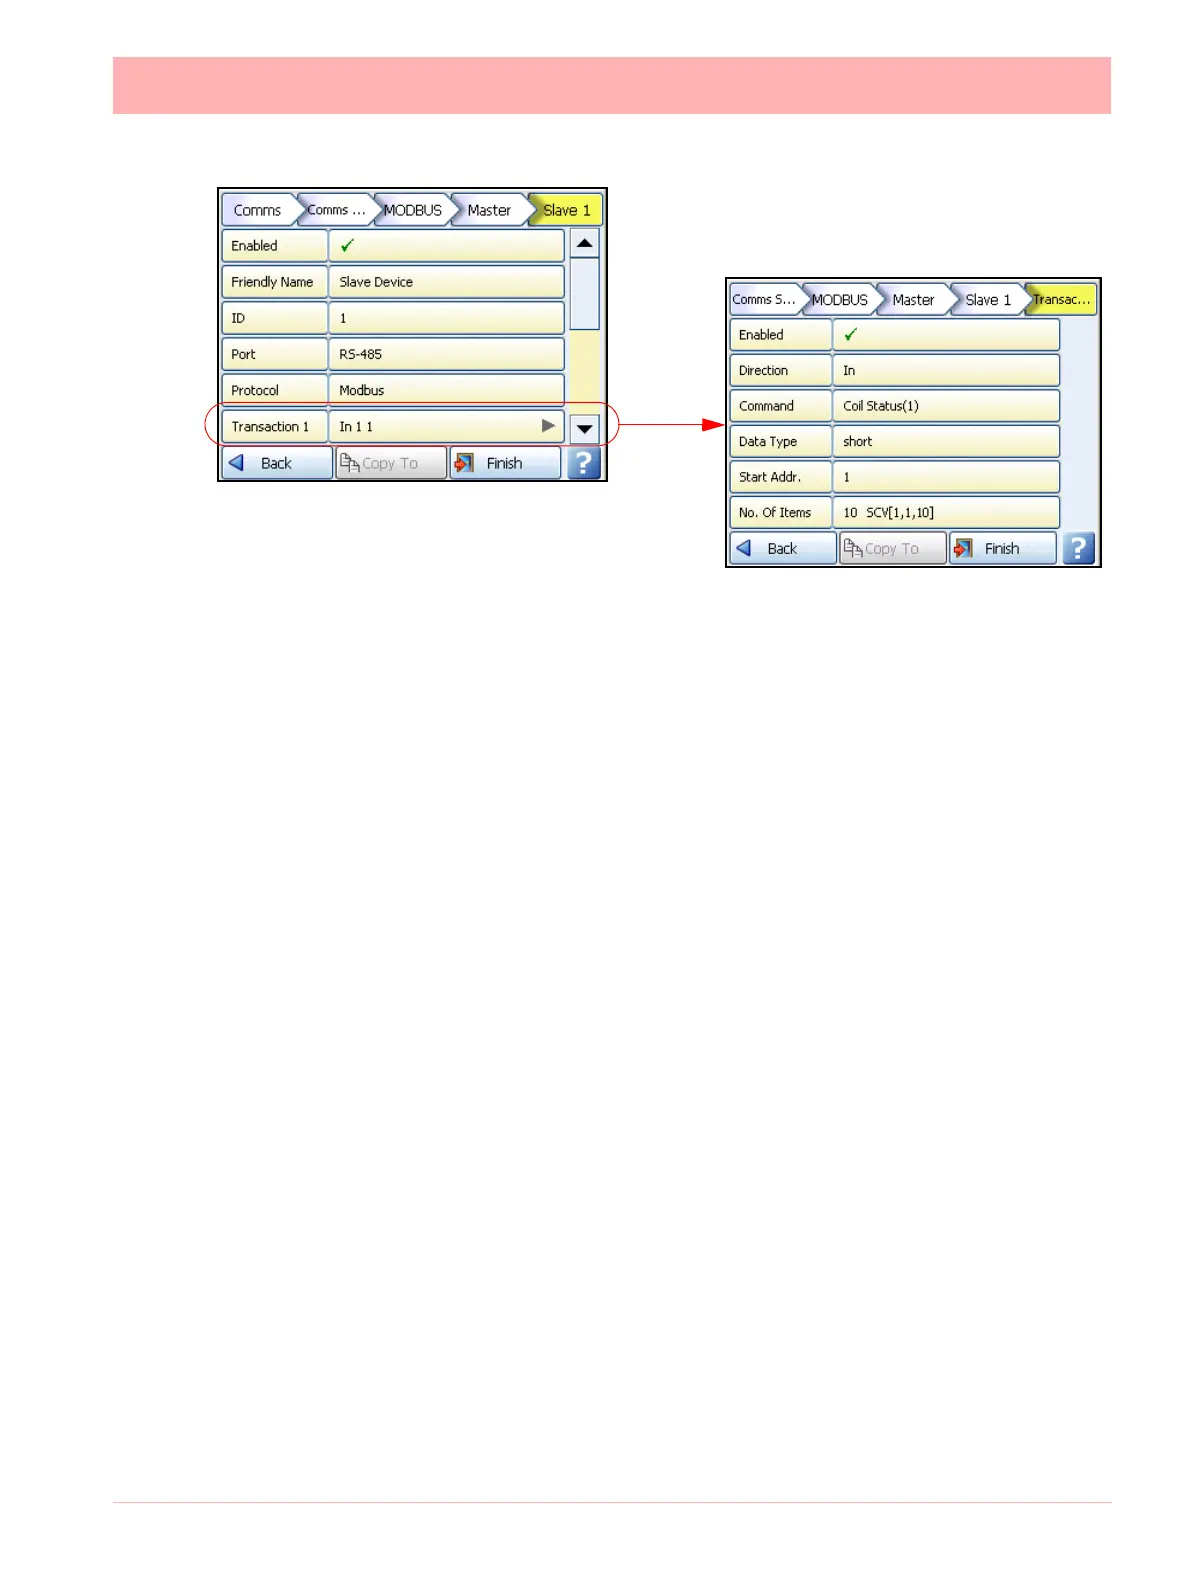
Slave
• Enabled - Toggle On to make this recorder a Slave Device
• Port - Select this for a list of available ports, either Ethernet or RS485. For port configu-
ration see
“Ports” on page 74.
• Protocol - Select this for a list of available protocols. Modbus or Modbus X*. Modbus
and Modbus X can both use Ethernet or RS485 Ports. Protocols define the format in
which the data is transferred from the recorder to a PC or transfer between other
devices and peripherals. FPLB – Floating Point Little Endian Byte Swapped Format &
FP B - Floating Point Big Endian Format are standard notations.
• Slave ID - This is a unique Modbus ID/Address used by the recorder to identify Modbus
messages. Applications that talk to the recorder with Modbus will need to know this
number to return messages to the device. If you are using the Communication Server
on TrendServer Pro the same Slave ID number must be entered. (1-254)
RS485
• Baud Rate - Select this for a list of available Baud Rates. This is the speed, in bps (bits
per second), at which data is transferred.
• Byte Options - Select this button for a list of available Byte Options. The Byte Options
consist of 3 digits comprising of Parity (set to None N, Even E or Odd O), 8 Data Bits
and Stop Bits, signifying the end of the character string, 1 or 2,
• Line Turn Around - This is for a 2-wire line type. Data has to be fully transmitted
before the line can be turned-around and data can be received, or vice versa.
• Reply Delay - Enter a delay time, in milli seconds, before the recorder sends a reply.
Recommended delay should be set to 12mS (min.) if using the Comms Server.
*Modbus X - Modbus X protocol differs from standard Modbus by the 4 floating point order
which is reversed for application compatibility.
To check communications connections and trouble shooting network settings versus SCV
parameters see “Comms Status” on page 165. This screen will help to identify which area
to focus on if the recorder connections are not doing what you expected.
When the configuration is complete select the Finish button to Commit, Discard or Commit
Later. Select the Back button to return to the previous menu.
Each Master device can have up to 32 slaves
and each slave can perform up to 8 transactions.
 Loading...