procedure. Also use this procedure to detect leaking or severed tubing after events, such as
construction, which may have affected the integrity of the tubing.
l
Unused sample line ports should have a particulate filter installed to keep the system clean.
l
If an analyzer is installed in the Vertex M with a Chemcassette tape, the optics may need
cleaning before activating a previously unused point.
3.4.2 Sample Line Connections
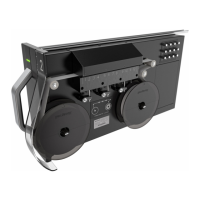
Figure 3-1. Sample Line Inlet Connections
To prepare for installation of sample lines, remove the FEP Teflon tubing from the installation
kit. The top of the unit includes 25 connections:
l
24 Sample Inlets
l
Exhaust Outlet (See "Installing Pump Exhaust Line" on the facing page for connection.)
Note: Always perform a leak check after installing sample lines. See"Leak Checking Sample
Lines" on page75 for the leak check procedure.
Each inlet has a quick connect/disconnect fitting with an internal O-ring and an external grab
ring. To install a tube into a sample line inlet, insert the tube far enough into the fitting to
ensure that the tube has passed through both the external grab ring and the internal O-ring
and is firmly seated against the stop. The insertion depth for a correctly installed sampling line
is 1/2 in. to 5/8 in. (12 mm–16 mm). Verify the insertion depth by holding the tube and
marking with your thumb where it emerges from the fitting. Remove the tube to measure the
insertion depth.
CAUTION
Improper installation of the tube into the connector results in dilution of the sample.
Vertex M 36 User Manual
 Loading...