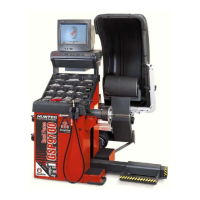
GSP9700 Series Road Force Measurement System Operation 3. Mounting Wheels on the Balancer 23
Lowering the Tire/Wheel Assembly
Raise the hood.
Lift the lift control handle “up” to move the lifting beam and trolley into position to
support the tire/wheel assembly.
Step on the Spindle-Lok
®
/foot pedal of the GSP9700, and then loosen the wing nut
that secures the clamping cup.
With the wheel lift supporting the tire/wheel assembly, steady the tire/wheel assembly
with your left hand, and remove the wing nut and clamping cup with your right hand.
Slide the tire/wheel assembly to the right, so that it clears the spindle shaft.
Press the lift control handle “down” until the trolley carriage is at its lowest level.
Roll the tire/wheel assembly off the carriage trolley.
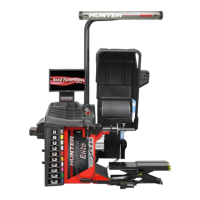
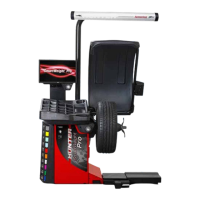
3.2 Mounting the Wheel (Without Wheel Lift)
CAUTION: Use only cones and accessories that are specifically
designed for the GSP9700 Series Road Force Measurement
System.
Since today’s vehicle designs are more sensitive to road feel, it is critical to achieve
the best balance. Proper balance requires that the tire/wheel assembly be centered
on the balancer. Tire/wheel assemblies can be balanced to zero, even with the
tire/wheel assembly mounted off-center. The main objective of the balancer operator
is to center the wheel on the hub and shaft, using the best available method.
Mounting the wheel off-center creates incorrect measurements of imbalance and
runout conditions.
Remove any existing wheel weights, rocks, and debris from the tire tread, and clean
the center hole of the wheel. Inspect inside of wheel for excessive accumulation of
dirt and debris. Remove if necessary before balancing.
Accurate balancing depends on accurately centering the wheel. Choose the proper
wheel mounting cone by placing it in the center hole of the wheel to be balanced.
Refer to “CenteringCheck
®
,” page 30.
NOTE: If the basic cone and adaptors do not fit the wheel, additional
centering adaptors will be necessary. A wheel that cannot
be properly centered, cannot be properly balanced. All
balancers require additional centering adaptors to properly
center certain types of wheels. For additonal information,
refer to Form 3203T for optional accessories.
With the safety hood open, place the wheel mounting cone on the spindle shaft
against the captivated spring. Position the wheel with the inside surface facing the
balancer, centered on the cone.
Install the plastic clamping cup and wing nut on the spindle shaft against the wheel
and secure the entire assembly by firmly tightening the wing nut.
If equipped with optional Spindle-Lok
®
foot pedal, depress and hold down while
tightening the wing nut. Holding the shaft locked while tightening the wing nut
improves centering accuracy.
Slowly roll the wheel towards you while tightening the wing nut. This improves
accurate wheel centering, since the wheel is allowed to roll up the taper of the cone
as opposed to forcing it to slide up the cone.