6. Install safety latch bars between the cavity plate and hot runner on both sides of the
assembly. A minimum of two safety latch bars are required.
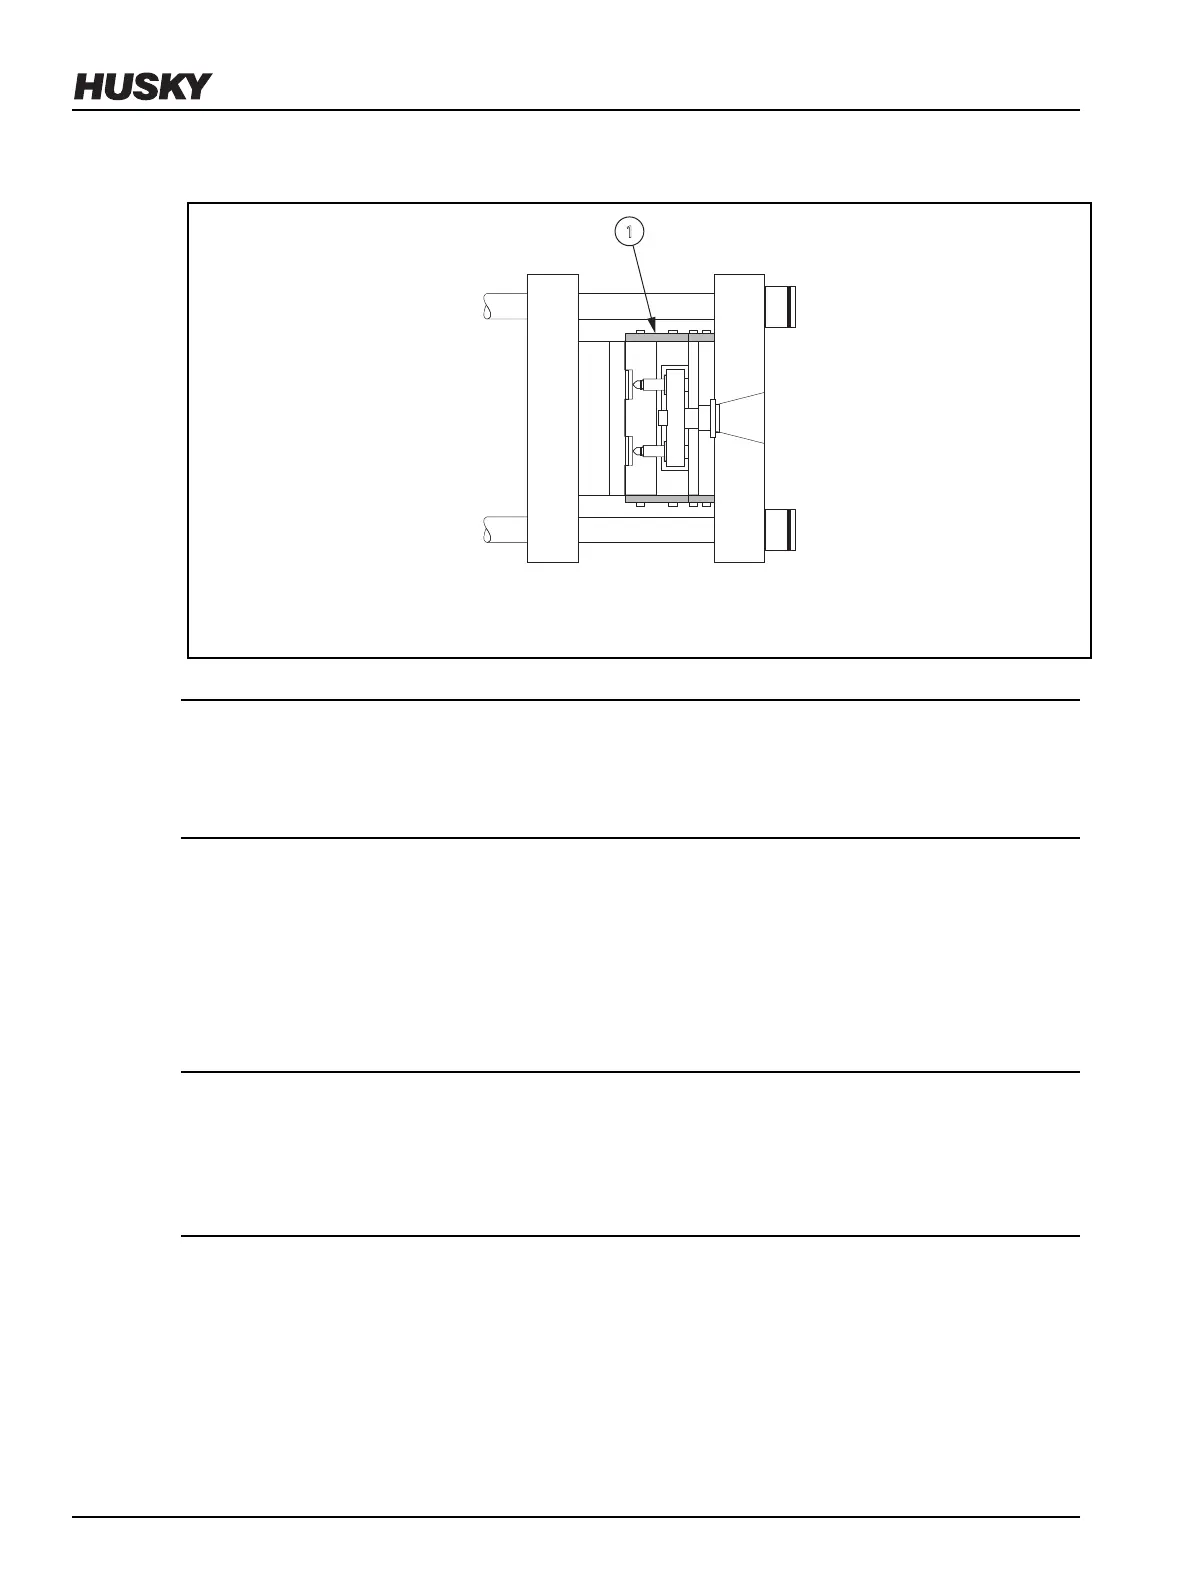
Figure 6-40: Latching the Cavity Plate to the Hot Runner (Overhead View)
1. Safety Latch Bar
CAUTION!
Mechanical hazard – risk of damage to the nozzle sealing surfaces. The temperature of the
nozzle tips must cool to room temperature <25 °C (<77 °F) before the cavity plate is
removed. Damage to the nozzle sealing surfaces will occur if the temperature is too high.
7. Remove the screws that secure the cavity plate to the hot runner.
8. Remove all locks and tags.
9. Reduce the clamp opening and closing speed.
10. Slowly close the clamp.
11. Lock out and tag the machine and controller (if equipped).
12. Remove all safety latch bars.
CAUTION!
Mechanical hazard – risk of damage to the machine, mold and hot runner. Make sure the
hoses attached to the cavity plate are long enough to allow latching without damaging the
hoses. In some cases it may be necessary to relieve residual pressure in the system and then
disconnect the hoses.
13. Install safety latch bars between the cavity plate and core plate on both sides of the
assembly. A minimum of two safety latch bars are required.
14. Remove all locks and tags.
v 2.2 — March 2021 Unify Manifold System
102 Removing and Installing the Cavity Plate