CAUTION!
Mechanical hazard – risk of damage to the mold and hot runner. The nozzles and manifold
must be at room temperature (< 25 °C or < 77 °F) before the cavity plate is connected to the
hot runner. Severe damage to the nozzle and cavity plate sealing diameters could result if
the mold is still hot.
7. Slowly close the clamp to move the cavity plate into position. Make sure the wires in the wire
channels are not pinched between the plates while closing.
8. Lock out and tag the machine and controller (if equipped).
9. Remove all safety latch bars.
10. Install safety latch bars between the cavity plate and hot runner on both sides of the
assembly. A minimum of two safety latch bars are required.
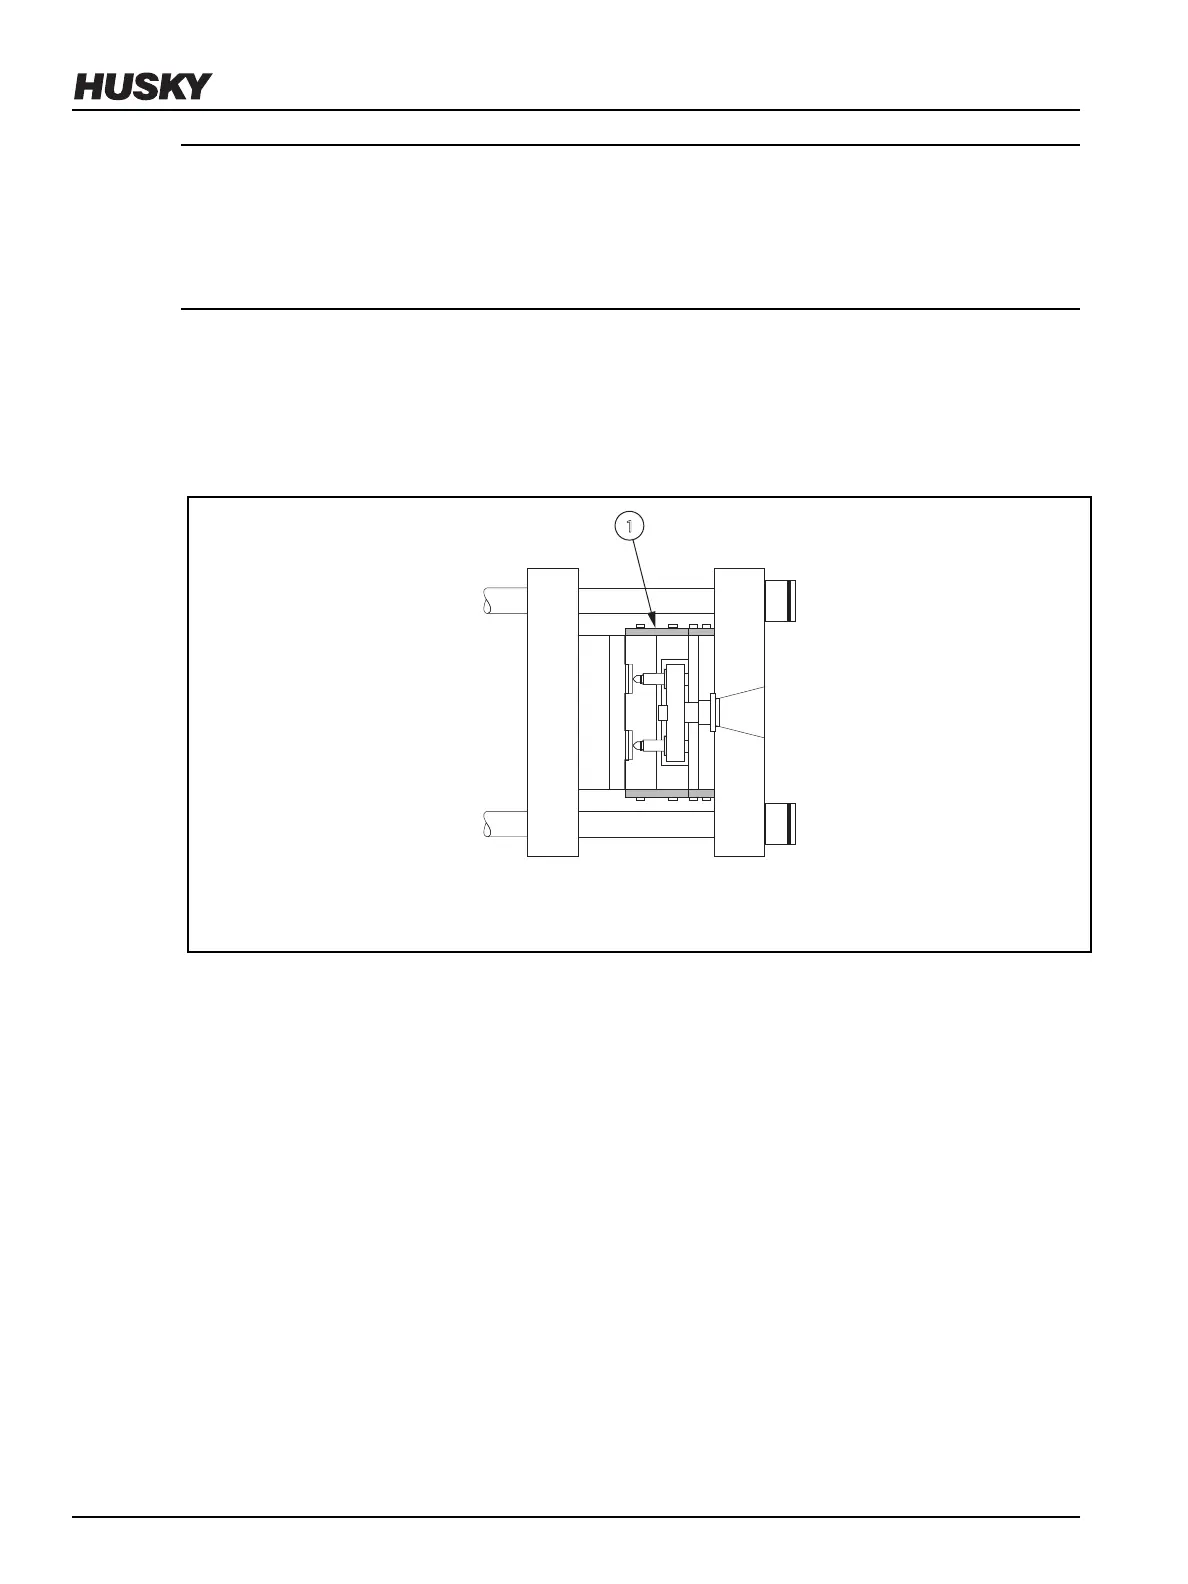
Figure 6-42: Latching the Cavity Plate to the Hot Runner (Overhead View)
1. Safety Latch Bar
11. Remove all locks and tags.
12. Reduce the clamp opening and closing speed.
13. Slowly open the clamp to move the cavity plate away from the core plate.
14. Lock out and tag the machine and controller (if equipped).
15. Install the screws that secure the cavity plate to the hot runner and torque them to the
specied value. Refer to the manufacturer’s documentation for torque requirements.
16. Remove all safety latch bars.
17. Check the electrical circuit with an ohmmeter to make sure no wires were damaged during
installation. Refer to the electrical schematic to identify each zone.
6.15
Inspecting and Cleaning Manifolds
To inspect and clean a manifold, do the following:
v 2.2 — March 2021 Unify Manifold System
104 Inspecting and Cleaning Manifolds