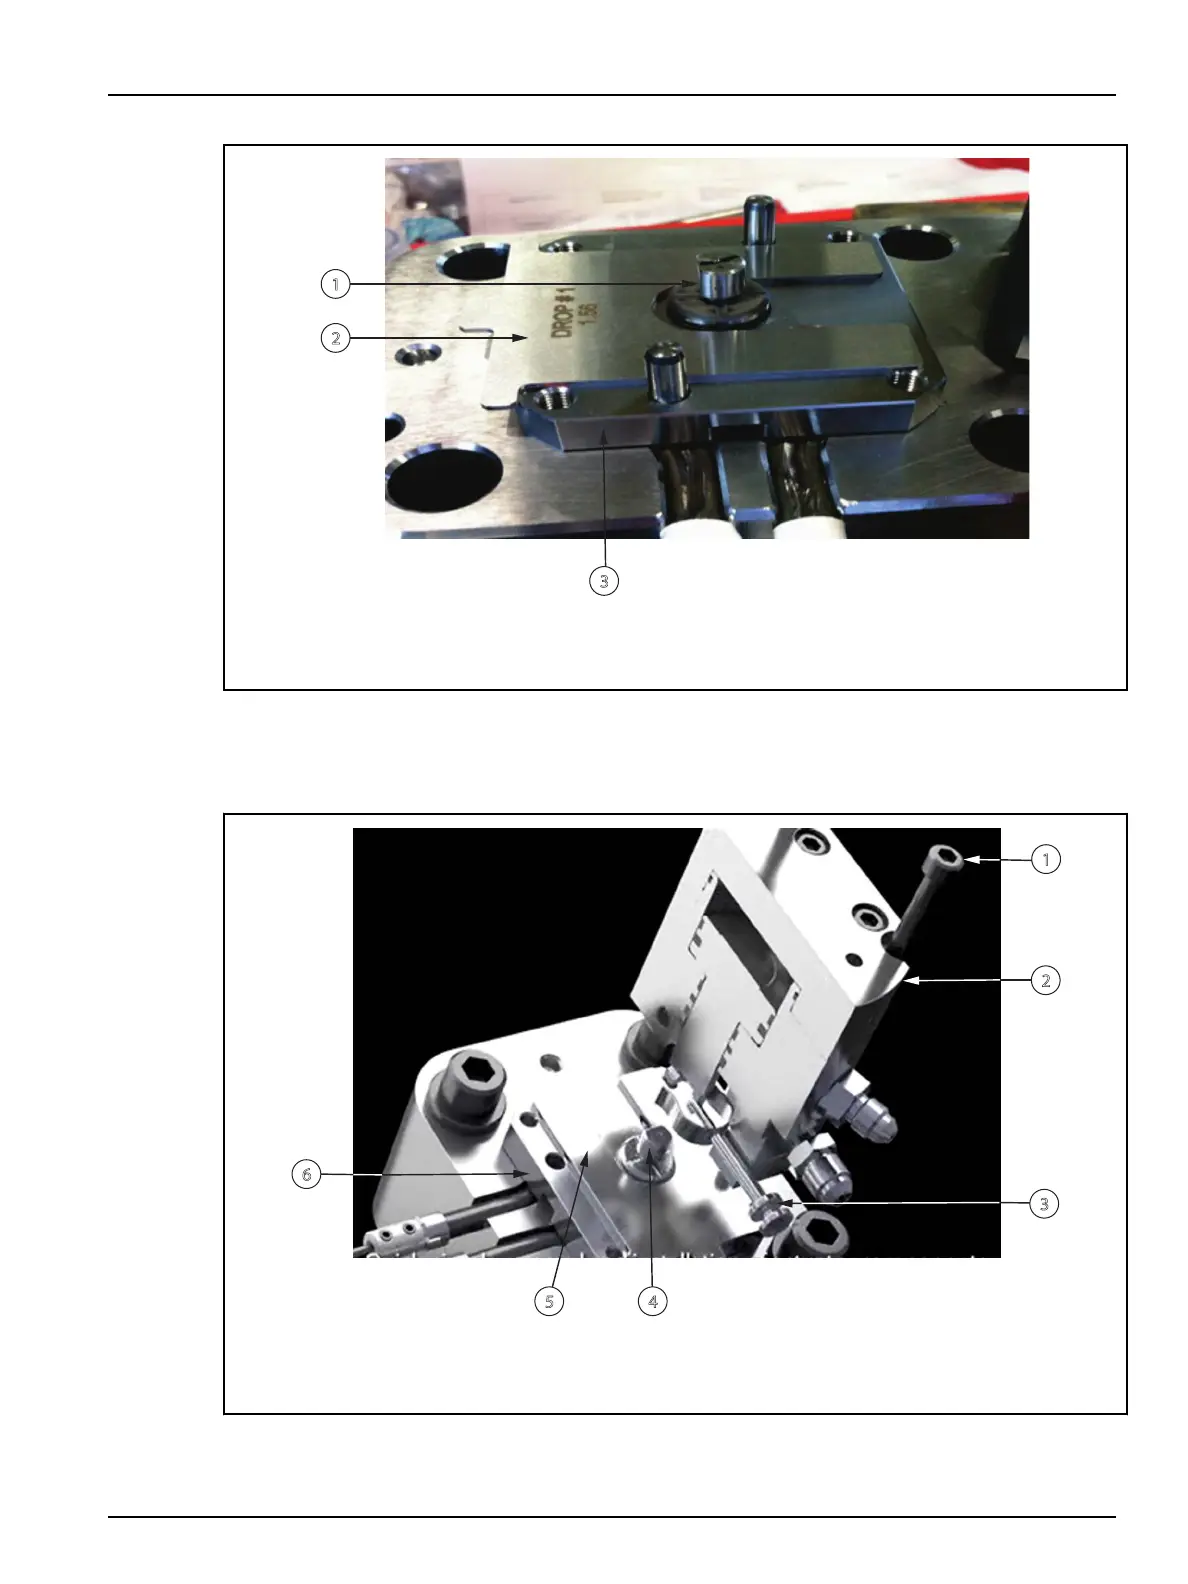
Figure 6-9: Removing and Installing a Shim
1. Valve Stem 2. Shim Labeled with Drop Location 3. Bushing Cap
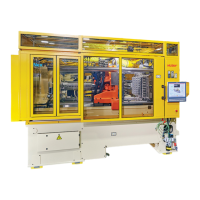
3. Lower the hydraulic actuator vertically onto the drop location. The actuator is labeled by
drop location (Refer to Section 6.5.1). Make sure the correct actuator is installed for the drop
location.
4. Install, but do not tighten, the screws on the outer perimeter of the actuator.
Figure 6-10:
1. Screw 2. Actuator 3. Spring Pin 4. Valve Stem 5. Shim 6. Bushing Cap
Hot Runner Installation Manual v 2.2 — March 2021 Maintenance
Removing and Installing the Hydraulic Actuator 71