Replacing the lower bezel
This procedure applies only to the 5U server model with hot-swap power supplies.
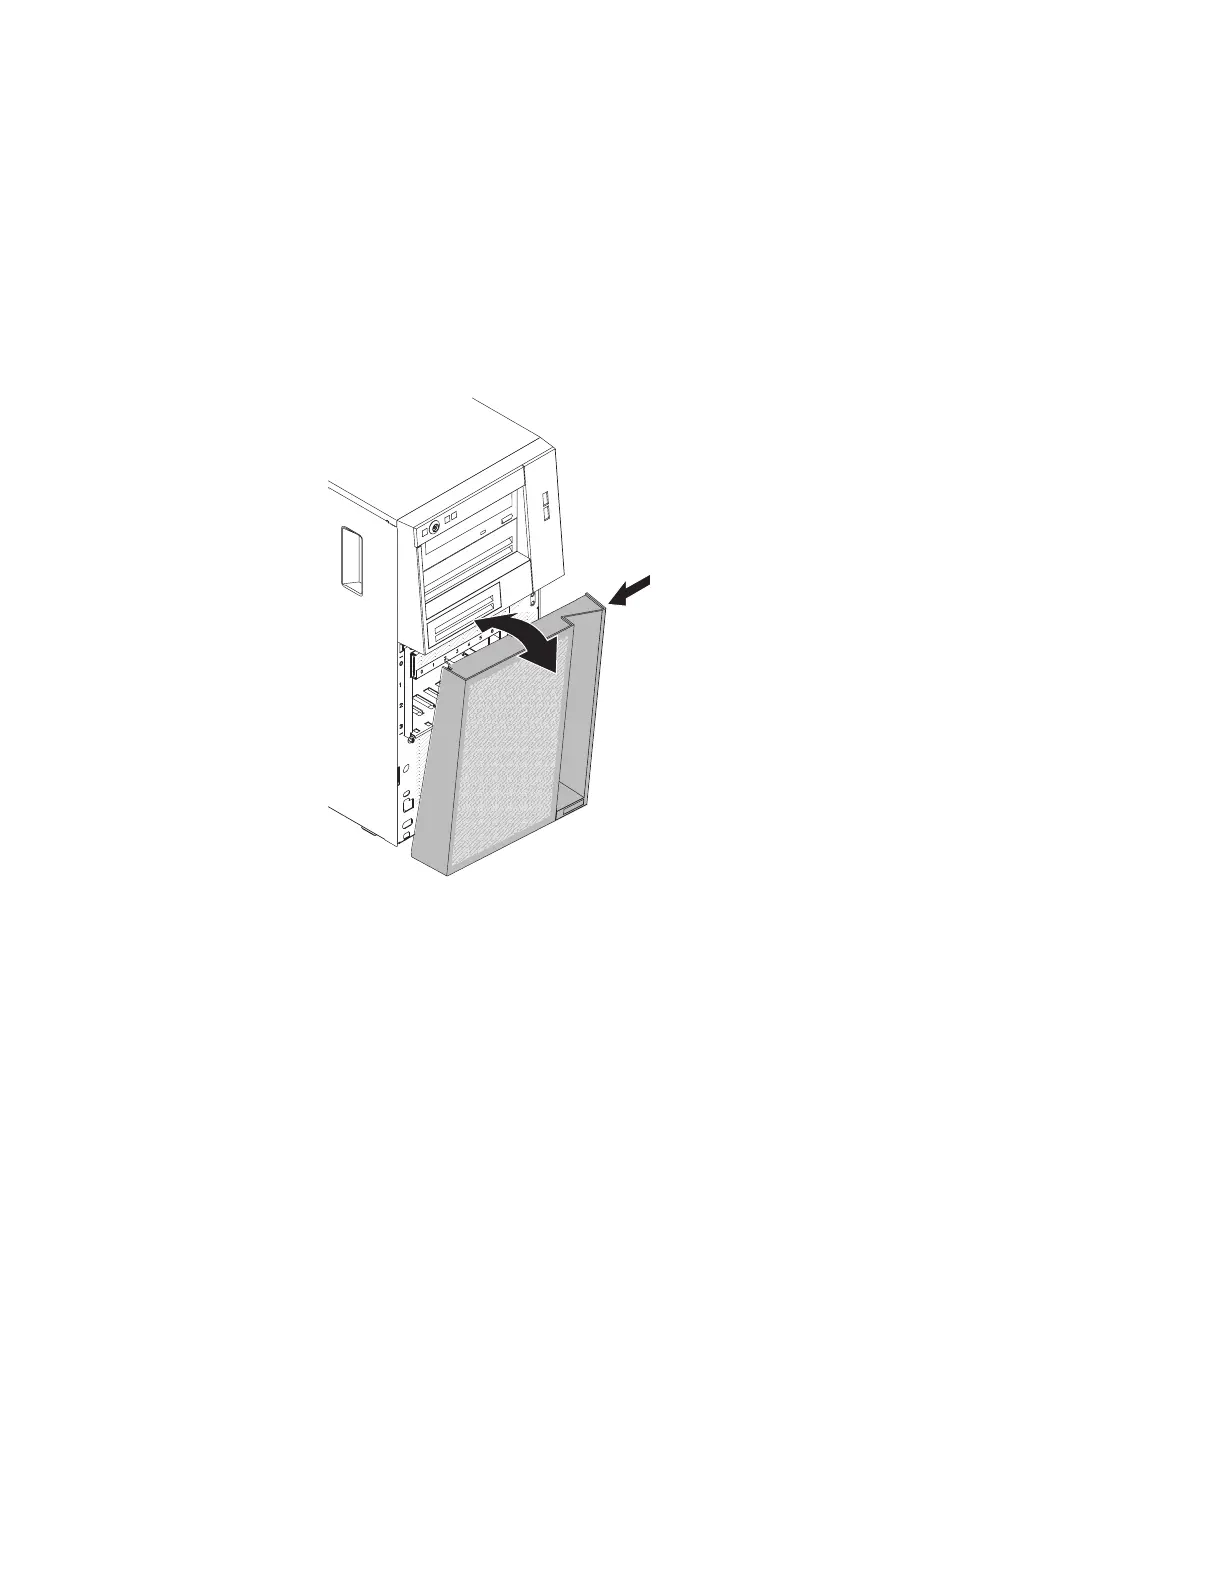
To install the lower bezel on the 5U server model with hot-swap power supplies,
complete the following steps.
1. Read the safety information in “Safety” on page vii and “Installation
guidelines” on page 35.
2. Insert the two bottom tabs on the lower bezel into the corresponding holes in
the front of the chassis.
3. Rotate the top of the lower bezel up to the chassis; then, press the blue-colored
release tab on the right side of the lower bezel and completely close the lower
bezel until it locks securely into place.
4. Reconnect the external cables and power cords; then, turn on the attached
devices and turn on the server.
Figure 89. Lower bezel installation for 5U server model with hot-swap power supplies
190 System x3100 M5 Type 5457: Installation and Service Guide

 Loading...


