Replacing the hard disk drive fan duct
This procedure applies only to the 5U server model with hot-swap power supplies.
Attention: To ensure proper cooling and airflow, do not operate the server for
more than 30 minutes with the side cover removed.
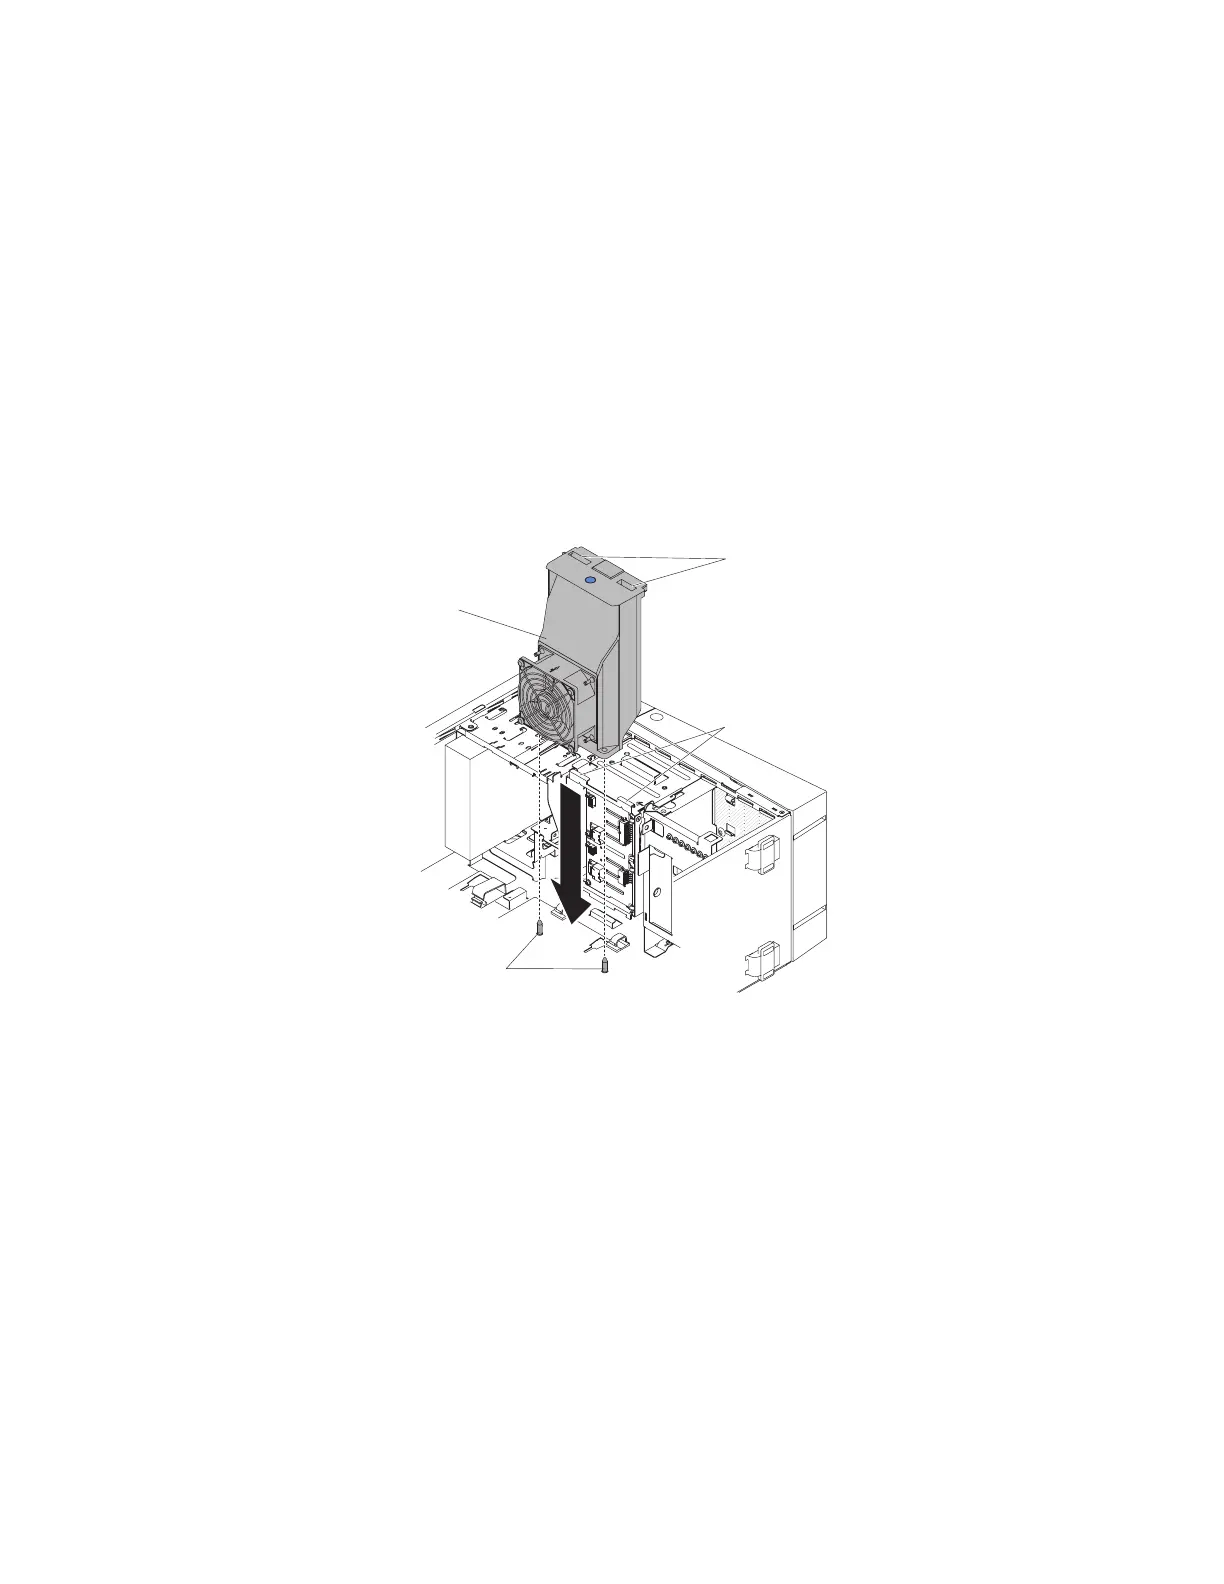
To install the hard disk drive fan duct on the 5U server model with hot-swap
power supplies, complete the following steps.
1. Read the safety information in “Safety” on page vii and “Installation
guidelines” on page 35.
2. Lower the hard disk drive fan duct into the chassis, making sure the two guide
pins and two latches on the chassis protrude through the respective holes on
the hard disk drive fan duct.
The following illustration is for 5U server models with 2.5" hot swap hard disk
drives installed.
The following illustration is for 5U server models with 3.5" hot swap hard disk
drives installed.
Hard disk drive
fan duct
Guide pins
Latches
Latch holes
Figure 127. 2.5" hard disk drive fan duct installation for 5U server model with hot-swap power
supplies
Chapter 6. Removing and replacing components 225

 Loading...


