Replacing the operating temperature enhancement kit
Use this information to replace the operating temperature enhancement kit
Attention: To ensure proper cooling and airflow, do not operate the server for
more than 30 minutes with the side cover removed.
To install the operating temperature enhancement kit on the 4U server model with
non-hot-swap power supplies, complete the following steps. For 5U server models
with hot-swap power supplies, please see the next sub-section.
1. Read the safety information in “Safety” on page vii and “Installation
guidelines” on page 35.
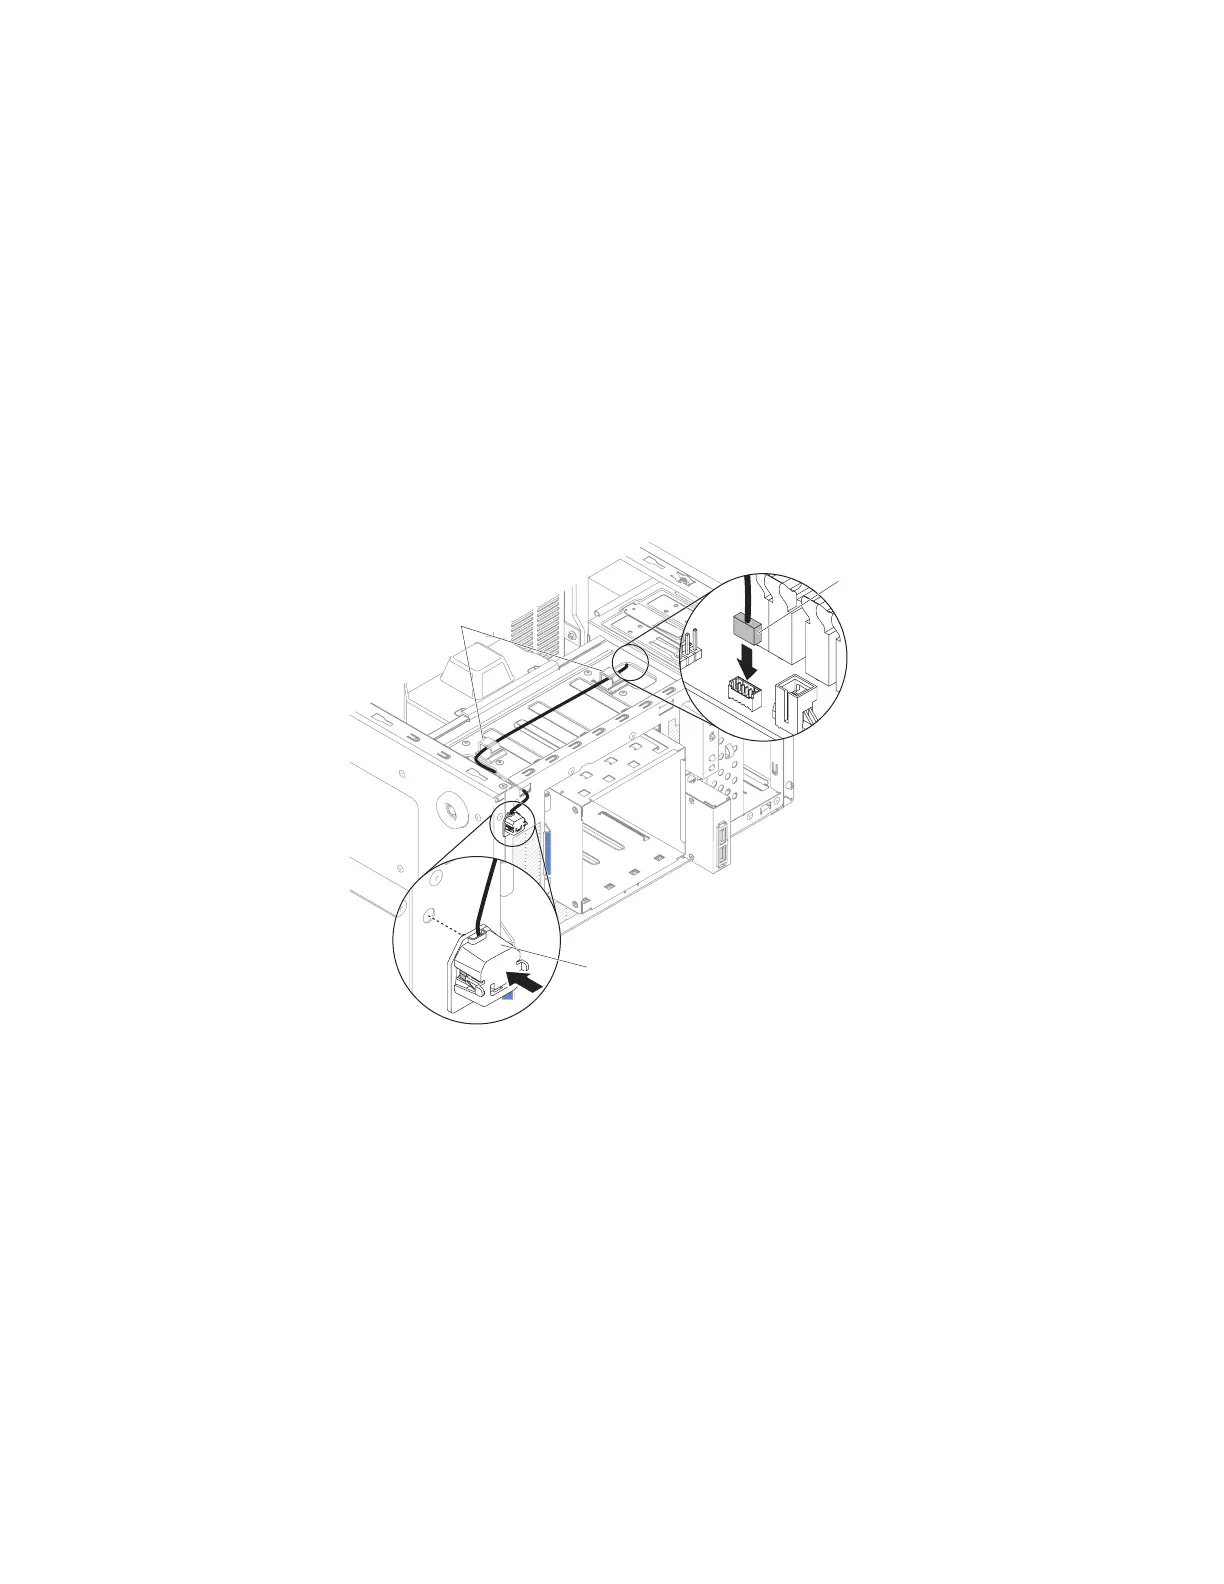
2. Insert the thermal sensor board into the thermal sensor holder. Make sure the
cabling goes through the hole as shown in the illustration and connect the
thermal sensor connector to the system board. Remember to close the cable
clips to secure the cable.
3. Install the side cover (see “Replacing the side cover” on page 182).
4. Stand the server back up in its vertical position.
5. Install the bezel (see “Replacing the bezel” on page 188).
6. Reconnect the external cables and power cords; then, turn on the attached
devices and turn on the server.
To install the operating temperature enhancement kit on the 5U server model with
hot-swap power supplies, complete the following steps. For 4U server models with
non-hot-swap power supplies, please see the above sub-section.
1. Read the safety information in “Safety” on page vii and “Installation
guidelines” on page 35.
2. Insert the thermal sensor board into the thermal sensor holder and then install
the holder onto the chassis. Make sure the cabling goes through the respective
Thermal sensor
connector
Thermal sensor
Cable clips
Figure 207. Thermal sensor board installation for 4U server model with non-hot-swap power
supplies
Chapter 6. Removing and replacing components 293

 Loading...


