8. Remove the air baffle (see “Removing the air baffle” on page 39).
9. Follow the cabling instructions, if any, that come with the adapter. Route the
adapter cables before you install the adapter.
10. Follow the instructions that come with the adapter to set jumpers or switches,
if any.
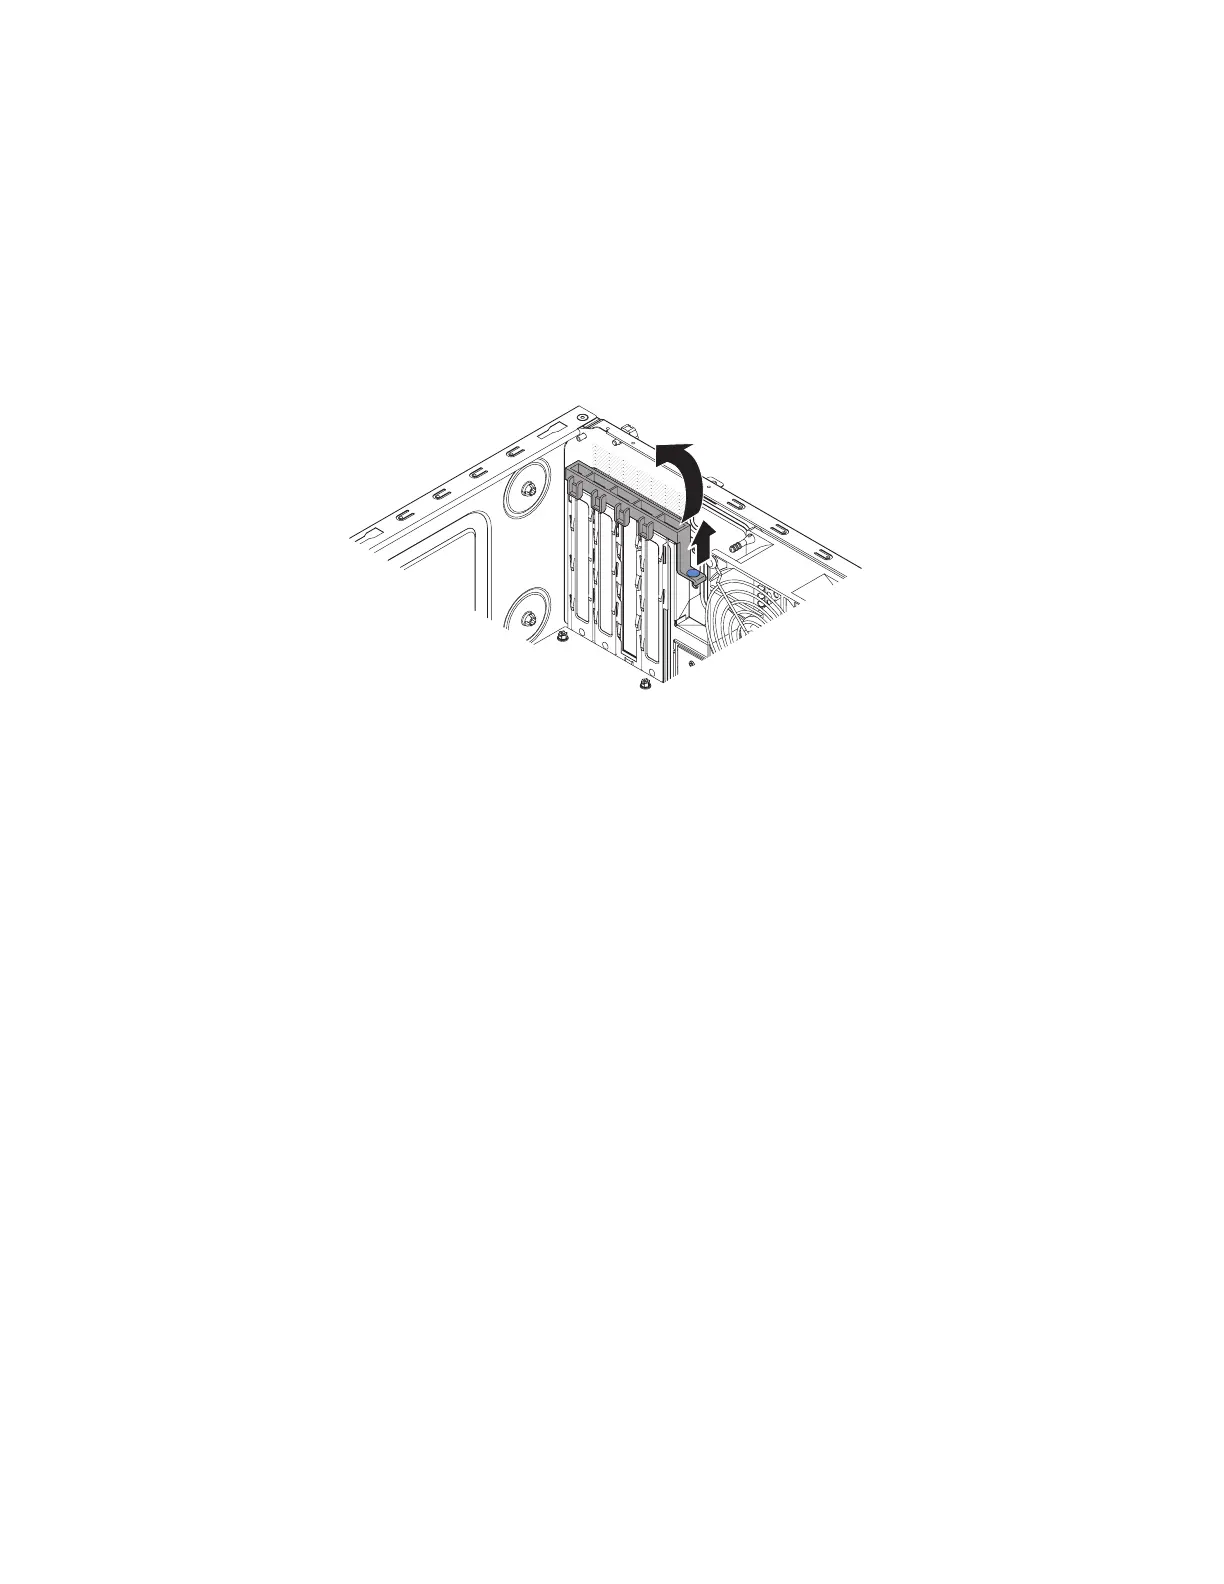
11. Lift the end of the rear adapter retention bracket till the tab disengages the
hole on the chassis.
12. Rotate the rear adapter retention bracket upward to remove it from the
chassis.
13. Remove the expansion-slot cover by unscrewing the screw that secures it to
the chassis. Store the expansion-slot cover and screw in a safe place for future
use.
Note: Expansion-slot covers must be installed on all vacant slots. This
maintains the electronic emissions standards of the server and ensures proper
ventilation of server components.
14. Carefully grasp the adapter by the top edge or upper corners, and align it
with the expansion slot guides; then, press the adapter firmly into the
expansion slot. Make sure that the adapter is correctly seated in the expansion
slot before you turn on the server. Incomplete installation of an adapter might
damage the system board or the adapter.
Attention: Make sure that the adapter is correctly seated in the expansion
slot before you turn on the server. Incomplete installation of an adapter might
damage the system board or the adapter.
Figure 39. Rear adapter retention bracket removal for 4U server model with non-hot-swap
power supplies
Chapter 2. Installing optional devices 63

 Loading...


