100
HDK-99 1803 VER1 (E)
5.2 Settings from the Menu
3 On MENU (3/4), turn the rotary pulse switch to
position the cursor on "LENS SELECT," and press
the SET button.
The submenu is displayed.
4 Set "NUMBER", "NAME" and "EXTENDER".
Refer to the explanation of corresponding item for how
to set each data.
NO. 1 is selected here as an example.
CAUTION:
If a new le is created with the same le number as an
existing le, the data will be overwritten and the old
data will be lost.
5 Turn the rotary pulse switch to position the cursor
on "FILE SET," and press the SET button.
The cursor moves to the mode selection column.
6 Turn the rotary pulse switch to select the set value,
and press the SET button.
The value is conrmed, and either of the following
messages is displayed at the bottom of the screen:
- LENS No. x : Displayed when "MANUAL"
is selected.
- PUSH SET -> START : Displayed and ashes when
"AUTO" is selected.
Go to Step 7 when "AUTO" is selected.
When "MANUAL" is selected, go to Step M1 (P101)
to obtain the model name of the lens after lens le
items such as GAIN/FLARE/GAMMA are adjusted by
MCP, etc.
7 Press the SET button.
The lens le is created.
8 Set the S3-4 DIP switch of the MPU_MULTI_B module back to "OFF."
Note:
- When the camera is powered OFF, the FILE SET settings are turned OFF.
- Before creating lens les, prepare all the lenses to use. Then, create the les under the same condition at a time. If the conditions are
changed, the setting cannot be accurate. Lens les memorize a difference in level between lenses. If the lighting or chart is changed,
the camera cannot tell whether it is a lighting, chart, or lens difference.
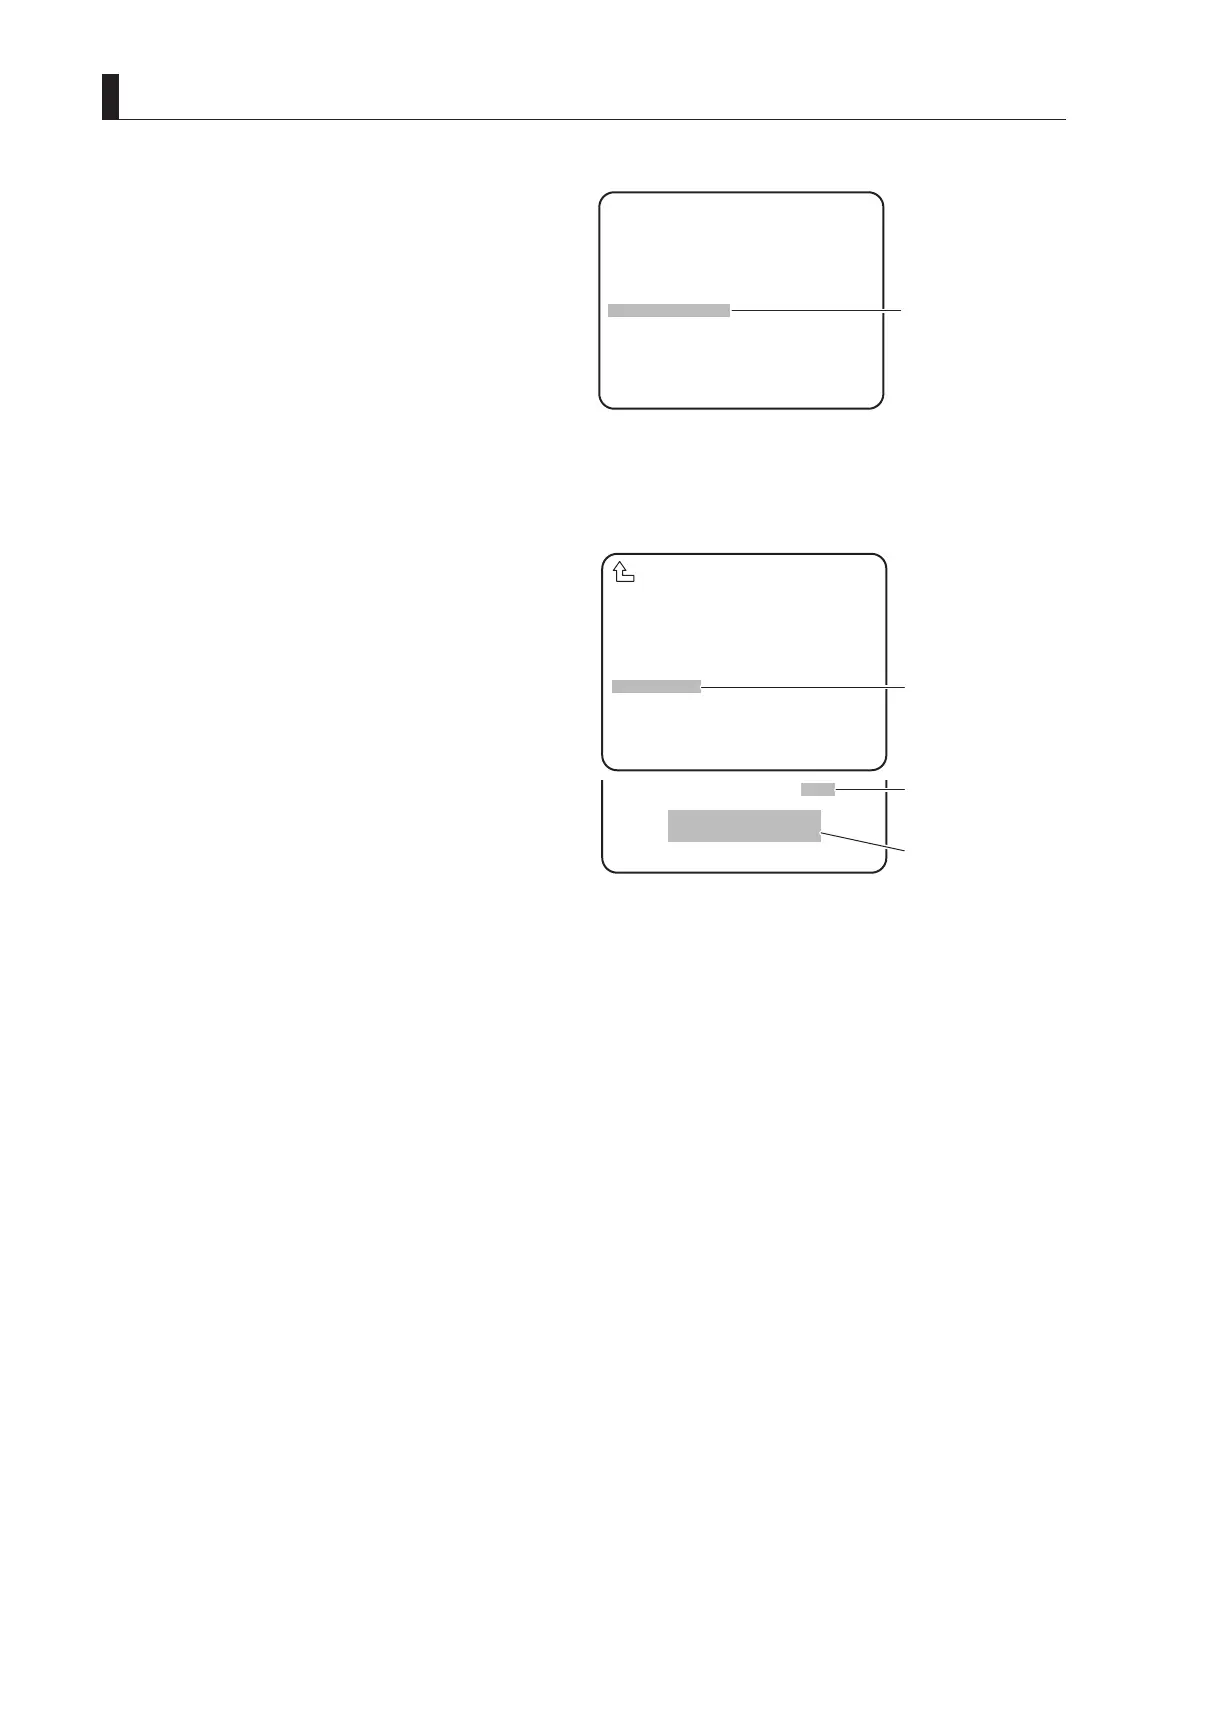
SCAN FORMAT SELECT
CPU SYSTEM CONTROL
AUTO IRIS SET
AWB/ABB MODE
LENS SELECT
LEVEL ADJUST
PROCESS MODE
PRESET FILE LOAD
MENU MODE
*** MENU (3/4) ***
▲
▲
③
Position the flashing
cursor on "LENS
SELECT" and confirm.
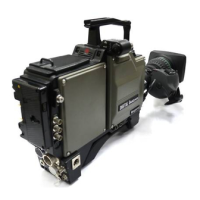
FILE SET OFF
LENS NO.1
PUSH SET→START
NUMBER NO.1
NAME ( )
(AB40X10 ABCD )
EXTENDER OFF
AUTO SEL OFF
FILE SET OFF
LENS TYPE ***
AUTO X0.8 CONV OFF
LENS SERIAL I/F OFF
LENS SELECT
▲
⑤
Position the cursor on
"FILE SET" and
confirm.
⑥
Select the set value
and confirm.
⑦
Either message is
displayed or flashes.