2. Connect one end of the grounding cable to a proper earth ground, such as the rack in which the
switch is mounted.
3. Aach an ESD grounding strap to your bare wrist, and connect the strap to the ESD grounding point
on the switch.
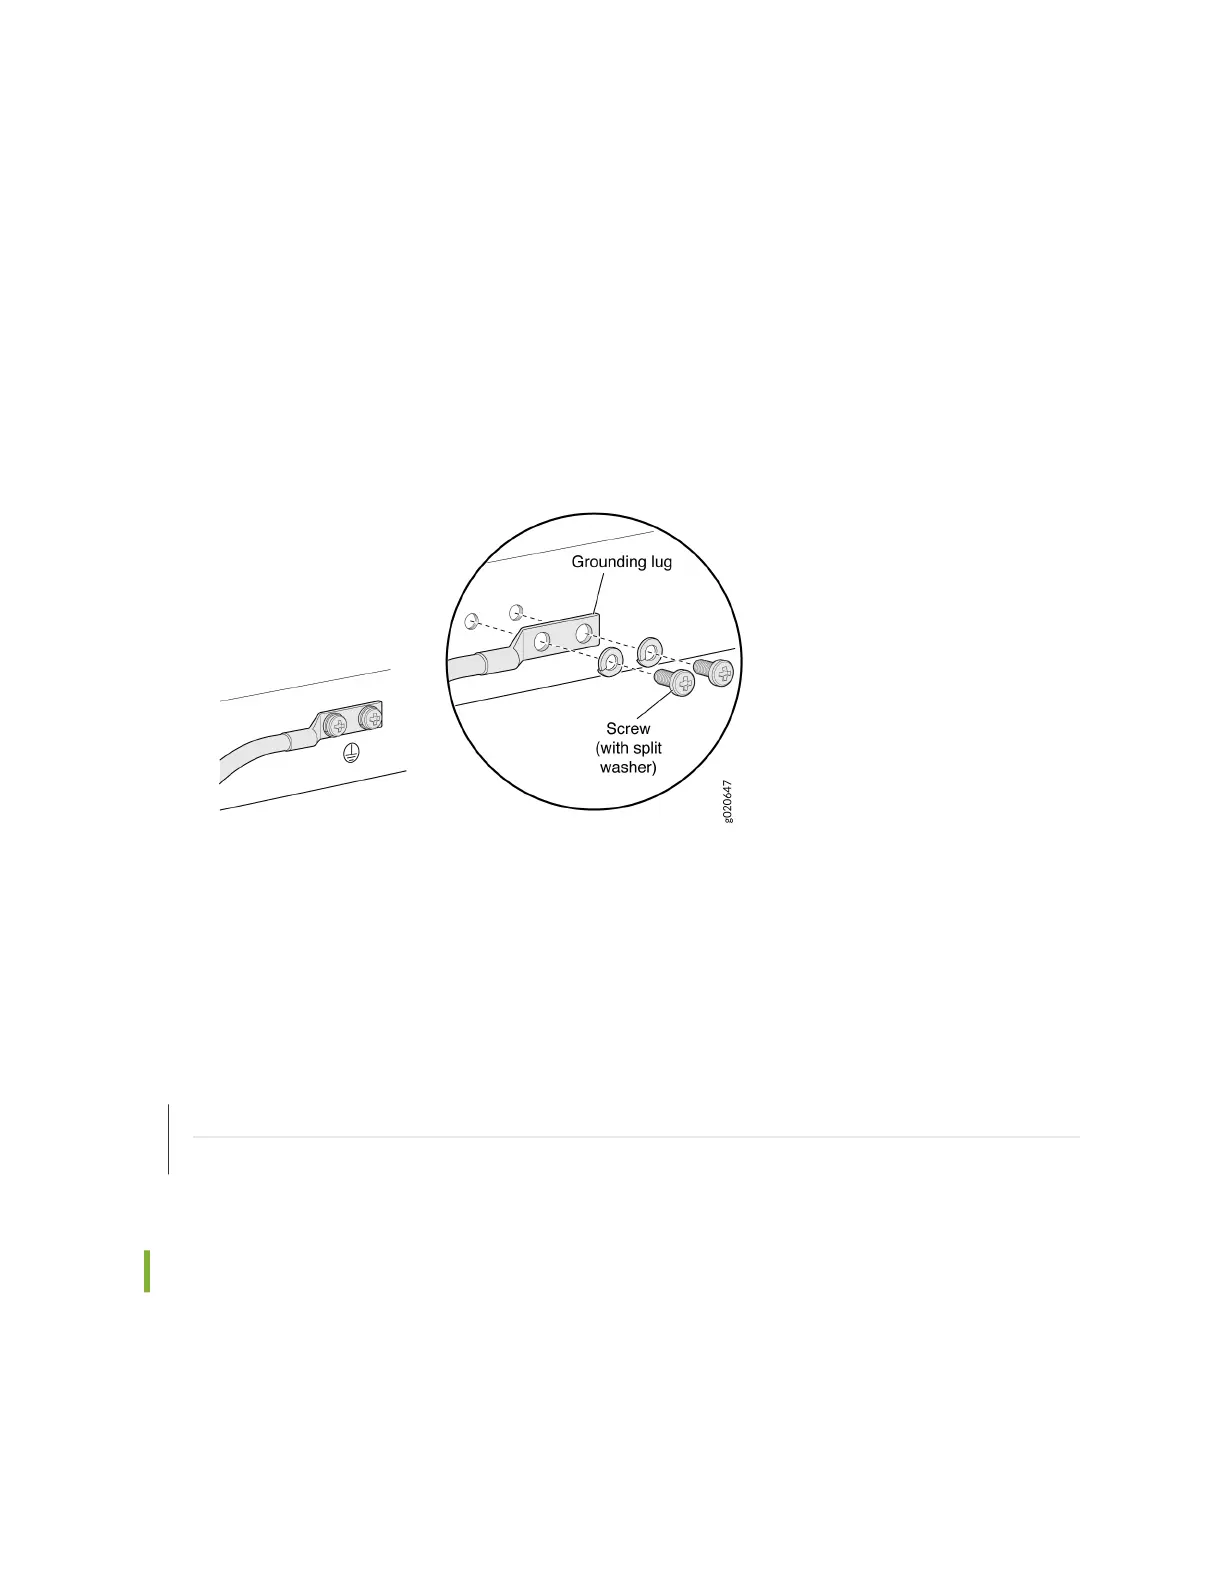
4. Place the grounding lug aached to the grounding cable over the protecve earthing terminal. See
Figure 75 on page 141.
Figure 75: Connecng a Grounding Cable to an EX Series Switch
5. Secure the grounding lug to the protecve earthing terminal with the washers and screws.
6. Dress the grounding cable and ensure that it does not touch or block access to other switch
components and that it does not drape where people could trip over it.
SEE ALSO
General Safety Guidelines and Warnings
Grounded Equipment Warning
Connecng AC Power to an EX2300 Switch
Ensure that you have the following parts and tools available:
• A power cord appropriate for your geographical locaon
141
 Loading...


