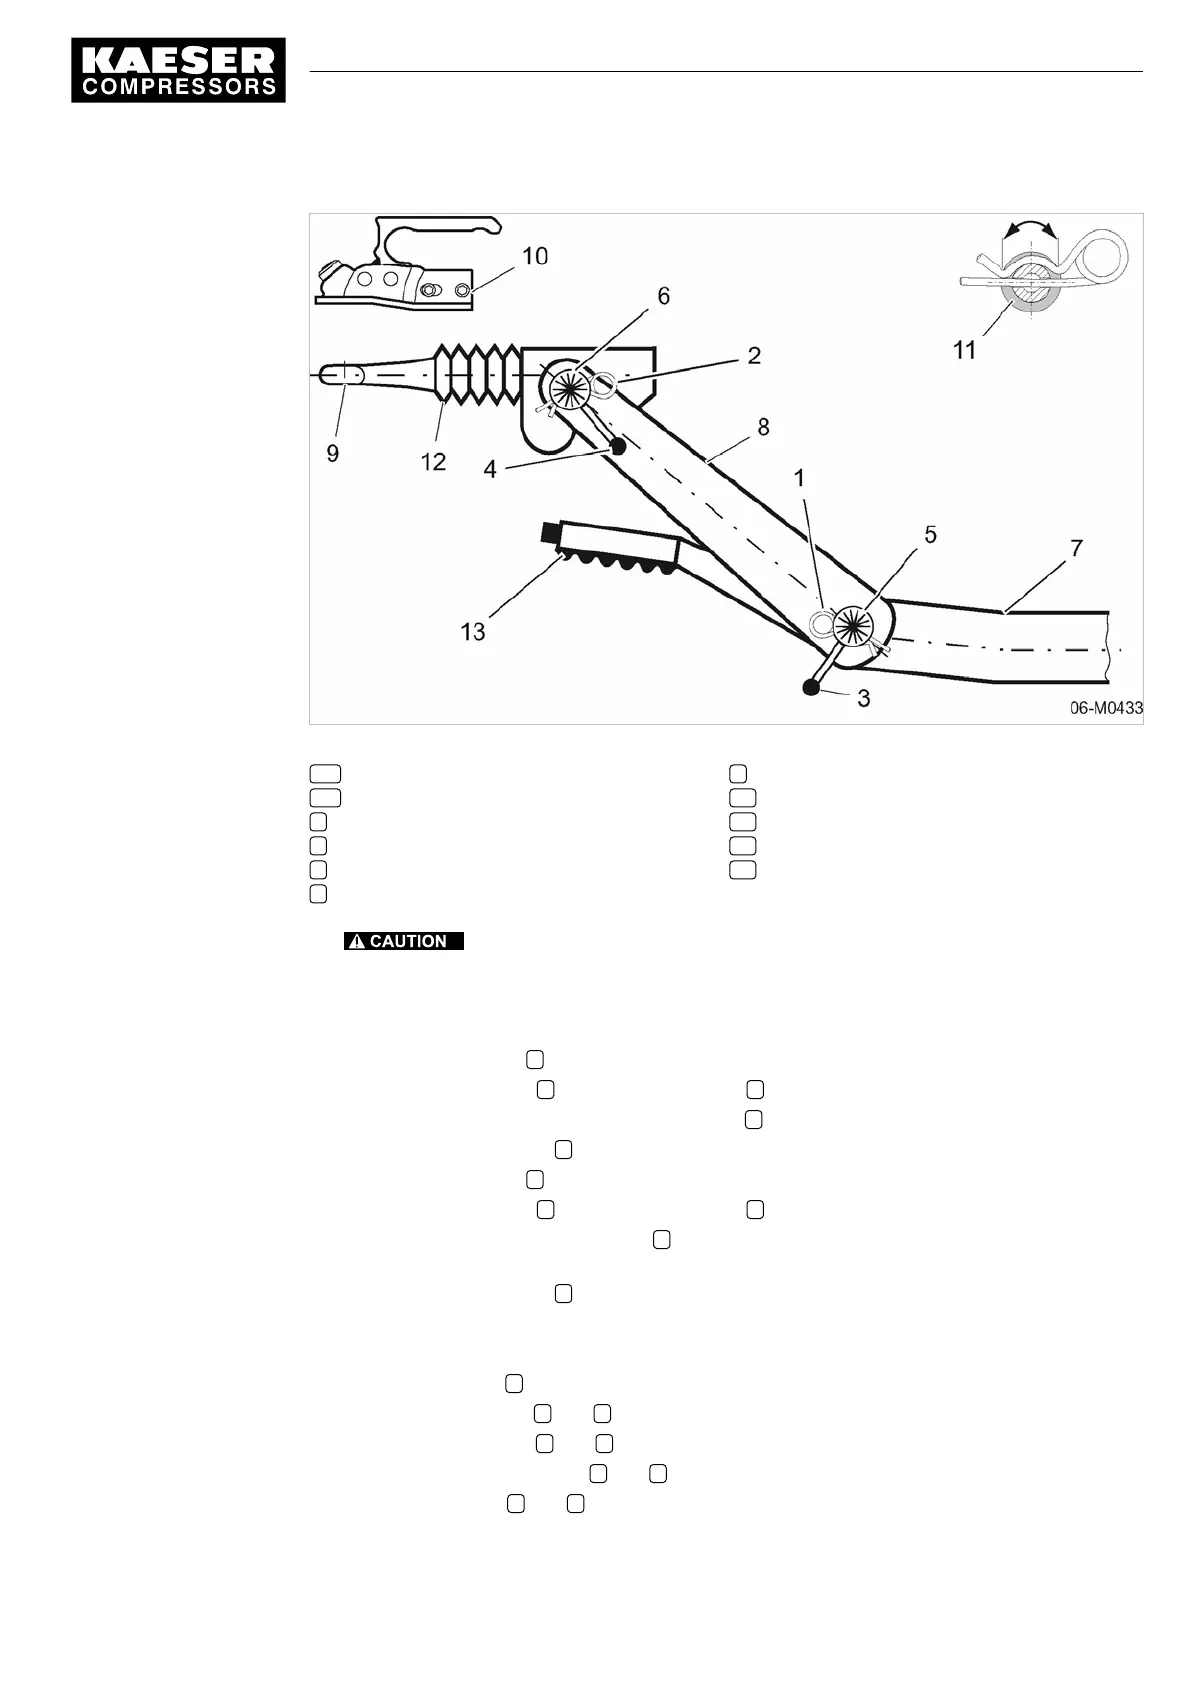
Fig. 10 Towbar height adjustment sb
1,2 Split pin
3,4 Locking lever
5 Serrated joint 1
6 Serrated joint 2
7 Towbar tube
8 Towbar center-piece
9 Towing eye
10 Ball coupling
11 Split pin securing principle
12 Overrun damper
13 Parking brake
1.
Danger of pinching!
Severe injury to fingers is possible if they become trapped in the adjusting mechanism.
➤ Always wear protective gloves.
➤ Work with caution.
2. Draw out the split pin 1
.
3.
Undo the locking lever 3
until the serrated joint 5 is disengaged.
4.
Make the angle adjustment to the serrated joint 5
.
5.
Tighten the locking lever 3
making sure the serrations engage.
6.
Draw out the split pin 2
.
7.
Undo the locking lever 4
until the serrated joint 6 is disengaged.
8.
Adjust the angle of the serrated joint 6
to bring the towing eye or coupling parallel to the
ground at the height of the towing vehicle hitch.
9.
Tighten the locking lever 4
making sure the serrations engage.
10.
Check that the towbar is adjusted to the correct height.
Check if:
■ the towing eye 9
or coupling is at the right height and parallel to the ground,
■
the serrated joints 5
and 6 are fully engaged,
■
The locking levers 3
and 4 are tightened.
11.
Make sure the locking levers 3
and 4 are tight by striking with a hard rubber hammer.
12.
Insert the split pins 1
and 2 .
6 Installation
6.3 Adjusting the chassis
No.: 9_9446 01 USE
SERVICE MANUAL Screw Compressor
M26
41