K990400 16 April 2008
C-1
eXamVision Quick Reference
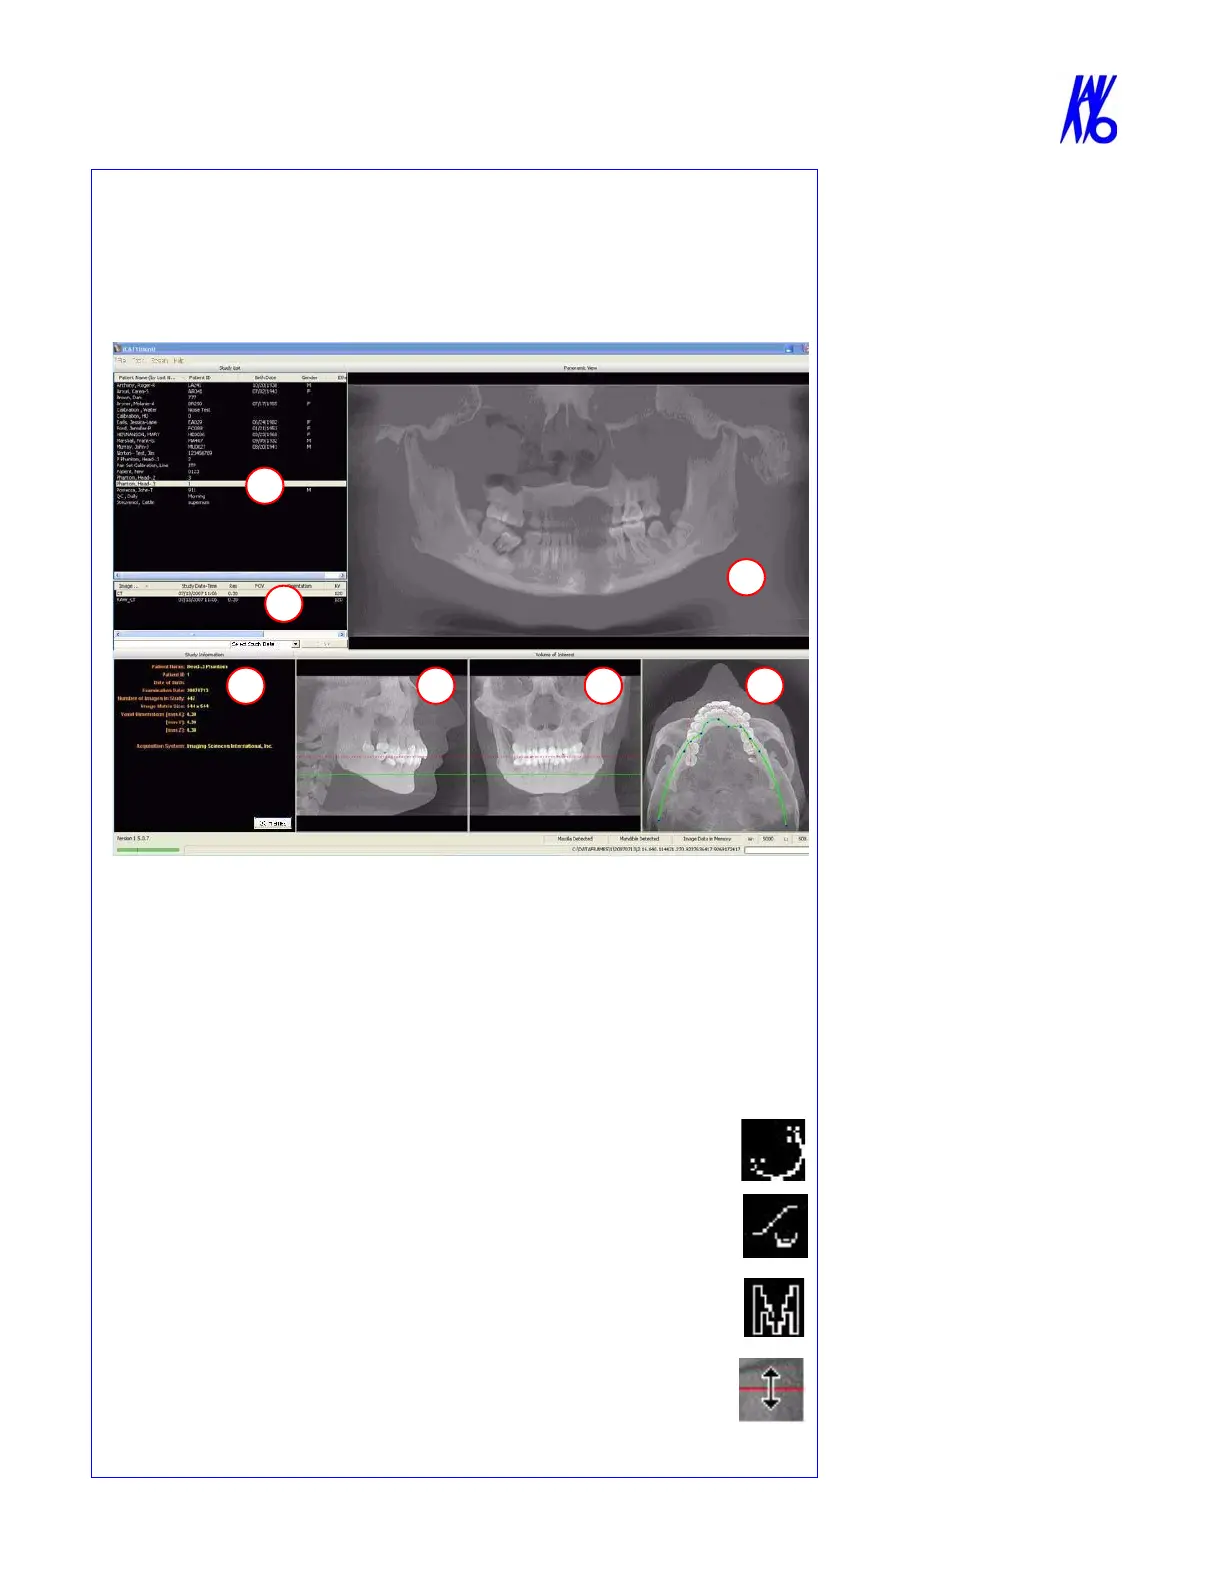
Navigating the eXamVision Interface
This guide shows how to:
• View reconstructed images
• Use main features and tools to optimize an image
Tools for Viewing this Image
HIDING THE STUDY LIST
Study List can be hidden by selecting Tools > Hide Study List. To show, select
Tools > Show Study List.
CURSOR TOOLS
ROTATION TOOL - Hover cursor over the lower right corner of the
desired view. Cursor changes to the rotation tool.
BRIGHTNESS / CONTRAST TOOL - Drag cursor up, down, left, and
right to adjust brightness and contrast. Use Reset Window/Level options
on Pop Up menu to reset brightness and contrast settings.
MIP/RADIOGRAPH - The system software enables displaying images as
MIP or Radiograph. Move cursor to the top right of any image. The cursor
becomes an M, toggle a selection.
MAXILLA and MANDIBLE CONTOUR LINES - can be repositioned
with a click and drag to the desired location.
REMINDER
Images are displayed as if you are
looking at the patient from the front.
TO DISPLAY PATIENT IMAGE
1. Click Patient Name.
2. Click Patient Scans
DISPLAYED VIEWS
3. Patient Study Info
4. PANORAMIC View
Opens to IMPLANT Screen
5. SAGITTAL View
Opens to CEPH Screen
6. CORONAL View
Opens to MPR Screen
7. AXIAL View
Opens to TMJ Screen
MEASUREMENTS
HU Statistics
(Bone Density) Right click a view
and select HU Statistics. Drag and
click to define an area. Statistics
appear in upper right corner. A
maximum of 4 HU stats can be taken
at a time in a normal view and 2 in a
cross section view.
Distance
(Linear Measurement) right click a
view and select Distance. Point,
click, drag, and release to draw a
line. A measurement in mm appears
in upper left corner. A maximum of
9 distance measurements can be
taken at a time in a normal view and
4 in a cross section view.
Right click and select “HU Stats” or
“Distance” again to turn the tool off
Right click the actual measurement
statistic to remove, inactivate, or
activate them.

 Loading...