29
4.8 SNMP Settings
Simple network management protocol (SNMP) provides the ability to monitor and gives status
information of the SNMP agent to the SNMP management console. NAS server behaves as an
SNMP agent that answers requests from management console and sends trap information to it. The
following options should be configured to using SNMP protocol:
Community: A name serves as a simple authentication. The communication between the SNMP
management console and the NAS server cannot be established if the community names are
mismatch.
IP: IP address of the SNMP management console
Trap: A trap is a voluntary message send out from a SNMP agent (which is in this case your NAS
server) when there is an event occurred.
Management: Configure the SNMP management console as Read Only or Full Control.
Location: Provide location information of the SNMP agent.
Contact: Provide name of the contact person who has the management information of the SNMP
agent.
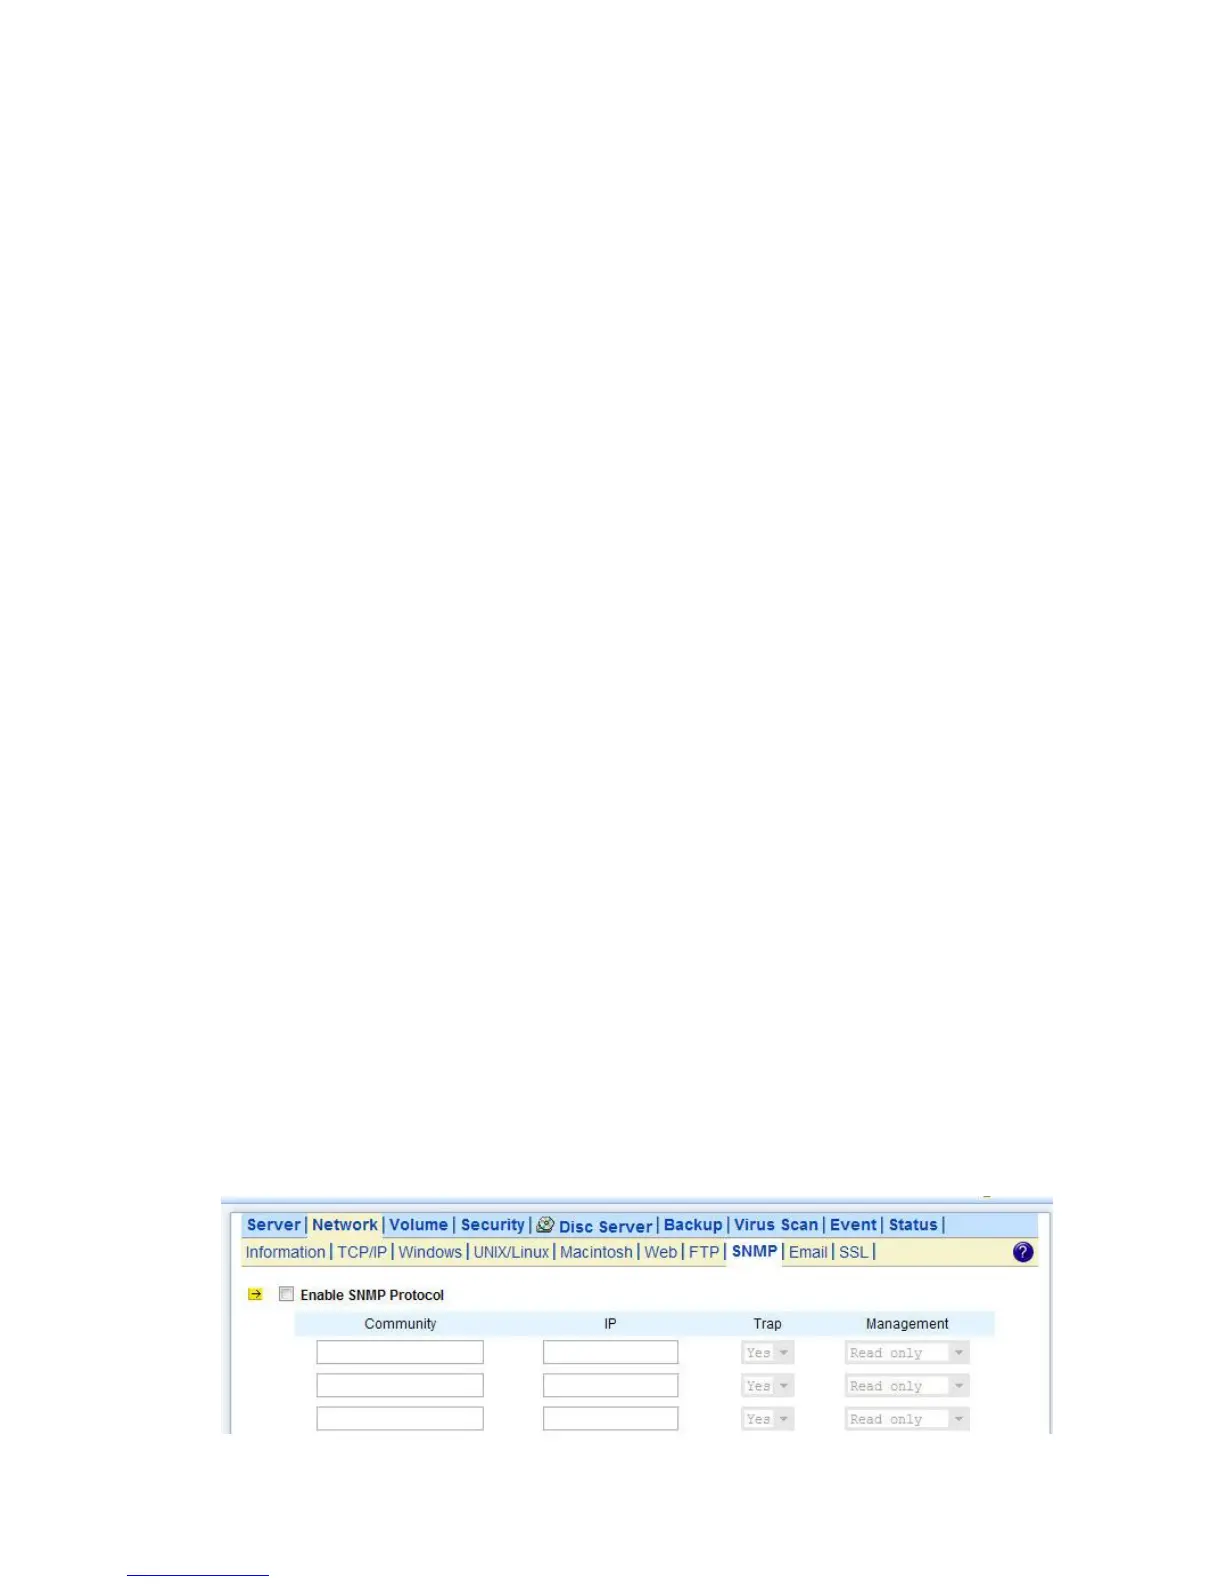
Configuring SNMP Settings
1. Click the Enable SNMP Protocol checkbox to enable SNMP accessing.
2. Enter a Community name.
3. Enter the IP address of the management console.
4. Select Yes from the pull down menu if you want the corresponding management console to receive
trap message.
5. Select Read Only from the pull down menu if you want the corresponding management console
has read only privilege.
6. Repeat Step 2 to Step 5 if more than one management console is available. NAS server supports
up to 4 management consoles.
7. Enter the location information of your NAS server.
8. Enter the name of the contact person who has the management information of the NAS server.
9. You can check the checkbox beside Send a test trap to send sample trap information to validate
your setting of the SNMP settings.
10. Click Apply to save the setting.