68
location means any user-defined path. Please use the Select Path hyperlink to specify the path. It
will restore files and the full directory hierarchy under the specified path.
7. Specify whether to restore the ACL settings together with the files.
8. Specify whether to overwrite the existing files with the backup files.
9. Click the Apply button to start to restore.
Checking Task Progress, Viewing Logs
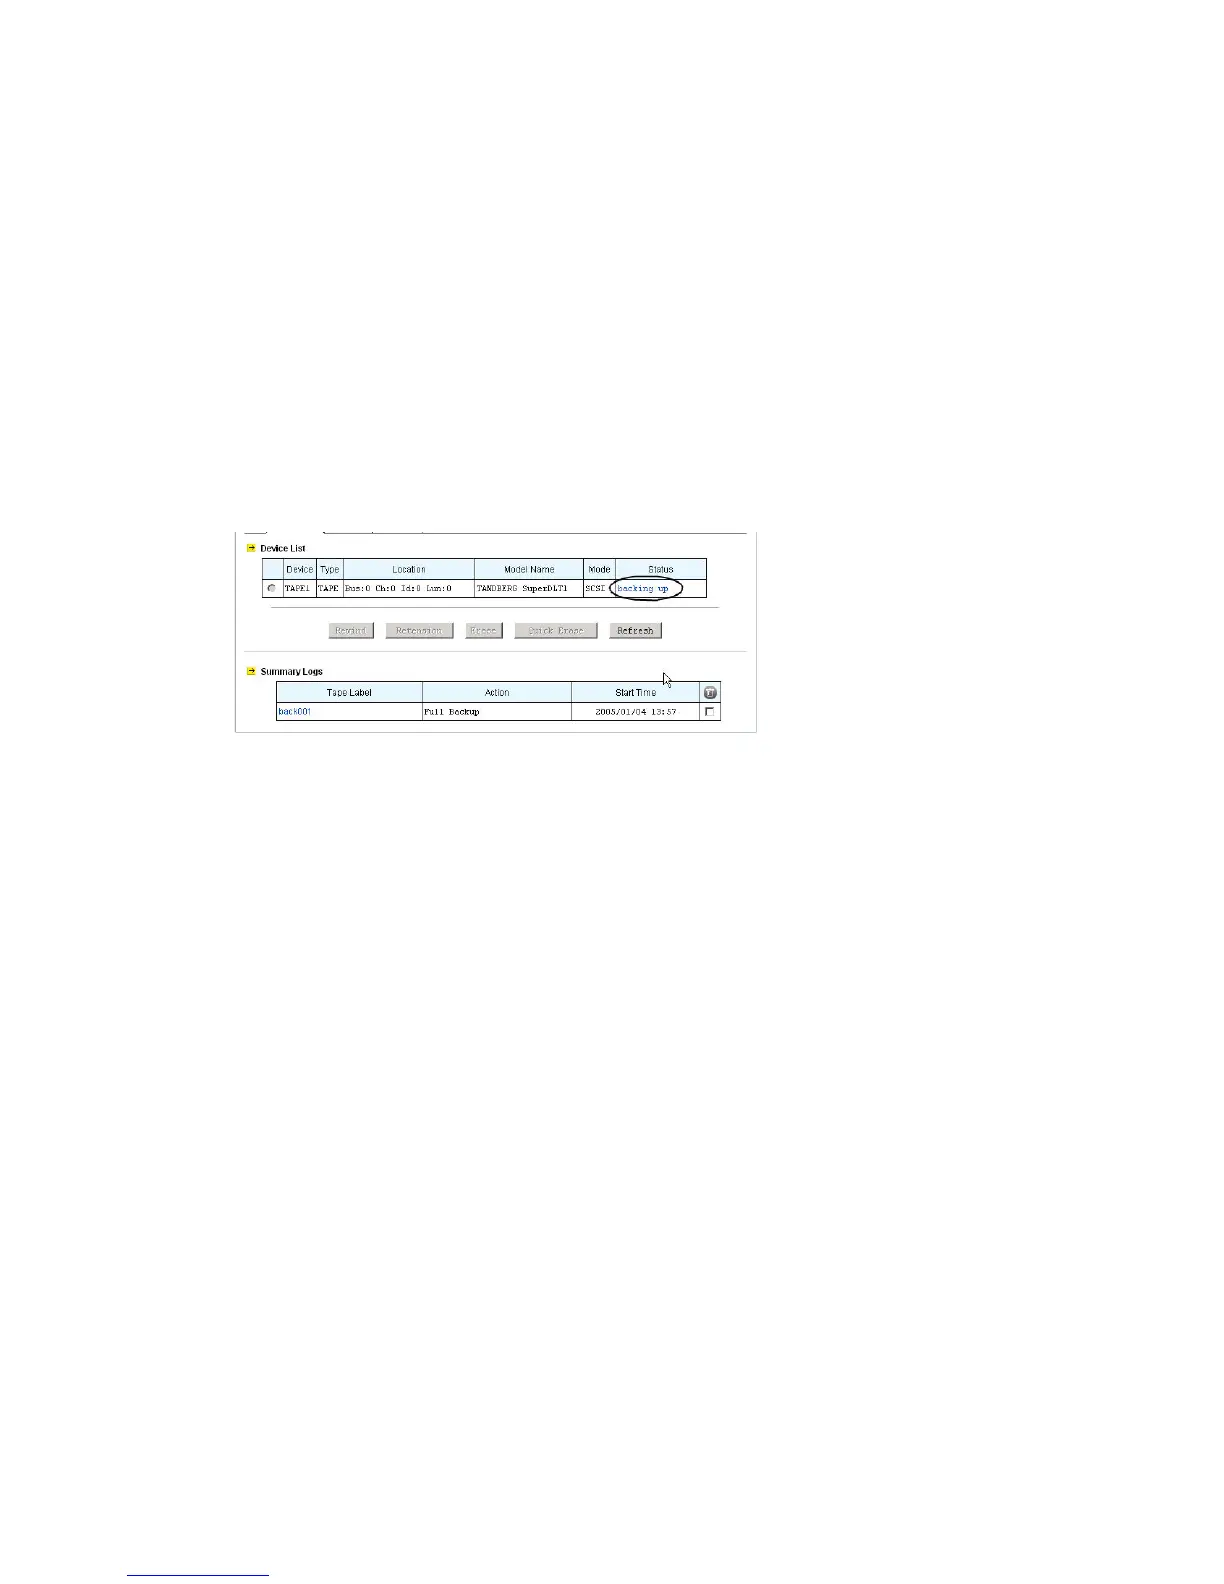
When a tape task is running, you can view its progress on the Summary page. On the upper
Summary page is a list of tape drives. Any task currently running will be shown as a hyperlink in the
Status column. Click a hyperlink to watch task progress and details. It shows Ready without
hyperlinks if there is no running task.
After a backup or restoring task finishes, it will keep summary logs in the system folder. On the lower
Summary page are the logs. They keep records of the statistics and errors of the backup/restoring
tasks ever executed. Click a hyperlink in the Tape Label column to see its details. To delete logs,
please check the check-boxes to the right and click the Delete icon.
9.3 Using a Tape Library
First, set up the tape library so that it can be controlled by software. Please refer to the tape library’s
instruction manuals for details. Then, connect the tape library to the NAS server with a SCSI cable.
The NAS server supports up to two tape libraries.
The tape library support is an optional feature on 1U/2U.
Managing Devices, Tapes and Tape Cleaning
When the NAS server starts up, it will initialize the tape library. It might take a while. To view the status,
please open the administration page and enter Backup→Tape Library→Devices. When it finishes
the initialization, you will see a page as below.