45
6.5 Creating Share and Assigning Share Permissions
You can share a specific folder in any volume created in the NAS server with others on the network.
When you create a share, you can assign the permission to the share that other users will be allowed
or denied when they access the share over the network.
To create a new share:
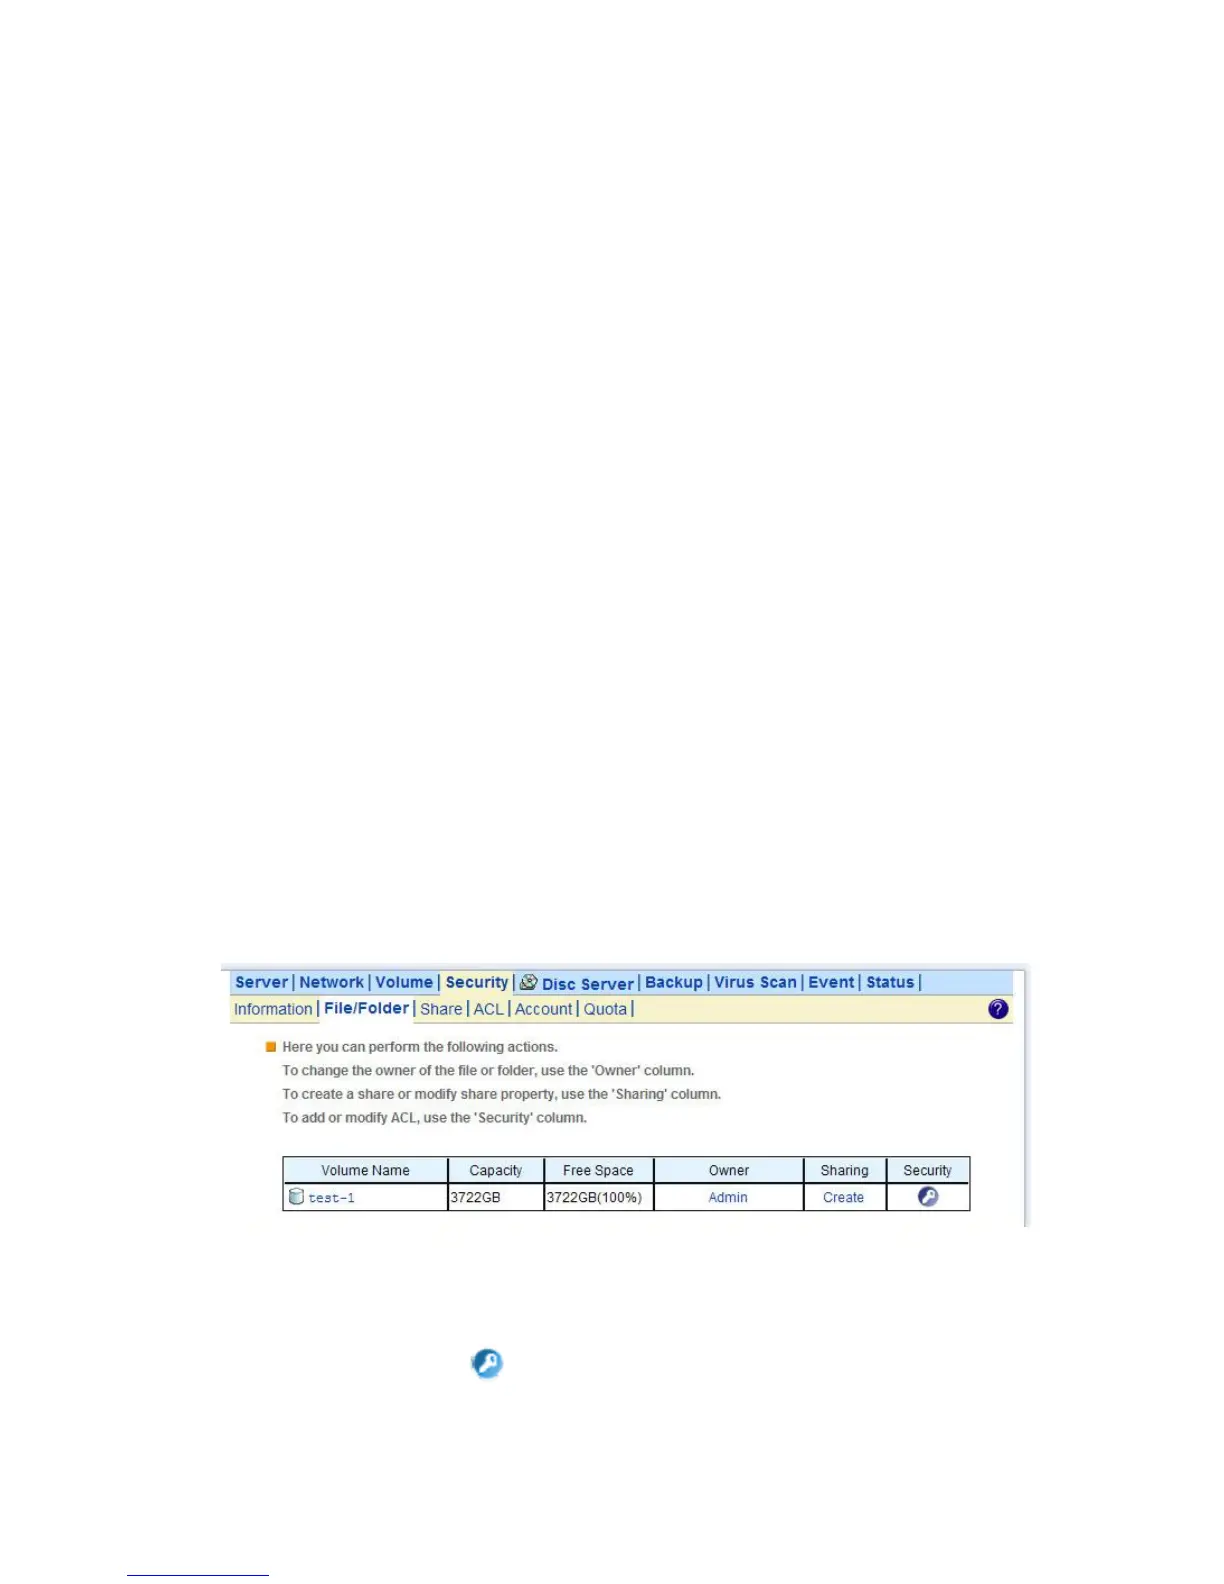
1. Go to Security→File/Folder menu.
2. Locate the volume you want to share on the volume lists.
3. Click the Create hyperlink to share the corresponding volume. Then go to Step 9.
4. If you want to share an existing folder under a volume, click the volume name hyperlink. Click the folder
hyperlink until you reach the desire directory. Then, go to Step 8.
5. If you want to share a new folder under a volume, click the folder hyperlink until you reach the desire
directory path.
6. Click the Create Folder button to create a new folder.
7. Enter a new folder name and click Apply.
8. Click the Create hyperlink to share the corresponding folder.
9. Enter a unique share name in the Share Name field. The share name is what user will see when they
connect to this share. The actual name of the folder does not change.
10. To add a comment about the share, type the text in Comment.
11. To limit the number of users who can connect to the share, on the User limit, click Allow and enter a
number of users.
12. Select the protocols you want to share.
13. Click Apply to save the setting.
To assign share permission of a share for local account and domain account:
1. Go to Security→Share menu.
2. Locate the share and click to assign or modify share permission to this share.
3. Highlight the users or groups from user pool and click users checkbox.