Using the Main Menu14
14.4 Network
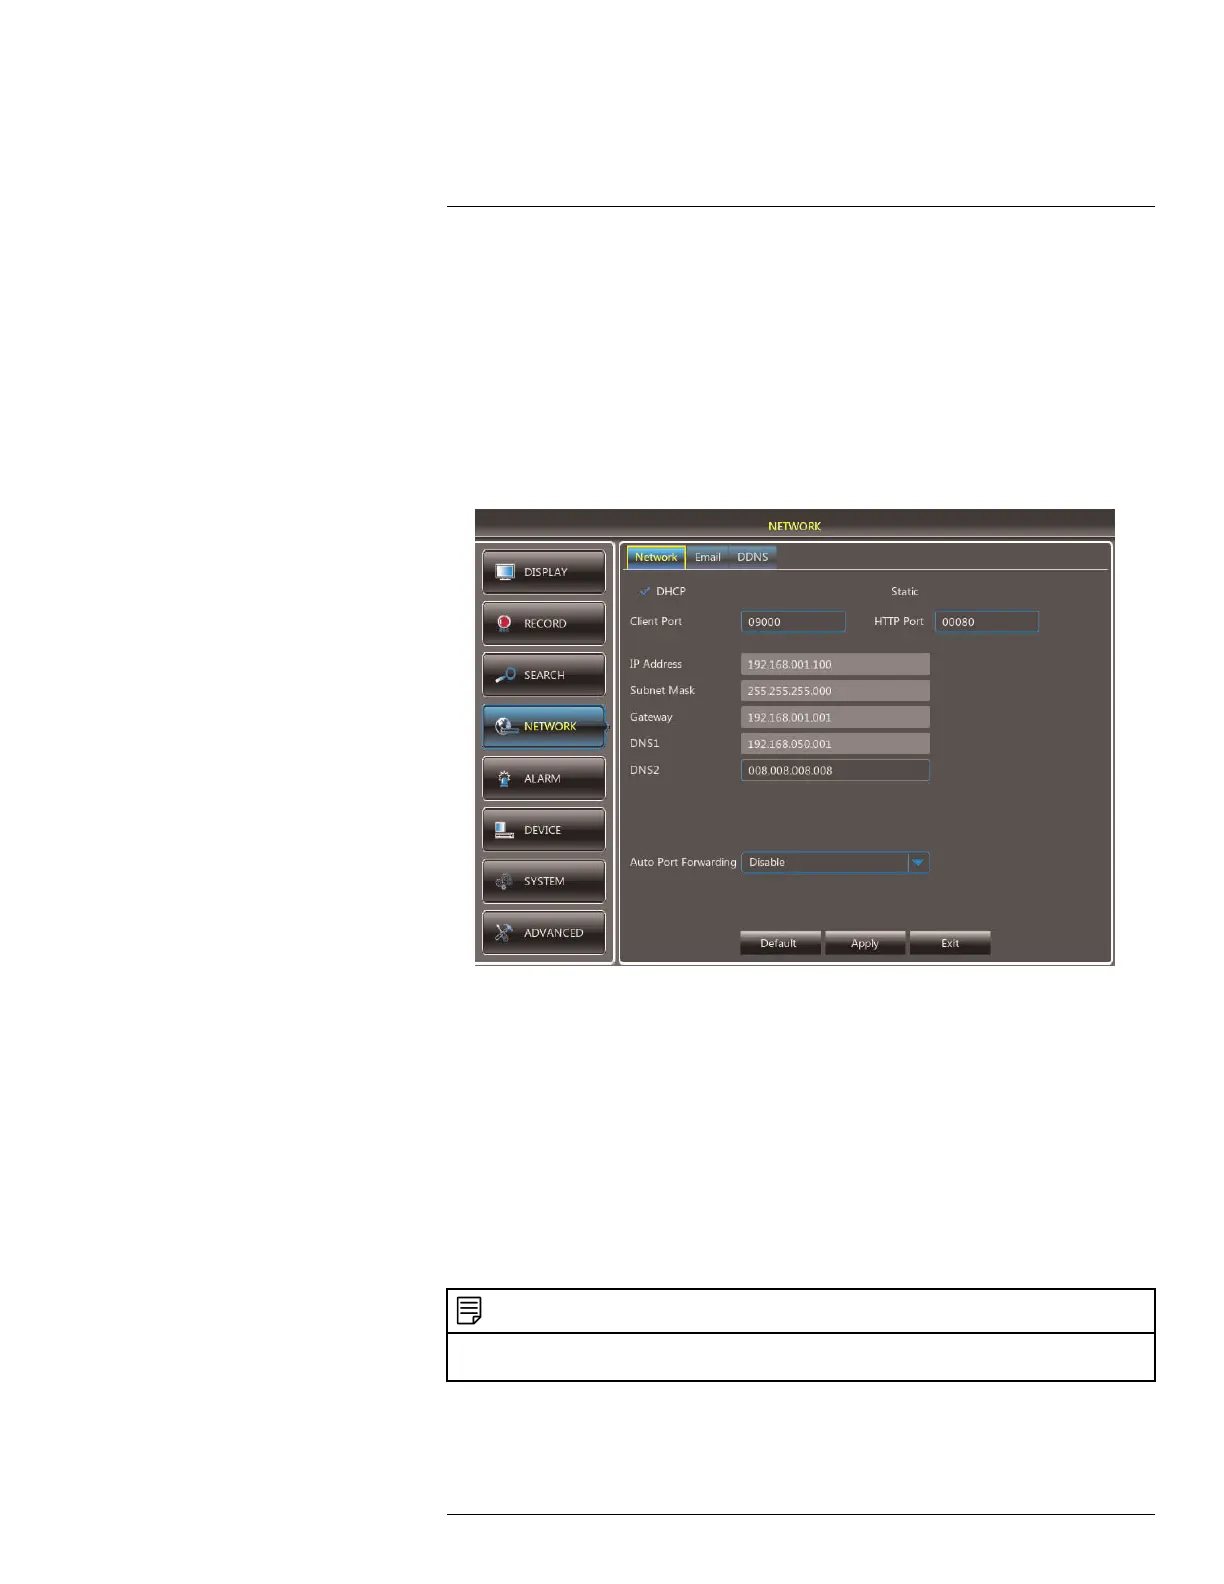
The Network menu allows you to configure network settings and email alerts.
14.4.1 Configuring Network Type: DHCP & Static IP
The system has the ability to operate in DHCP mode and Static IP mode.
To configure DHCP and Static IP settings:
1. Select the Network tab.
2. Select DHCP or Static. If you select DHCP, the router automatically assigns an IP to
your DVR.
If you select Static, click the field beside IP Address, and enter in the IP address of your
choice.
• Enter your custom Subnet Mask, Gateway, DNS1 and DNS2 using the mouse.
• You must assign the IP in your router that you wish to make static. For example, if
you assign 192.168.2.89 as the static IP in the DVR, you must assign 192.168.2.89
in your router as a static IP as well. Consult your router’s user’s manual for details.
3. Click Apply to save your settings.
4. Right-click until you exit all menus. You will be prompted to restart.
14.4.2 Enabling Auto Port Forwarding
Auto Port Forwarding allows the DVR to open required ports on your router. This feature
only works on certain router models.
NOTE
Port forwarding is not required to use the Lorex Stratus Connectivity service. For details on setting up re-
mote connectivity, see 15 Connecting to Your DVR Over the Internet on PC or Mac, page 63.
To enable Auto Port Forwarding:
1. Select the Network tab.
#LX400080; r.36800/36800; en-US
44

 Loading...


