28
Using the Main Menu
Format HDD
If you replace the pre-installed hard drive, the
new drive
must
be formatted in order to
function properly with the system.
To format the hard disk:
1. From the Main Menu, click . The
Record menu opens.
2. Click Format HDD.
3. Click Yes t
o format
the hard disk or click
No to cancel.
Please allow a few moments for formatting to
take place and the syst
em to reset.
Storage Calculator
A storage calculator shows the approximate
maximum continuous recording time available
on the hard drive based on your settings. Use
the storage calculator to help maximize your
hard drive space.
NOTE:
The estimation from the Storage
Calculator is based
only
on Continuous
Recording, not motion or alarm recording.
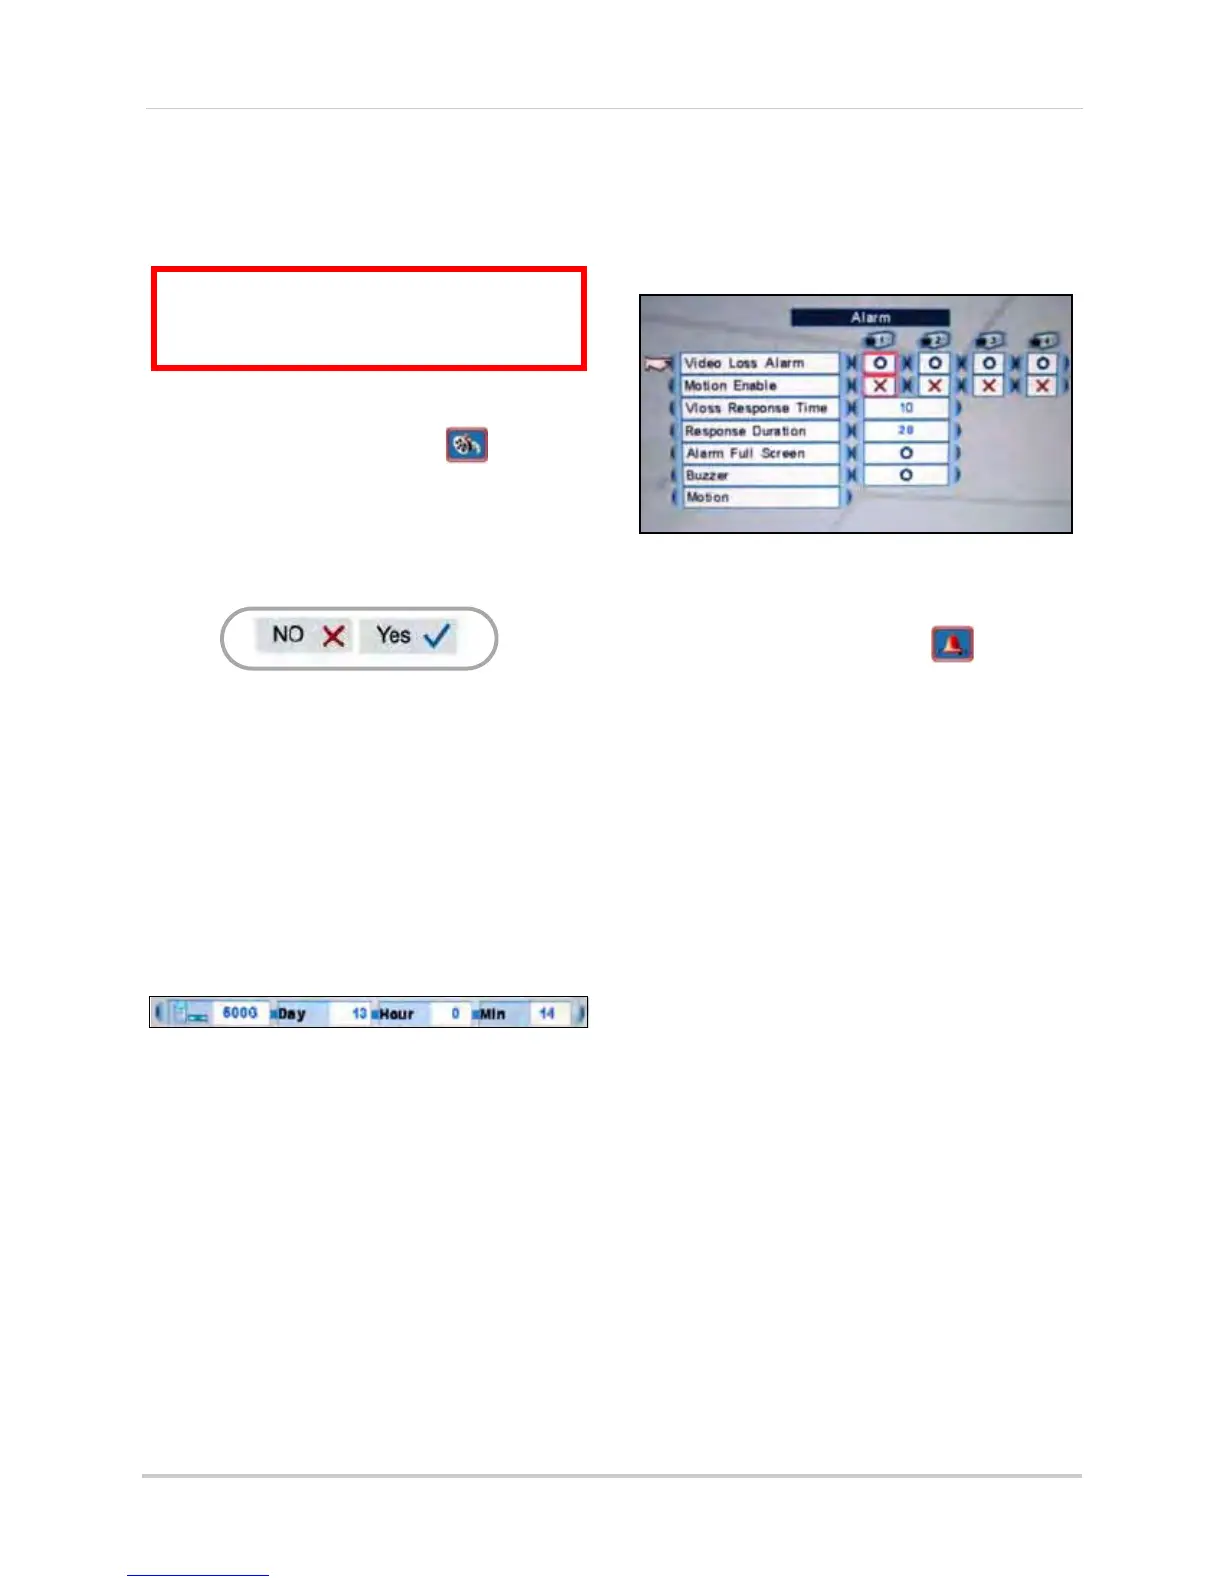
Alarm
4-channel
Configure alarm and motion detection
settings.
To configure the alarm settings:
1. From the Main Menu, click . The
Alarm menu opens.
2. Click and edit the following:
• Video Loss Alarm: Click under each
c
amera and select either O to enable
the VLoss alarm, or X to disable it. If
enabled, the system will sound an
alarm whenever one of the connected
channels incurs a loss of video.
• Motion Enable: Click under each
c
amera and select O to enable motion
detection or select X to disable it. If
enabled, the camera can record in
specific recording parameters when it
detects motion.
NOTE:
With Motion Detection enabled, the
text, "Motion" appears on-screen
(full-screen and quad split-screen)
whenever a motion event is triggered.
• VLoss Response Time: Select the time
(in seconds) for the system to record
prior to a triggered event: 0, 3, 5, 10, 30,
60, 120, 180, or Infinite.
• Response Duration: Select the time (in
seco
nds) for the system to record after
a triggered alarm or motion event:
1~255.
NOTE:
The Response Duration also applies to the
accompanying message and/or buzzer.
ATTENTION: Formatting the HDD erases
all data
on the hard disk.
This step cannot
be undone
.
Figure 12.8 Storage calculator
Figure 12.9 Storage calculator
Figure 13.0 Alarm menu (4-channel)