45
Using DVR Netviewer
2. Under Bitrate, select a bitrate speed. The
higher the bitrate, the better the quality of
the video stream. Adjust the bitrate speed
to best suit your connection.
3. Click Submit t
o sav
e your settings to the
system.
PPPoE
4-channel
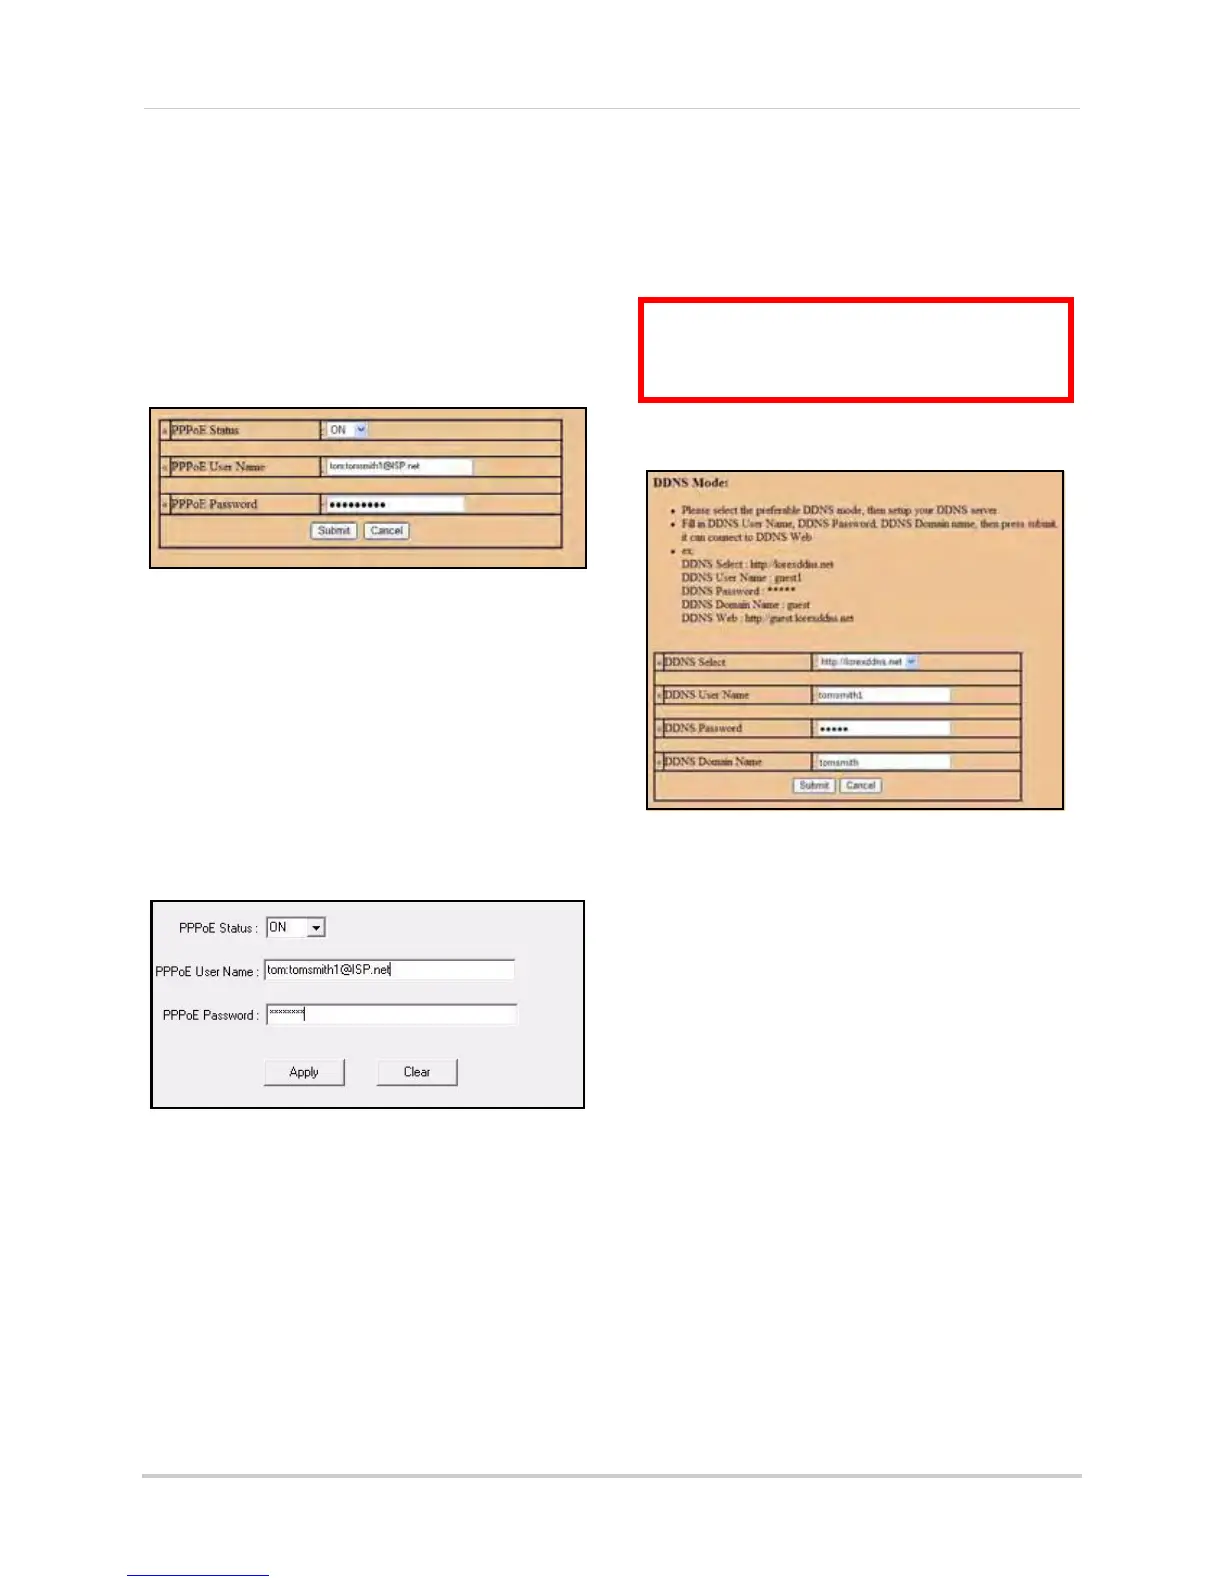
To change PPPoE settings:
1. Under Network, click PPPoE.
2. Under PPPoE status, select ON.
3. In the corresponding text fields, enter your
PPPoE Username and password.
4. Cl
ick Submit to sav
e your settings or click
Cancel to exit without saving.
8/16-channel
To change PPPoE settings:
1. Click the PPPoE tab.
2. Under the PPPoE Status, select ON.
3. In the corresponding text fields, enter your
PPPoE Username and password.
4. Click Apply to save your settings.
DDNS
Lorex provides a free DDNS service for use
with your DVR. A DDNS account allows you to
set up a web site address that points back to
your Local Network.
4-channel
Visit http://lorexddns.net to register for
Lorex’s free DDNS service. For more details on
setting up a free Lorex DDNS
account, see
“Setting Up DDNS Service” on page 56.
NOTE:
You must register for Lorex’s free DDNS
service prior to configuring DDNS settings.
To change DDNS settings:
1. Under Network, click DDNS.
2.
Under DDNS Select, select http://
lorexddns.net
3. In the c
orresponding text fields, enter your
DD
NS username and pas
sword.
NOTE:
Obtain this information from the
confirmation email after registering for the free
Lorex DDNS service.
Figure 23.5 PPPoE menu (4-channel)
Figure 23.6 PPPoE menu (8/16-channel)
ATTENTION: You
MUST
enter your DDNS
information
LOCALLY
before attempting
remote access.
Figure 23.7 DDNS setup (4-channel)