Operation 19
Lockout Diagnostic
1. Press Menu → Back → Enter → Next → Next → Enter to go to menu 5C1) White wire… The
page shows the lockout condition of the output (alarm or safe) and the self-test (pass or fail). To
temporarily invert the lockout relay press Up or Down.
2. Press Next to go to menu 5C2) Green wire diagnostic.
3. Press Next to go to menu 5C3) Orange wire diagnostic.
4. Press Exit three times to return to the operation display.
Display Diagnostic
1. Press Menu → Back → Enter → Next → Next → Next → Enter to go to menu 5D1) Time and
Date. The page shows the current time and date according to the GS550 internal clock.
2. Press Next to go to menu 5D2) Time clock battery. Self-test pass or fail.
3. Press Next to go to menu 5D3) External power voltage.
4. Press Next to go to menu 5D4) Display internal temperature.
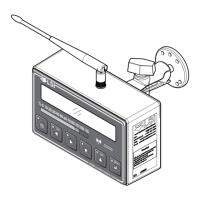
5. Press Next to go to menu 5D5) GS550 base station id. The base station id should be the same
as the GS550 display serial number printed on the left side of the box
6. GS550-03 portable displays only: press Next to go to menu 5D6) Battery level. The battery
level of the onboard rechargeable battery pack is indicated.
7. Press Next to go to menu 5D7) Radio. FCC, IC indicates Federal Communications Commis-
sion (U.S.A.) and Industry Canada certification, CE indicates European Community certifica-
tion. The frequency used by the system network is indicated on the second line.
8. Press Exit three times to return to the operation display.
Digital Input Diagnostic
1. Press Menu → Back → Enter → Back → Enter to go to menu 5E4) Blue Wire. The page
shows the blue wire digital input status.
2. Press Exit three times to return to the operation display.
SkyAzúl, Equipment Solutions

 Loading...