Page 8-66 LTV
®
1200/1150 Ventilator Service Manual p/n 18603-001, Rev. C
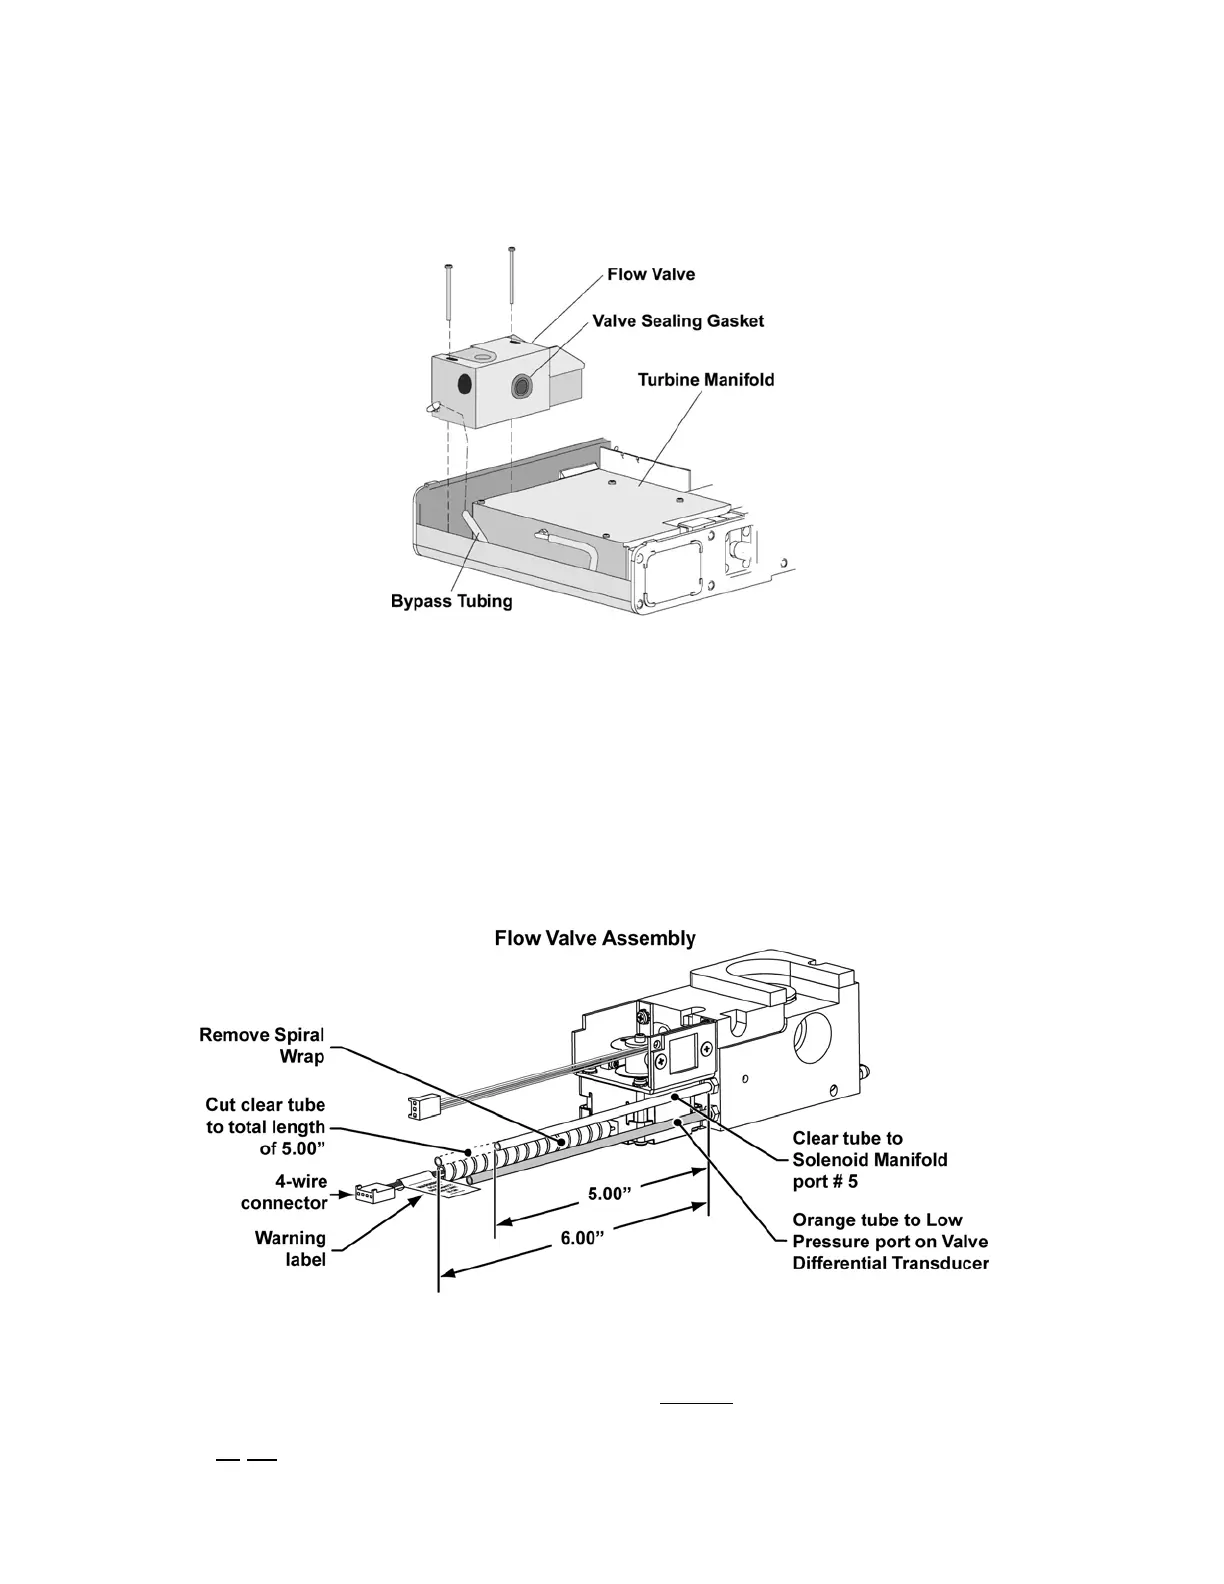
6) Remove the 2 screws from the body of the flow valve.
7) Lift the flow valve up and out of the ventilator case.
8) Disconnect the bypass tubing from the connector at the base of the flow valve.
Flow Valve preparation:
1) If replacing the same Flow Valve, skip to the next section.
2) If installing a new Flow Valve, P/N 10019, measure the length of the clear silicone tube
attached to the port above the orange silicone tube (see illustration).
• new Flow Valve assemblies are shipped with 6.00” clear silicone tubing to
accommodate use on most LTV
®
ventilators
• For use with LTV
®
1200/1150 ventilators, the tube must be cut to a total length of
5.00” ± 0.250” prior to installing the new Flow Valve
3) New Flow Valve assemblies are also shipped with Spiral Wrapping on the 4-wire
connector cable. For use with LTV
®
1200/1150 ventilators, the Spiral Wrap must be
gently removed prior to installing the Flow Valve (unwrap
, do not pull on, or strain the
wiring).
• do
not remove the Warning label from the 4-wire connector cable