p/n 18603-001, Rev. C LTV
®
1200/1150 Ventilator Service Manual Page 8-97
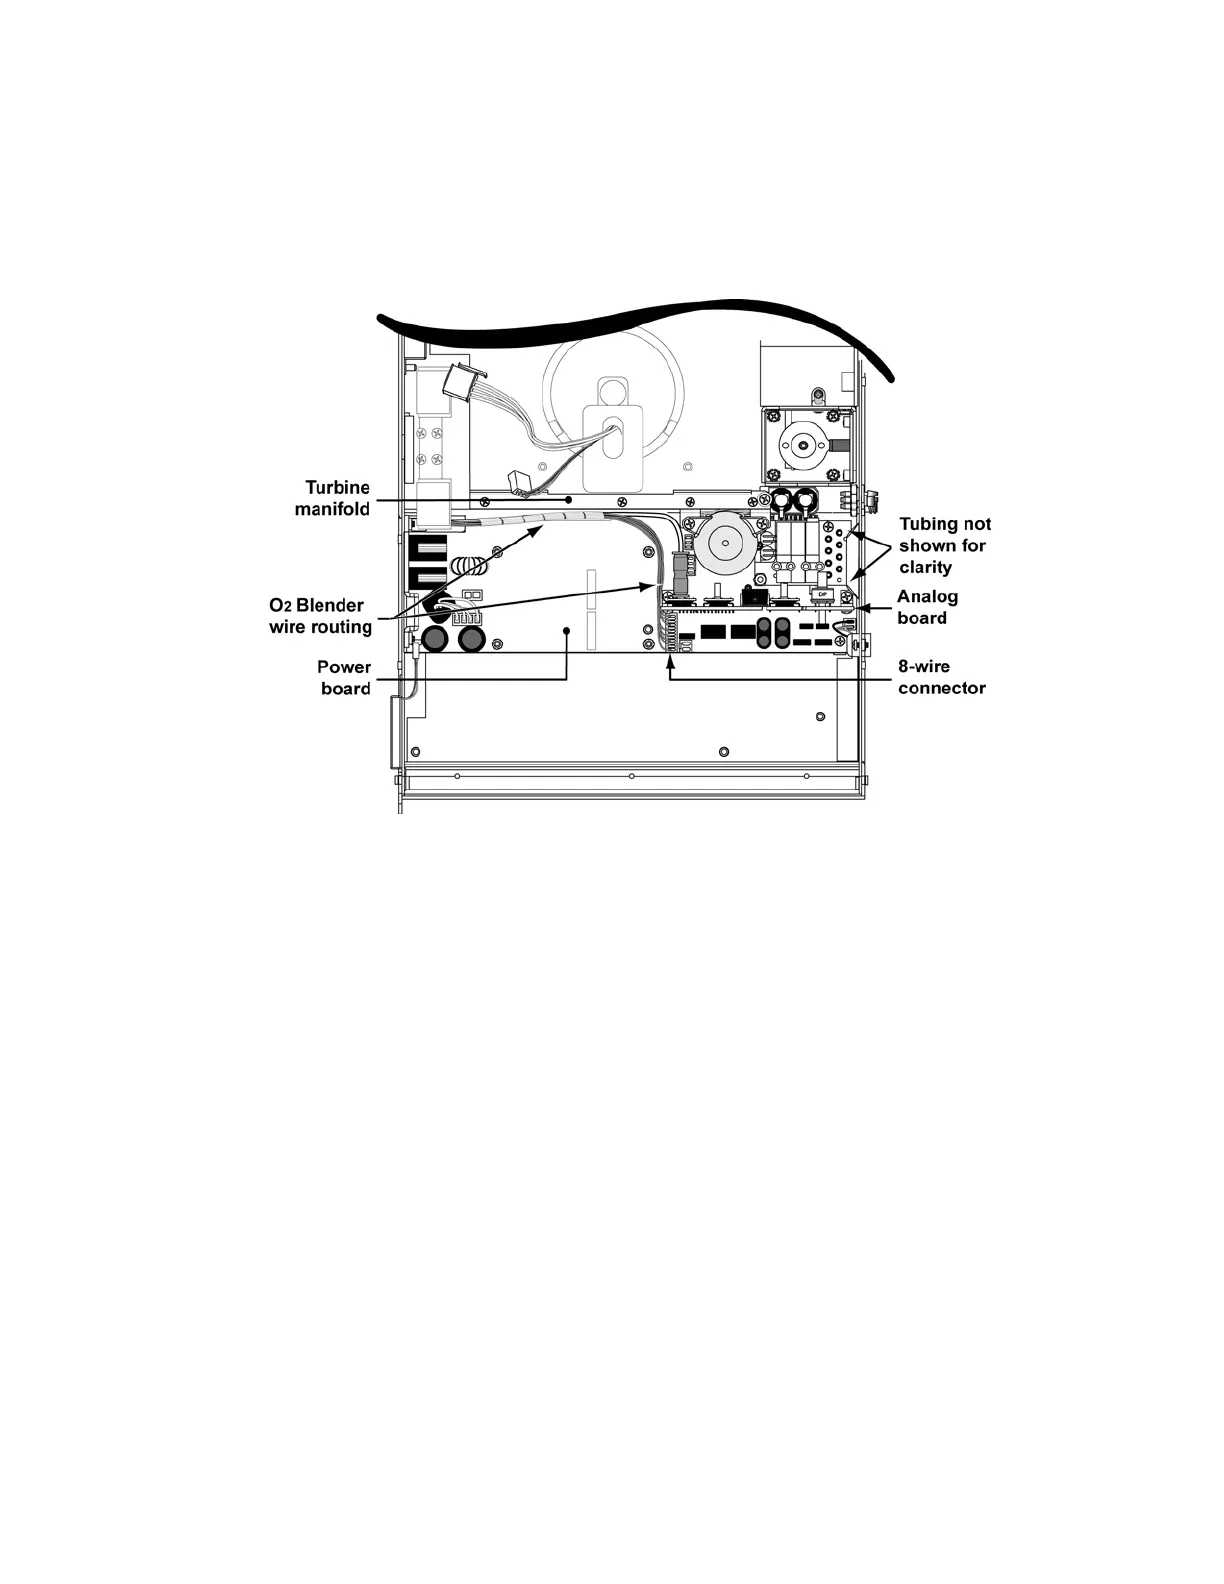
5) Connect the 8-wire connector from the oxygen blender to the power board. The
connector is keyed to fit in only one direction and will snap into place when properly
connected (LTV
®
1200 only).
6) Tuck the wrapped wires and oxygen tube down along the side of the turbine manifold
against the power board (LTV
®
1200 only).
7) Replace the motor board (LTV
®
1200 only) (see instructions on page 8-90).
8) Connect the 3-wire and 5-wire connectors from the turbine to the motor board. The
connectors are keyed to fit in only one direction and will snap into place.
9) Replace the single (1) screw and washer attaching the solenoid mount assembly to the
turbine manifold spacer. See instructions on page 8-124. Torque the screw to 120 in-oz
(0.84Nm).
10) Inspect the orange seal on the side of the flow valve. If it is damaged, remove and
replace it with a new seal as follows: Peel the old seal off the flow valve. Remove any
old adhesive from the flow valve using a mild detergent and dry the valve side. Remove
the protective backing from the flow valve seal and press it into place.
11) Replace the flow valve (see instructions on page 8-65).