p/n 18603-001, Rev. C LTV
®
1200/1150 Ventilator Service Manual Page 8-117
To replace the Solenoid Manifold:
1) Remove the back panel of the
ventilator and disconnect the
internal battery cable (see
instructions on page 8-28).
2) Disconnect the 4-wire flow valve
connector from the motor board.
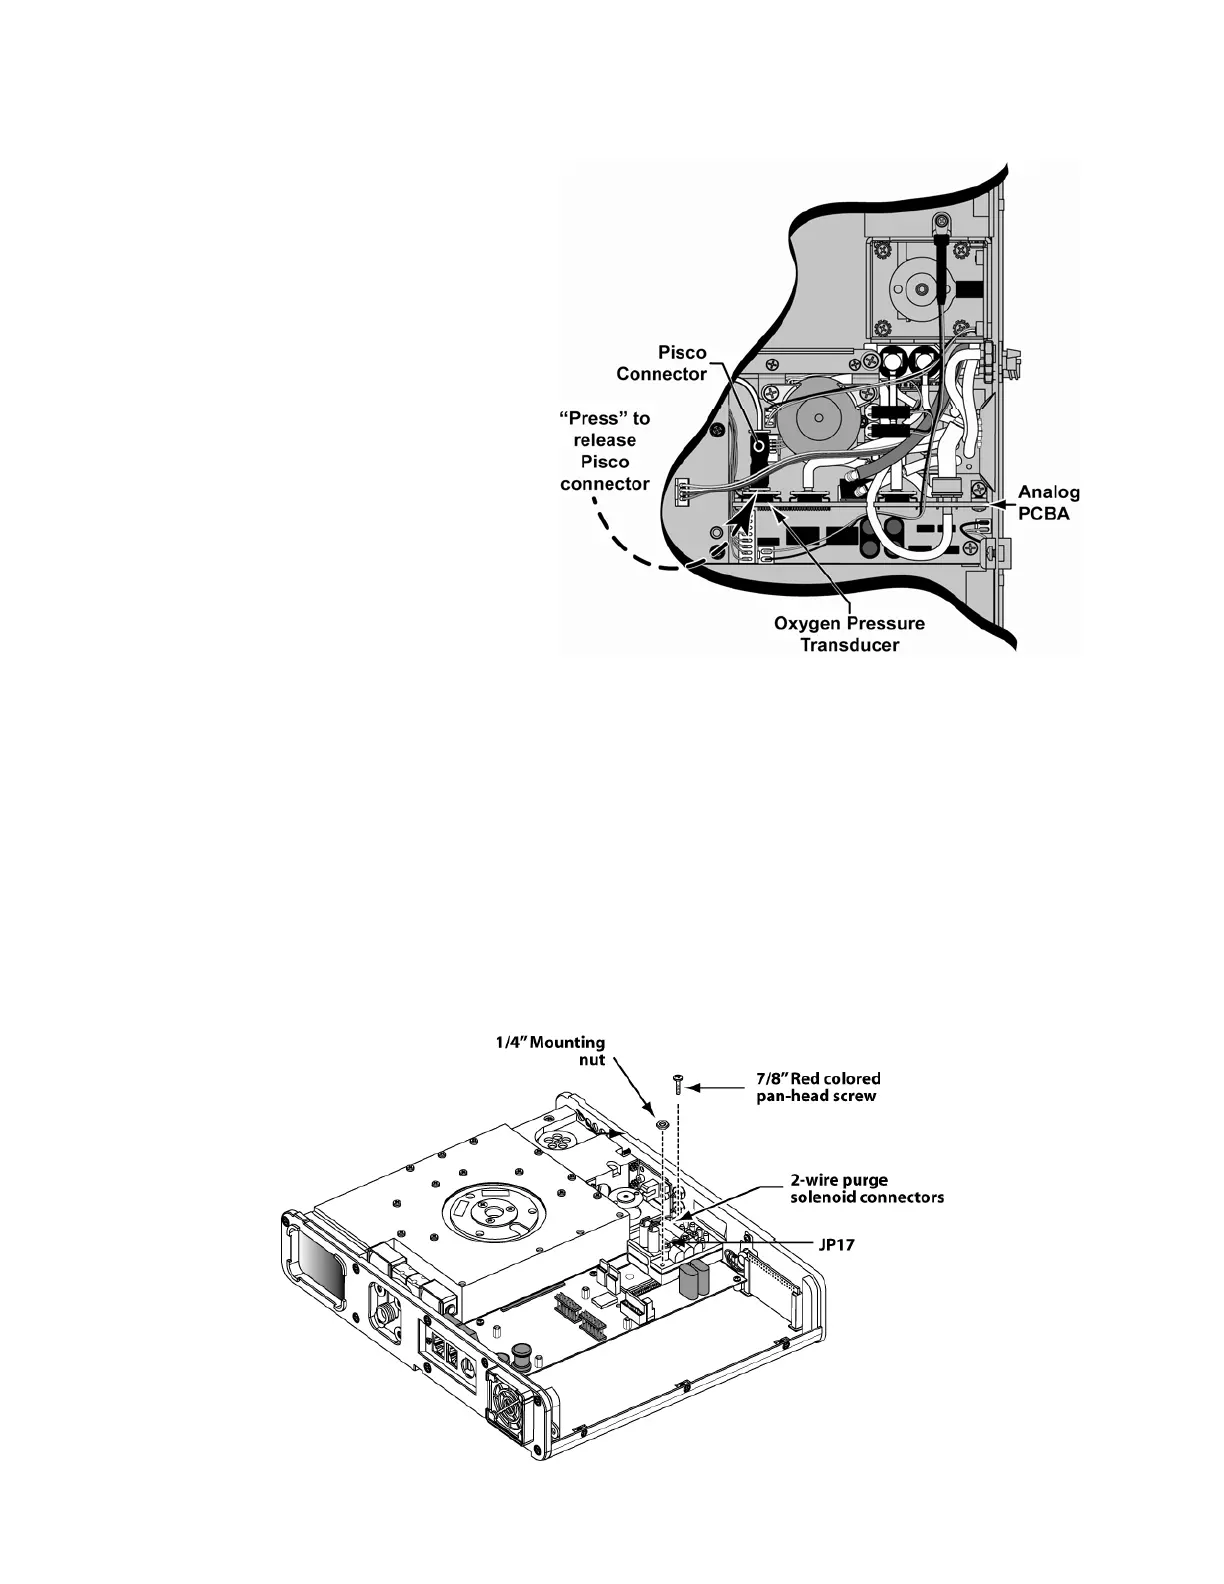
3) Disconnect the Pisco connector
from the analog board (LTV
®
1200 only).
4) Disconnect the 3-wire flow valve
connector from the power
board.
5) Disconnect the 2-wire
thermistor cable from the power
board.
6) Disconnect all flexible tubing
from the analog board (see
page 8-60 for list).
7) Remove the analog board. See
instructions on page 8-57.
8) Remove the two (2) screws securing the accumulator to the turbine manifold spacer.
9) Disconnect the two 2-wire connectors from the Purge Solenoids.
10) Remove the flow valve assembly (see instructions on page 8-65).
11) Disconnect the three (3) flexible tubes from the Flow Xducer and Exh Valve fittings on
the side panel of the ventilator.
12) Loosen the one (1) screw with washer that secures the solenoid mount assembly to the
spacer.
13) Remove the four (4) screws attaching the turbine manifold spacer, remove the spacer
and set aside away from the ventilator.
14) Disconnect the flexible tube from port #1 of the solenoid manifold.
15) Remove the mounting screw and hex-nut from the solenoid manifold.