OPERATOR'S STATION
Header Controls (continued)
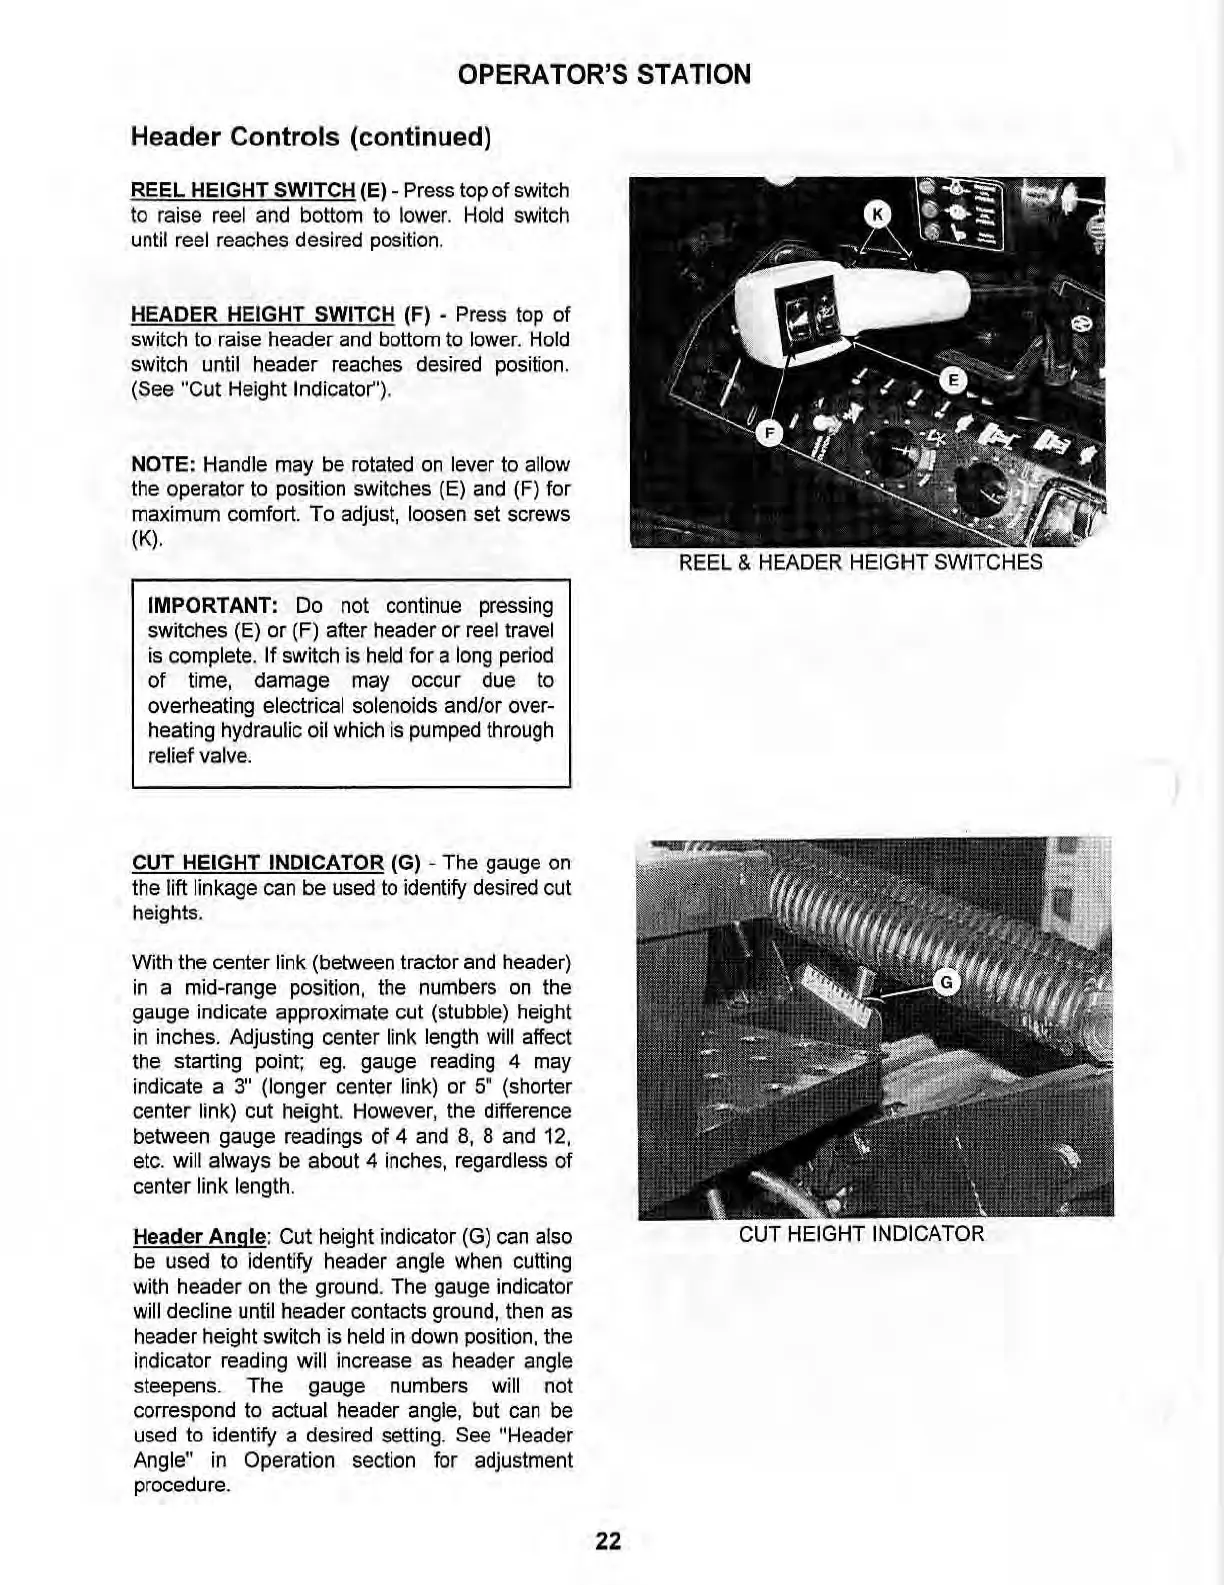
REEL HEIGHT SWITCH (El -
Press
top of switch
to raise reel and bottom
to
lower.
Hold
switch
until reel reaches desired positi
on.
HEADER HEIGHT SWITCH (F) • Press
top
of
switch to raise header
and
bottom
to
lower.
Hold
switch until header
reaches
desired
position.
(See "Cut Height Indicator').
NOTE: Handle may be rotated on lever to allow
the operator to position switches (E) and (F)
for
maximum comfort.
To
adjust, loosen set screws
(K).
IMPORTANT:
Do
not continue
pressing
switches (E)
or
(F) after header
or
reel travel
is
complete. If switch is
held
for a
long
period
of
time,
damage
may
occur
due
to
overheating electrical solenoids and/or over-
heating hydraulic
oil
which
is
pumped
through
relief valve.
CUT HEtGHT INDICATOR (G) . The gauge
on
the lift linkage can
be
used to identify desired cut
heights.
With the center link (between tractor and header)
in
a mid-range position, the numbers
on
the
gauge indicate approximate cut (stubble) height
in
inches. Adjusting center link length will affect
the starting point; ego gauge reading 4 may
indicate a
3" (longer center link)
or
5"
(shorter
center link) cut height. However, the difference
between gauge readings
of
4 and
8,
8 and 12,
etc.
will always be about 4 inches, regardless
of
center link length.
Header
Angle:
Cut
height indicator (G) can also
be used to identify header angle when cutting
with header on the ground. The gauge indicator
will decline until header contacts ground, then as
header height switch is held
in
down position, the
indicator reading
will increase as header angle
steepens.
The
gauge numbers will not
correspond to actual header angle, but can be
used to identify a desired setting.
See "Header
Angle" in Operation section for adjustment
procedure.
REEL & HEADER HEIGHT SWITCHES
22