169441 172 Revision D
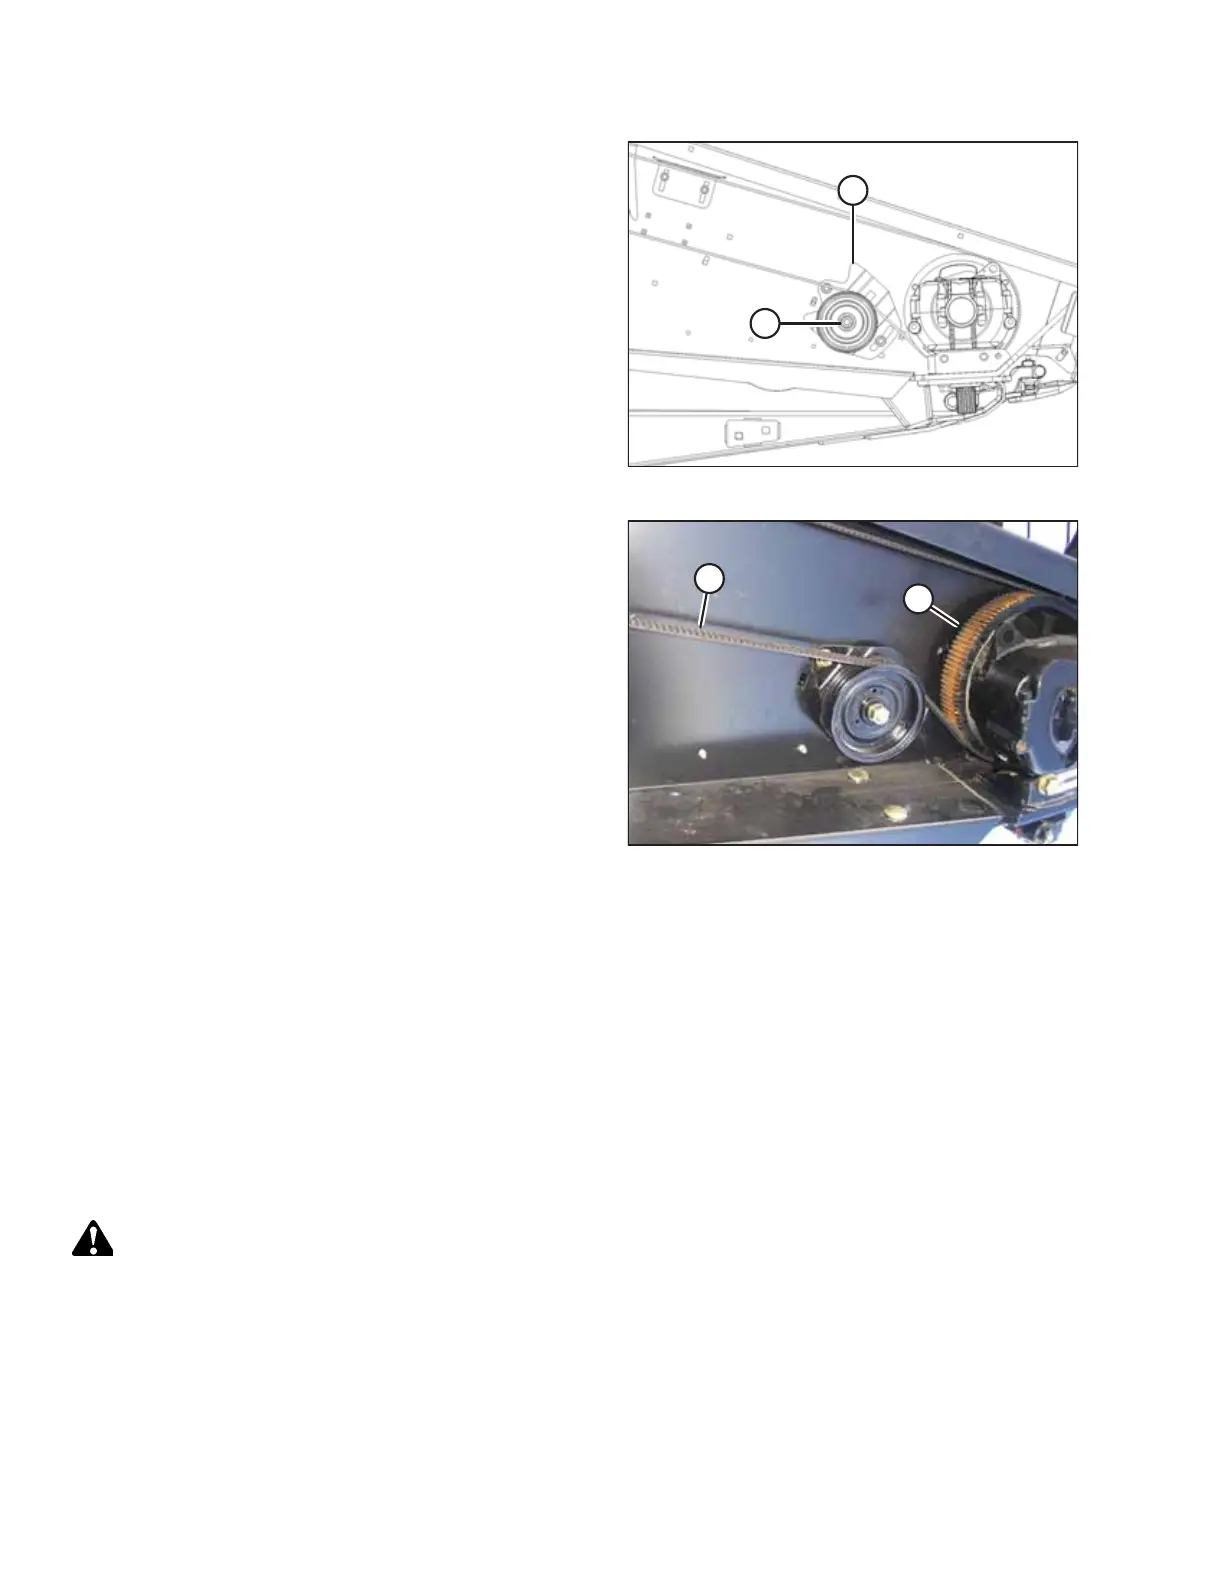
Figure 4.106: Right Knife Drive Box and Idler Pulley
7. Rotate the idler pulley bracket (A) down and slide the idler
pulley up by hand to remove most of the belt slack. Tighten
nut (B).
8. Check that the timing belts are properly seated in the
grooves on both the driver and driven pulleys.
9. Check for correct knife timing by rotating the drive slowly
by hand and observing the knives where they overlap at the
centre of the header.
IMPORTANT:
The knives must move in opposite directions and begin
moving at exactly the same time.
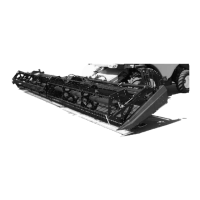
Figure 4.107: Right Knife Drive Box and Idler Pulley
10. If the knives do not begin moving at the same time, loosen
the right side drive belt (A) just enough to allow the belt to
be repositioned to the next cog(s) and proceed as follows:
a. If the right knife leads the left knife, rotate the RIGHT
SIDE driven pulley (B) clockwise.
b. If the right knife lags the left knife, rotate the RIGHT
SIDE driven pulley (B) counterclockwise.
11. Re-tension the right side drive belt as per above, ensuring that the drive pulleys do not rotate.
IMPORTANT:
Do NOT use the adjuster bolt at the drive pulley to adjust timing belt tension.
12. Recheck the timing.
13. Close the endshield. For instructions, refer to 4.3.2 Closing Hinged Endshields, page 117.
4.8.2 Knife Drive Box
Knife drive boxes convert rotational motion into the reciprocating motion of the knife, and are belt driven by a hydraulic
motor. There is one knife drive box on single-knife headers and two knife drive boxes on double-knife headers.
CAUTION
To avoid personal injury, before servicing machine or opening drive covers, refer to 4.1 Preparing Machine for
Servicing, page 113.
MAINTENANCE AND SERVICING