215620 89 Revision A
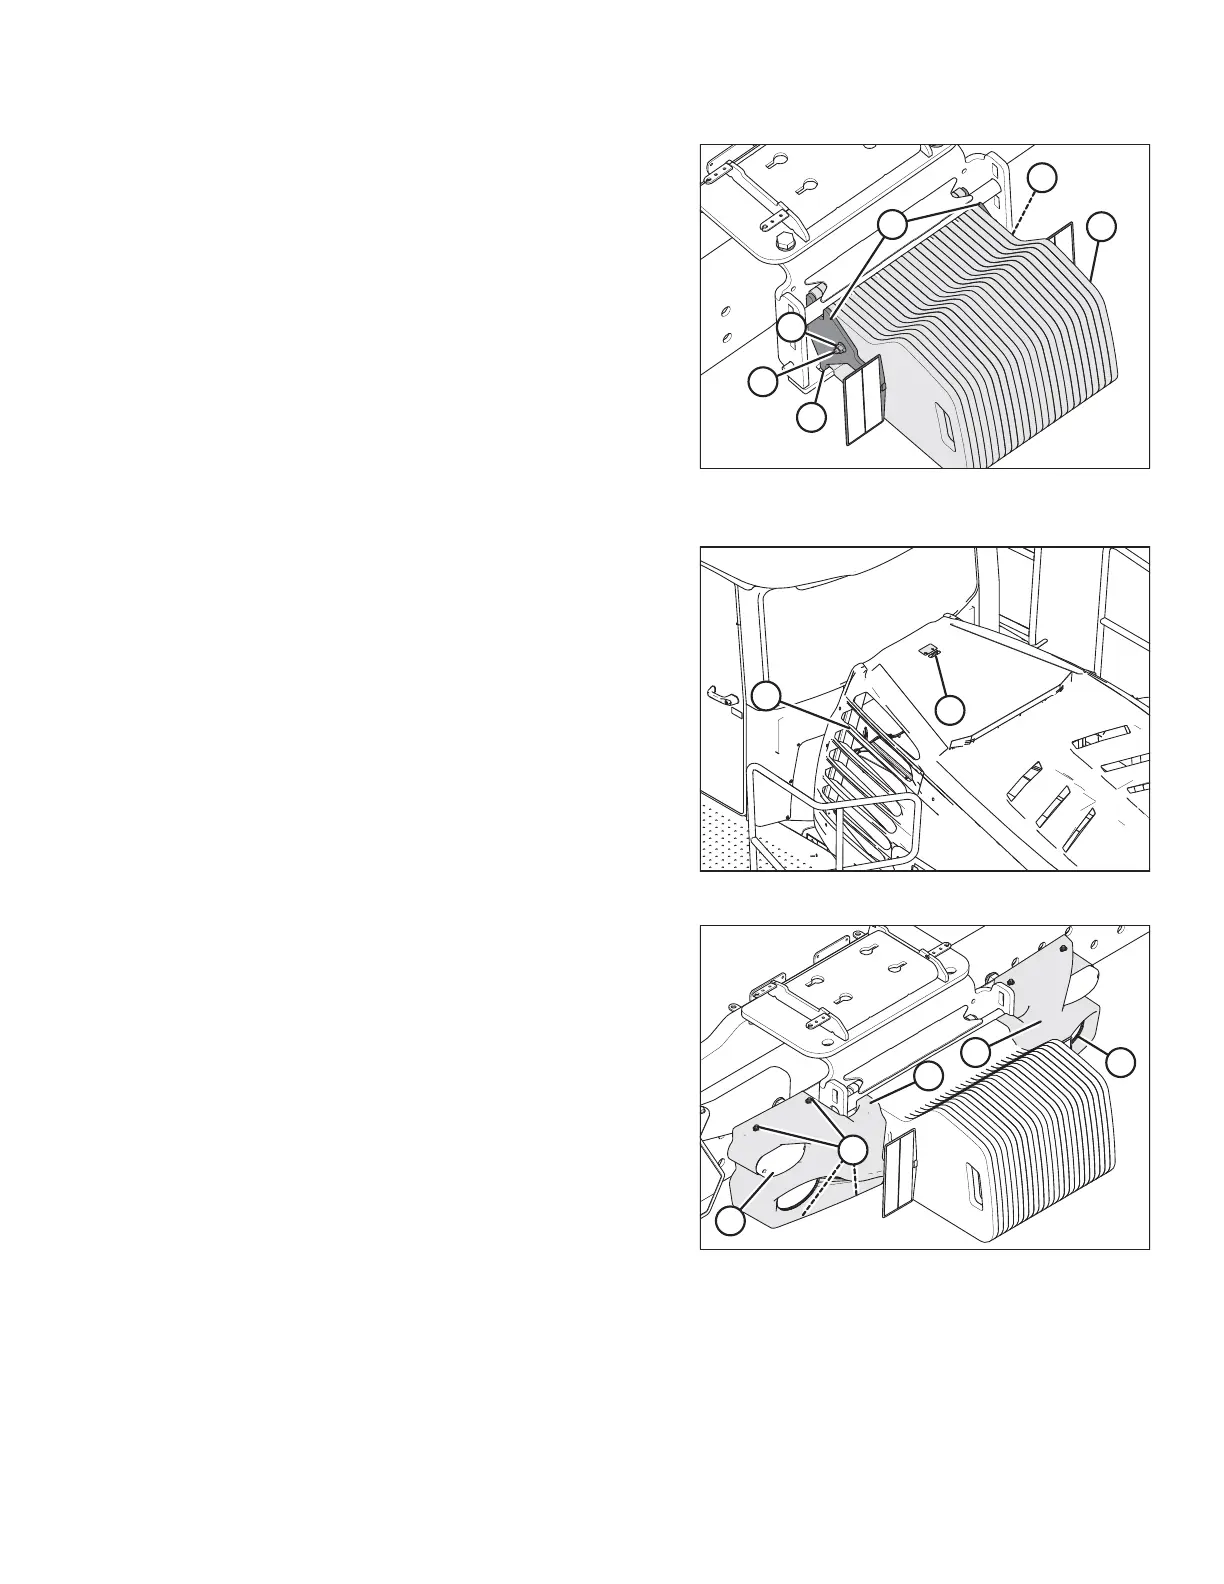
Figure 3.99: Three Ballast Kits Installed – 489 kg
(1080 lb.)
NOTE:
When all three sets of weights are installed, no spacers are
required.
Figure 3.100: Engine Compartment Hood
9. Move latch (A) towards the right cab-forward side of the
windrower.
10. Grasp louver (B), and lift the hood to open it.
Figure 3.101: Rear Light Bezel with Ballast Kit(s)
Installed
11. Bring left bezel (A) close to the frame and connect plug
P215 to the back of red tail/brake light (E).
12. Loosely attach left bezel (A) to the frame with four hex
flange bolts (B).
13. Repeat Step 11, page 89 and Step 12, page 89, attaching
plug P210 at right bezel (C).
14. Turn the IGNITION key to the RUN position, and ensure that
rear swath lights (D) and red tail/brake lights (E) are
working.
15. If the lights are working, tighten hex flange bolts (B) to
secure the left and right light bezels.
IMPORTANT:
Ensure that rear swath lights (D) are centered in the
light bezel.
ASSEMBLING WINDROWER
 Loading...


