215620 168 Revision A
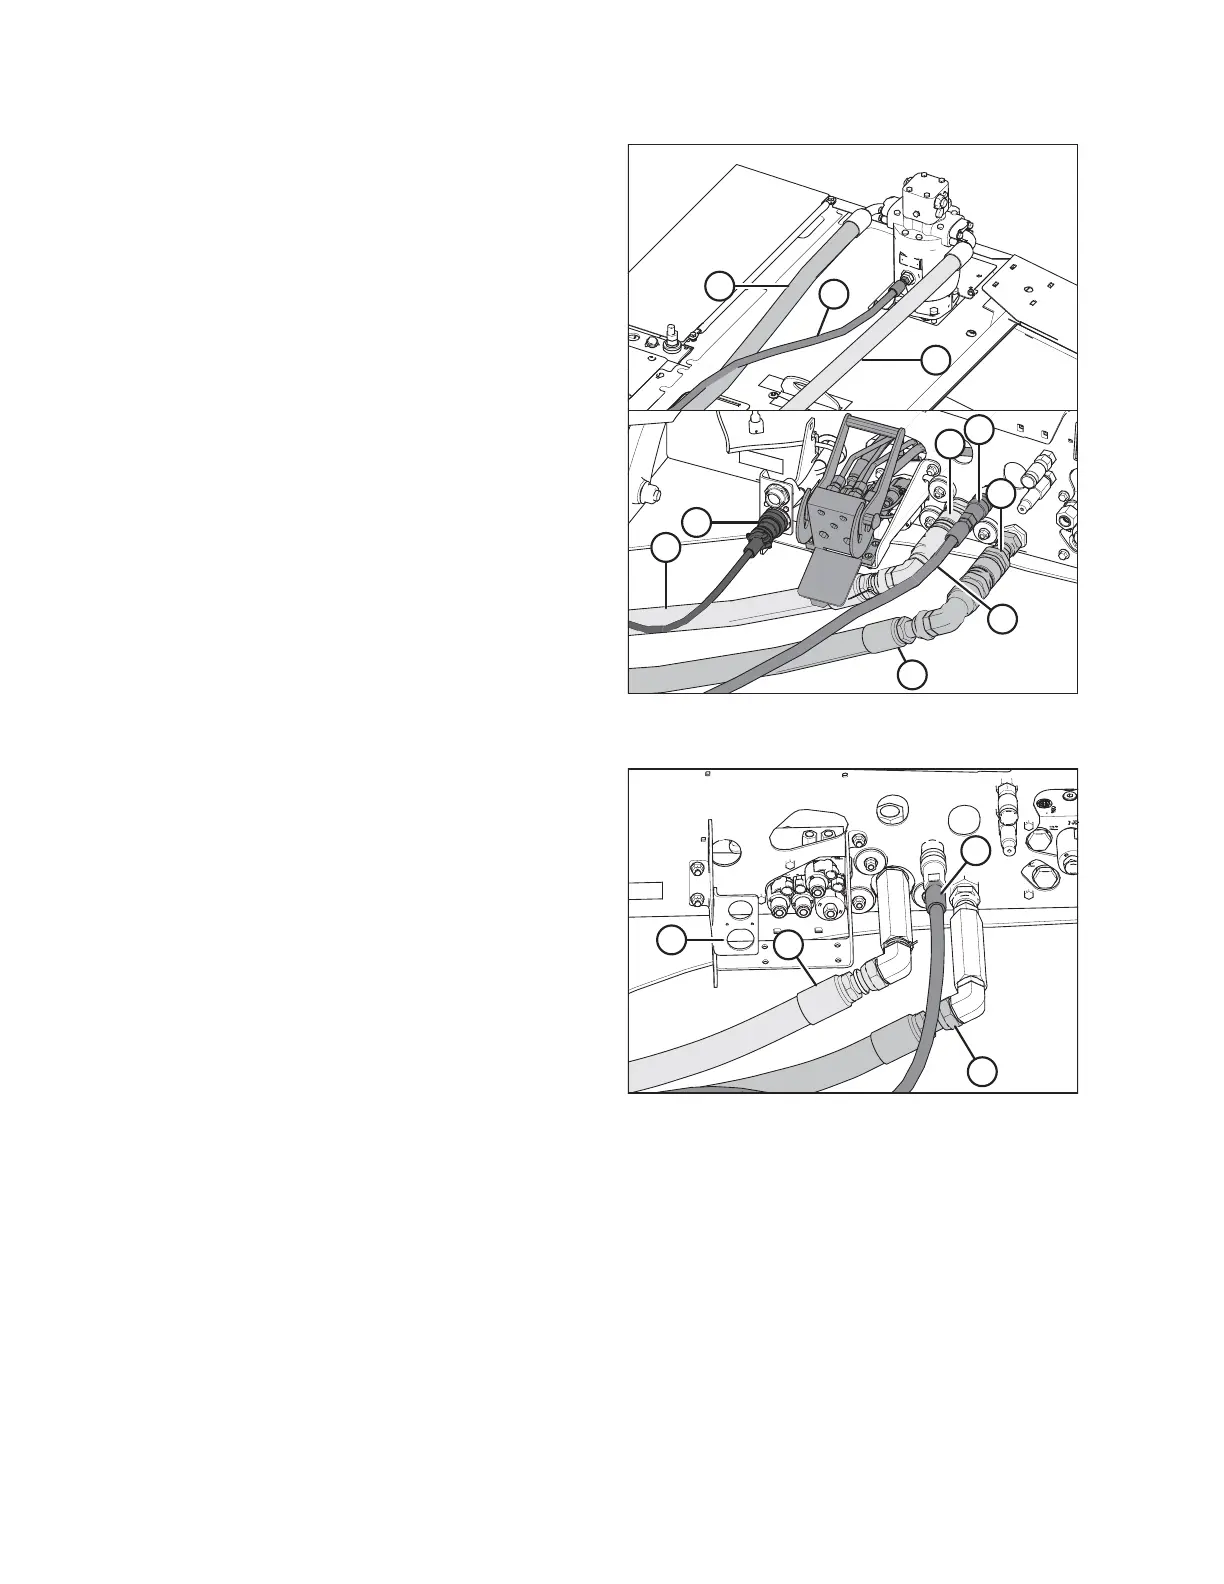
Figure 5.99: Quick-Disconnect Hydraulic and Electrical
Connections
6. Windrowers equipped with quick-disconnect fittings:
NOTE:
If the hoses are not equipped with quick-disconnect fittings,
they can be attached directly to the windrower fittings as
described in Step 7, page 168.
NOTE:
Some parts have been removed from the illustration for the
sake of clarity.
a. Connect disc pressure hose (A) (indicated by its red
cable tie) to receptacle (B).
b. Connect disc return hose (C) to receptacle (D).
c. Connect case drain hose (E) to receptacle (F).
d. Connect the header’s electrical harness to
receptacle (G).
NOTE:
Ensure that the hydraulic hoses have sufficient slack to
clear the multicoupler without coming into contact
with it. If necessary, increase the slack in the hoses by
loosening the hose holder at the windrower frame and
moving the hoses as required.
Figure 5.100: Hard-Plumbed Hydraulic and Electrical
Connections on a Rotary Disc Ready Windrower
7. Windrowers equipped with hard-plumbed fittings:
NOTE:
Some parts have been removed from the illustration for the
sake of clarity.
a. Attach the disc pressure hose (A) to fitting on frame
and torque to 216 Nm (159 lbf·ft).
b. Connect the disc return hose (B) to fitting on frame and
torque to 216 Nm (159 lbf·ft).
c. Connect the case drain hose (C) to fitting on frame and
tighten.
d. Connect the electrical harness to receptacle (D).
ATTACHING A HEADER TO THE WINDROWER
 Loading...


