Leveling the Printer Maintenance
10-6 Sprinter User's Manual
Leveling the Printer
Leveling is carried out by adjusting any or all of the four LEVELING CASTOR'S
FEET, located underneath the printer (Figure 10-3, page 10-5).
To level the printer:
1. Open the R
EAR COVER and SUBSTRATE PASS DOOR.
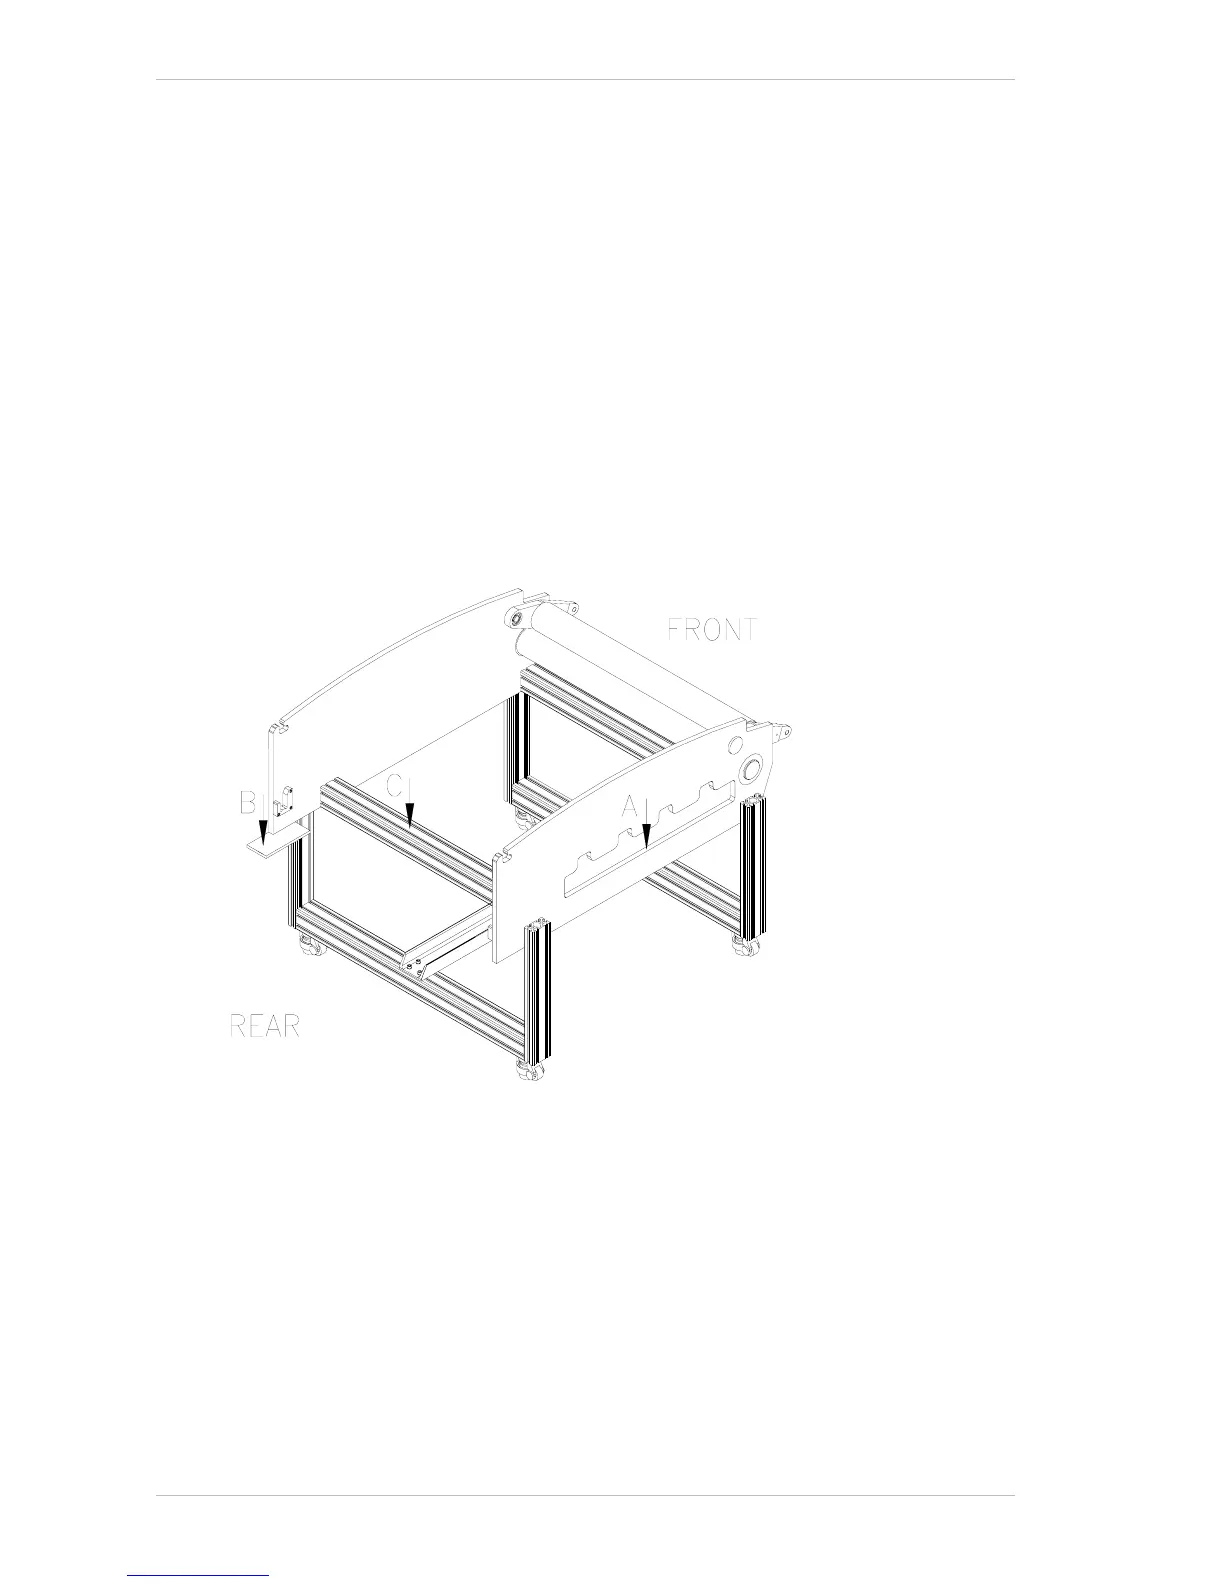
The three leveling points are indicated with arrows in Figure 10-4.
At the first point, marked 'A' (for left side - front-to-rear leveling,), place
the spirit level on the left side panel of the chassis, behind the
S
UBSTRATE PASS door opening.
At the second leveling point, marked 'B' (for right side - front-to-rear
leveling,) place a piece of flat metal under the right side panel and place
the spirit level on the flat metal.
At the third leveling point, marked 'C' (for right-to-left leveling,) place
the spirit level on the C
ONNECTING BAR which is located under the DUST
COLLECTOR.
Figure 10-4: The Leveling Points
2. Level the printer by turning the orange nut on the front and rear feet.
3. When the printer is level in both directions, close both the R
EAR COVER
and S
UBSTRATE PASS DOOR.