Comet Executive Gas Installation
2-21
Follow the procedure below for the type of gas
being used—natural gas, liqueed petroleum gas,
or manufactured gas.
For Natural Gas:
Perform only when the unit is OFF
with power disconnected and COOL.
1. Turn power OFF at the main disconnect
switch.
WARNING
Do not adjust or test gas
components unless you are
qualied to do so.
2. Connect a U-tube or other water column
manometer upstream of the gas connec-
tion, and measure the static gas pressure.
3. If the pressure is:
• Less than 5” (1.25 kPa): Burner may
not work reliably. Correct the gas pres-
sure before proceeding.
• 5” - 11” (1.25 - 2.75 kPa): Proper op-
erating range.
• More than 11” (2.75 kPa): This is a
high pressure gas supply. Installation
of an additional regulator is necessary:
1) The additional regulator must be
mounted according to the manu-
facturer’s specications.
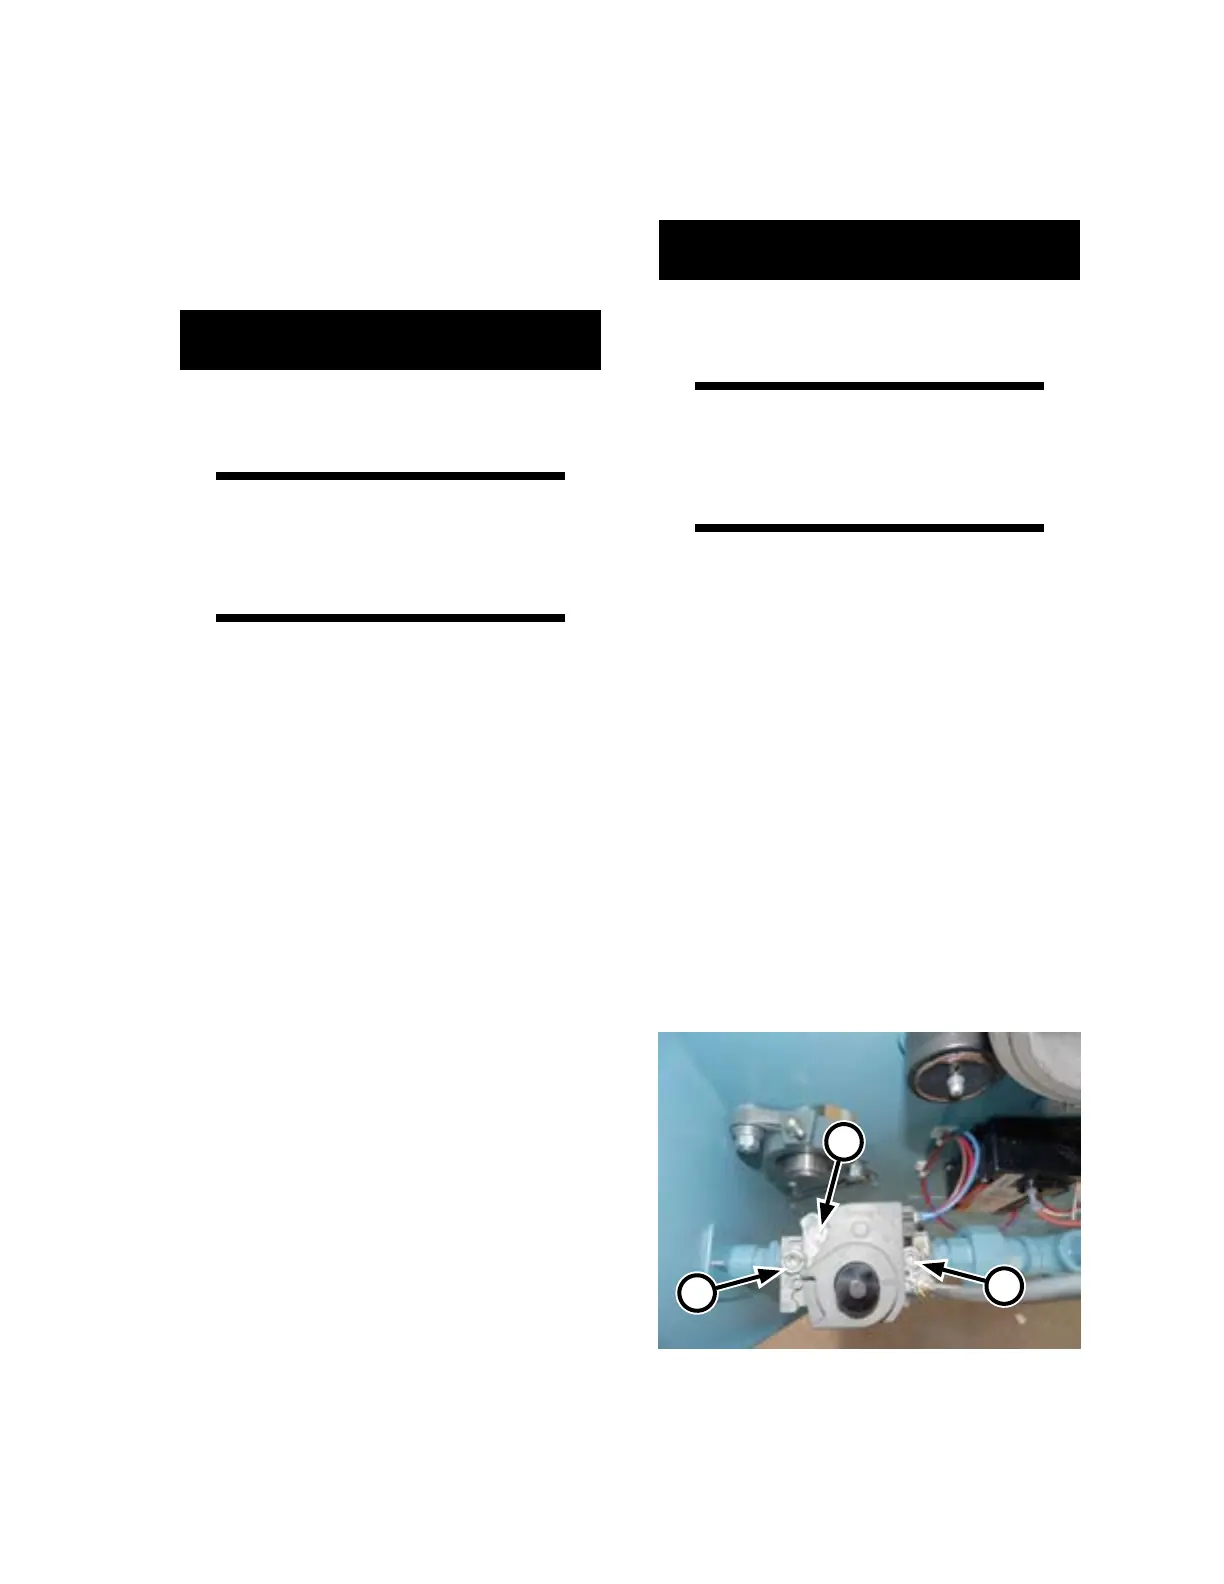
2) Open the left endframe door and
measure the incoming gas pressure
to gas valve (Figure 2-20) to make
sure it is now in the proper range
(connect the manometer to the “in”
port on the gas valve, A).
3) When replacing the plug, use pipe
thread compound to avoid leaks.
Teon tape is not recommended.
For Liqueed Petroleum Gas
(Propane, Butane):
Perform only when the unit is OFF
with power disconnected and COOL.
1. Turn power OFF at the main disconnect
switch.
WARNING
Do not adjust or test gas
components unless you are
qualied to do so.
2. Connect a U-tube or other water column
manometer upstream of the gas connec-
tion, and measure the static gas pressure.
3. If the pressure is:
• Less than 11” (2.75 kPa): Burner may
not work reliably. Correct the gas pres-
sure before proceeding.
• 11” - 12” (2.75 - 3.0 kPa): Proper op-
erating range.
A
B
C
Figure 2-20: Make sure to check gas operating
pressure (B) as well as upstream
pressure (A).