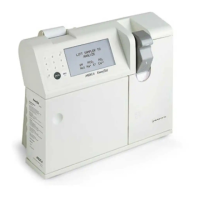
64
o p e r a t i n g t h e a n a l y z e r
s
s
s
Analyzer Surface Cleaning/Storage/Moving
When complete chassis cleaning or analyzer storage is necessary,
select VALVE MODULE from the
REPLACE COMPONENTS
menu. When the purge cycle is complete, remove the reagent mod-
ule. PURGE WITH AIR, READY? is displayed. Connect the
troubleshooting kit tubing to the valve module waste port with the open
end placed into a waste receptacle. Press YES. Calibrant A, Calibrant
B and Calibrant C are purged from the valve and sensor modules.
Remove the electrodes, sensor module, valve module and pump tube
from the analyzer.
Clean the analyzer with a 10% bleach (0.4-0.6% NaClO) solution.
Apply the solution to a cloth to wipe down all outside surfaces.
DO NOT use solvents (examples: methyl alcohol, ethyl alcohol, iso-
propyl alcohol) or cleaning agents containing benzalkonium chloride.
Failureto purge the flow path of air prior to storage could result in
severe damage to the sensor and valve modules.
Clean the sample port of the sampler. Clean all valve module surfac-
es. DO NOT run bleach solution through the sample path.
Reinstall the valve module and sensor module. The analyzer can now
be stored or moved. The pump tube, reagent module, electrodes, and
power cord should be stored separately.
To resume operation, insert the power cord and install the electrodes,
pump tube and reagent module.
A WARMING UP message may appear for up to 30 minutes.
During this time, the EasyStat will not calibrate or analyze samples.
H